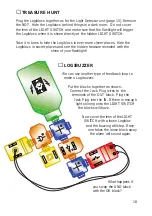
Step 5
Replace the BUTTON with the
LIGHT SWITCH. The lights will
come on again. Now cover
over the LIGHT SWITCH with
your hand and see what happens.
Step 6
Replace the LIGHT SWITCH with the IN
and plug in the Jack Plug leaving
the two wires loose.
Step 7
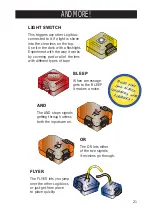
Finally, just add the FLYER,
AND, and OR Logiblocs,
press the BUTTON and check
that all the lights work.
Hold the Jack
Plug wires
in each hand
and touch
the metal ends
of the wires
together.
Again the lights
will light up.
As you have
seen, there are
three different ways to
trigger the Logiblocs.
LIGHT
SWITCH
JACK PLUG
IN
7
You have successfully completed the test procedure. Well done !
Now it is time to get the Logiblocs to work and have some fun !


