ZOOM OMAP35x DevKit
20
QuickStart Guide
4 Ready for Development Work
Interacting with your OMAP35x Development Kit (e.g., to update the bootloader software, to
download sample images or custom BSPs) requires a connection between your kit and a PC.
This connection is established with both software and hardware components. The following
sections will walk you through the set-up process, beginning with registering your
development kit.
4.1 Register your Development Kit
Registration provides you access to the latest revision of this manual, as well as other
documentation and software tools. In addition to downloads access, registration provides
future notifications when Logic releases documentation and software updates for your
product.
1.
To register, visit the Logic Support website at www.logicpd.com/support/ and click
on “Create Account”.
2.
Fill in the on-screen form and click the “Submit” button.
3.
You will receive an e-mail with a URL link to confirm account creation. Click on the
link to finalize account creation.
4.
You will be directed to a page on Logic’s website that states “Account Activated”.
At this point you can register your product. Click on the link to “register your
development kit and get access to downloads”.
5.
Fill in the on-screen form (all fields are required) and click the “Submit” button.
6.
Your product is now registered. Click on the “Return to your Account Overview” link
and you will see the list of registered products for your account.
7.
Under the heading for “OMAP35x Zoom Development Kit”, click the “All
Downloads” link to access the downloads associated with your OMAP35x
Development Kit.
4.2 Connect Development Kit to PC
In order to begin development work, the development kit needs to be connected to a PC.
The following steps will walk you through this process.
1.
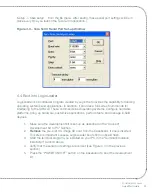
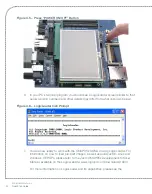
Connect the null-modem serial cable (supplied in the kit) to the serial port
connector on the baseboard and to an empty COM port on the your PC. See
Figure 4.1.


