24
6. Multiple
LNFCs
6.1
Establishing the Clock Master
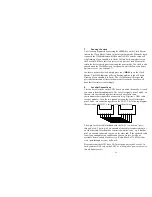
When using multiple LNFCs on the same LocoNet it is necessary to assign
ONE the role of
Clock Master
and the OTHERS as
Clock Slaves
. The role
of Clock Master simply means that one module is responsible for
broadcasting the initial/default time when it is first powered up. It is
responsible for periodically (about once every 50 to 60 seconds) sending
out a “synchronization message” so that all fast clock-aware devices on the
LocoNet synchronize their local time base. Clock Slaves will first show
their initial time when first powered on but will synchronize to Clock
Master within 60 seconds. Clock Slaves only listen to LocoNet messages
for new time and fast rate information.
ALL LNFCs are capable of
changing the current time and fast rate via their front panel keys
regardless of their role as Clock Master or Clock Slave.
As described in Section 5.7 all LNFCs are enabled as the Clock Master by
default (factory setting). As such you must choose one LNFC as the master
and change the option switch setting (make sure Clock Master Disable is
“1”) for the remaining LNFCs.
6.2
Network Clock Control vs. Local Control
The current messages supported by LocoNet allow you to change the
current time and fast rate from any LNFC, DT100 (and DT100R,
DT100IR), and some computer-based applications. This is what we
consider
Network Clock Control
. Whenever the fast rate is changed it will
be updated in the non-volatile memory of ALL LNFCs.
All other LNFC attributes (alarm time, hour format, initial time,
brightness, display functions) are considered to be under
Local Control.
That means that when you change one of these attributes for a given LNFC
it only affects that LNFC. For example, if you want the same brightness
setting on all LNFCs you must edit this parameter for each and every
LNFC. Future enhancements to the LocoNet architecture may allow some
of these attributes to be sent across the network.


