21
ADJUSTABLE BED FRAME - OWNER’S MANUAL //
MOVING THE BED FRAME UP AND DOWN
1. Press and hold the UP or DOWN Button for the Platform you wish to adjust
2. Wait until the Bed Frame has reached the desired position
3. Release the UP or DOWN Button
The Bed Frame will move until the Button is released or the highest / lowest position is reached.
SAVING A MEMORY POSITION
There are two pre-saved Memory Positions: Anti-Snore (Position 1) and Zero Gravity (Position
2). Press the Memory Position Buttons on the Remote Control to move to these positions. You
can change saved Memory Positions to new Memory Positions. To do this, proceed as follows:
1. Press and hold the UP or DOWN Button for the Platform you wish to adjust
2. Wait until the Bed Frame has reached the desired position
3. Release the UP or DOWN Button
4. Press and hold the Button for the new Memory Position for at least 3 seconds
WRVDYHWKHSRVLWLRQ7KH&RQWURO%R[ZLOOFOLFNWZLFHWRFRQ¿P
5. Release the Memory Position Button.
PAIRING THE REMOTE CONTROL
You must pair the Bed Frame to a Remote Control before operation. Ensure the Bed Frame has
been unplugged for at least 10 seconds, then proceed as follows:
1. Plug the Bed Frame into the mains. This will automatically switch it to Pairing Mode for 30
minutes. In this time, the Bed Frame will search for Remote Controls to be paired with.
2. During Pairing Mode, press and release any Button. This will pair the Remote Control to
the Bed Frame.
UNPAIRING THE REMOTE CONTROL
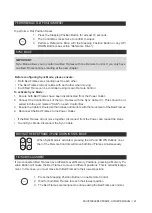
1. Press and hold the
Head UP and Foot DOWN
Buttons for at least 10 seconds.
2. 7KH5HPRWH&RQWUROZLOOÀDVKWLPHV
3. Test the Remote Control to check that it has been safely unpaired.
REFERENCE DRIVE
%HIRUHXVLQJWKH%HG)UDPHIRUWKH¿UVWWLPH\RXPXVWSHUIRUPDUHIHUHQFHGULYH:KHQWKH
GULYHLVLQLWLDWHGWKHORZHUVHFWLRQRIWKHEHGZLOOPRYH¿UVWIROORZHGE\WKHXSSHUVHFWLRQ
1. Press and hold the
Head UP/DOWN, Foot UP/DOWN
or
Sleeping Position Button. The
lower part of the Bed Frame will begin the reference drive. It will reach a lower limit and
then move up slightly. Do not release the button.
2. Continuing to hold the button, wait for the upper part of the frame to complete the drive.
3. Release the button and use the Bed Frame according to the instructions.
If the drive is interrupted, pressing any movement button restarts downward movement.
22 //ADJUSTABLE BED FRAME - OWNER’S MANUAL
ACTIVATING THE CHILD LOCK
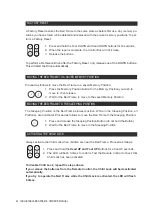
Always activate the Child Lock when children are near the Bed Frame. Proceed as follows:
1. Press and hold the
Head UP and Foot UP
Buttons for at least 6 seconds.
2. 7KH/('ZLOOÀDVKWLPHVWRFRQ¿UP7HVWWKH5HPRWH&RQWUROWRFKHFNWKDW
Child Lock has been activated.
To disable Child Lock, repeat the steps above.
If you remove the batteries from the Remote Control, the Child Lock will be deactivated
automatically.
,I\RXWU\WRRSHUDWHWKH%HG)UDPHZKLOHWKH&KLOG/RFNLVDFWLYDWHGWKH/('ZLOOÀDVK
6 times.
MOVING THE BED FRAME TO A SAVED MEMORY POSITION
Proceed as follows to move the Bed Frame to a saved Memory Position:
1. Press the Memory Position Button for the Memory Position you wish to
move to, then release.
2. Wait for the Bed Frame to move to the saved Memory Position
MOVING THE BED FRAME TO THE SLEEPING POSITION
3.
The Sleeping Position is the Bed Frame’s lowest position. While in the Sleeping Position, all
Platforms are horizontal. Proceed as follows to move the Bed Frame to the Sleeping Position:
1. Press and release the Sleeping Position Button (do not hold the Button)
2. Wait for the Bed Frame to move to the Sleeping Position
FACTORY RESET
$)DFWRU\5HVHWUHVWRUHVWKH%HG)UDPHWRWKHVDPHVWDWHDVEHIRUH¿UVWXVH$Q\PHPRU\SR-
sitions you have stored will be deleted and replaced with the pre-set memory positions. To per-
form a Factory Reset:
1. Press and hold the Foot DOWN and Head DOWN buttons for 10 seconds.
2. When the reset is complete, the Control Box will click twice.
3. Release the buttons.
To perform a Reference Drive after the Factory Reset, only release one of the DOWN buttons.
This will start the Drive automatically.
23
ADJUSTABLE BED FRAME - OWNER’S MANUAL //
IMPORTANT
Sync Mode allows you to control two Bed Frames with one Remote Control. If you only have
one Bed Frame continue reading at the next chapter.
SYNC MODE
%HIRUHFRQ¿JXULQJ6\QF0RGHSOHDVHHQVXUH
ƒ
Both Bed Frames are standing next to each other
ƒ
The Bed Frames will not collide with each other when moving
ƒ
Each Bed Frame can be controlled using its own Remote Control
MOVING THE BED FRAME UP AND DOWN IN SNYC MODE
When Sync Mode is activated, pressing the UP and DOWN Buttons on ei-
ther of the Remote Controls will move both Bed Frames simultaneously.
FIXING MISALIGNMENT
To activate Sync Mode:
1. Ensure both Bed Frames have been disconnected from the Power Outlet.
2. Connect the Control Boxes of the two Frames with the Sync Cable (X). This should be in-
serted into the port marked "CAS" on each Control Box.
3. Ensure the Cable is Routed so that it does not interfere with the movement of the Bed Frames.
4. Reconnect the Bed Frames to the Power Outlet.
ƒ
If the Bed Frames do not move together, disconnect from the Power and repeat the steps.
ƒ
To end Sync Mode, disconnect the Sync Cable.
,IWZRFRQQHFWHG%HG)UDPHVKDYHGLႇHUHQWVDYHG0HPRU\3RVLWLRQVSUHVVLQJD0HPRU\3R-
VLWLRQ%XWWRQZLOOFDXVHWKH%HG)UDPHVWRPRYHWRGLႇHUHQWSRVLWLRQV7KLVLVFDOOHG0LVDOLJQ-
ment. In this case, you must move both Bed Frames to their lowest position.
1. Press the Sleeping Position Button on one Remote Control
2. Wait for both Bed Frames to reach their lowest position
3. The Bed Frames are realigned. Continue using the Bed Frame as normal.
PERFORMING A FLAT POSITION RESET
To perform a Flat Position Reset:
1. Press the Sleeping Position Button for at least 10 seconds.
2. 7KH&RQWURO%R[FOLFNVWZLFHWRFRQ¿UPtheinput.
3. Perfom a Reference Drive with the Sleeping Position Button or any UP/
DOWN Button (see section "Reference Drive").


