background image


User manual 


Cable Handswitch for installation below the 

desktop


HSU 


Rev 3 


Subject to change without notice. Errors and omissions excepted.


LOGICDATA

  cannot  accept  responsibility  for  incorrect  operation  or  use  of 

the products other than for the intended purpose. 
Under the warranty terms, 

LOGICDATA

 shall replace or repair any products 

that  prove  defective  at  the  time  of  delivery. 

LOGICDATA

  shall  not  assume 

any further liability.


If  you  have  any  questions  or  special  requests,  please  contact 

LOGICDATA 

direct. 

2011 

LOGICDATA


Summary of Contents for HSU

Page 1: ...t responsibility for incorrect operation or use of the products other than for the intended purpose Under the warranty terms LOGICDATA shall replace or repair any products that prove defective at the...

Page 2: ...2 5 Overview 4 2 6 Handswitch Plug 6 3 Mounting Instructions 6 4 Functions 8 4 1 Display 8 4 2 Basic Functions 8 4 3 Advanced Functions 9 4 3 1 Storing a position 9 4 3 2 Recalling a saved position 9...

Page 3: ...han described above is only allowed with permission of LOGICDATA Information For all information concerning LOGICDATA control boxes please refer to the corresponding manual 2 2 Definition Information...

Page 4: ...ing plate screws Danger Use only genuine replacement parts Repairs must be carried out only by a qualified service technician If you neglect to do so you void your warranty 2 5 Overview Desk upwards D...

Page 5: ...Page 5 11 Desk upwards Desk downwards Display Figure 3 HSU MDF 2 LD Desk downwards Desk upwards Figure 4 HSU OD 2 LD...

Page 6: ...owing tools are required for installation 1 screw driver Please take note that the handswitch is equipped with a shift mechanism Therefore always mount the handswitch in a drawn in position 1 Unpack t...

Page 7: ...rol box using the jack marked with only Do not connect the handswitch plug to the motor jacks Caution Unplug the power cord of the control unit while mounting the handswitch Figure 5 Connect the HSU c...

Page 8: ...ards For an upward adjustment of the desk push this button Push this button until the desired height of the desk has been reached The desk will continue driving upwards until you release the button or...

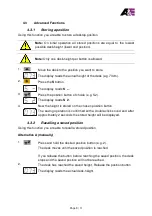
Page 9: ...e g S2 The display reads S 2 4 Now the height is stored on the chosen position button The saving operation is confirmed with a double click sound and after approximately 2 seconds the stored height w...

Page 10: ...m Without mounting plate Weight 0 3 kg incl Cable Note The foil of the handswitch might perish or might grow pale due to intensive UV radiation Therefore avoid direct solar radiation 6 Appendix 6 1 Po...

Page 11: ...lution Cable is not plugged Cable is not plugged as intended Plug the plug in the intended jack marked with Bad pin contact Plug off the plug an plug it in as intended as described above Cable is defe...

Reviews: