GETTING STARTED
12
Logicube SuperSonix User’s Manual
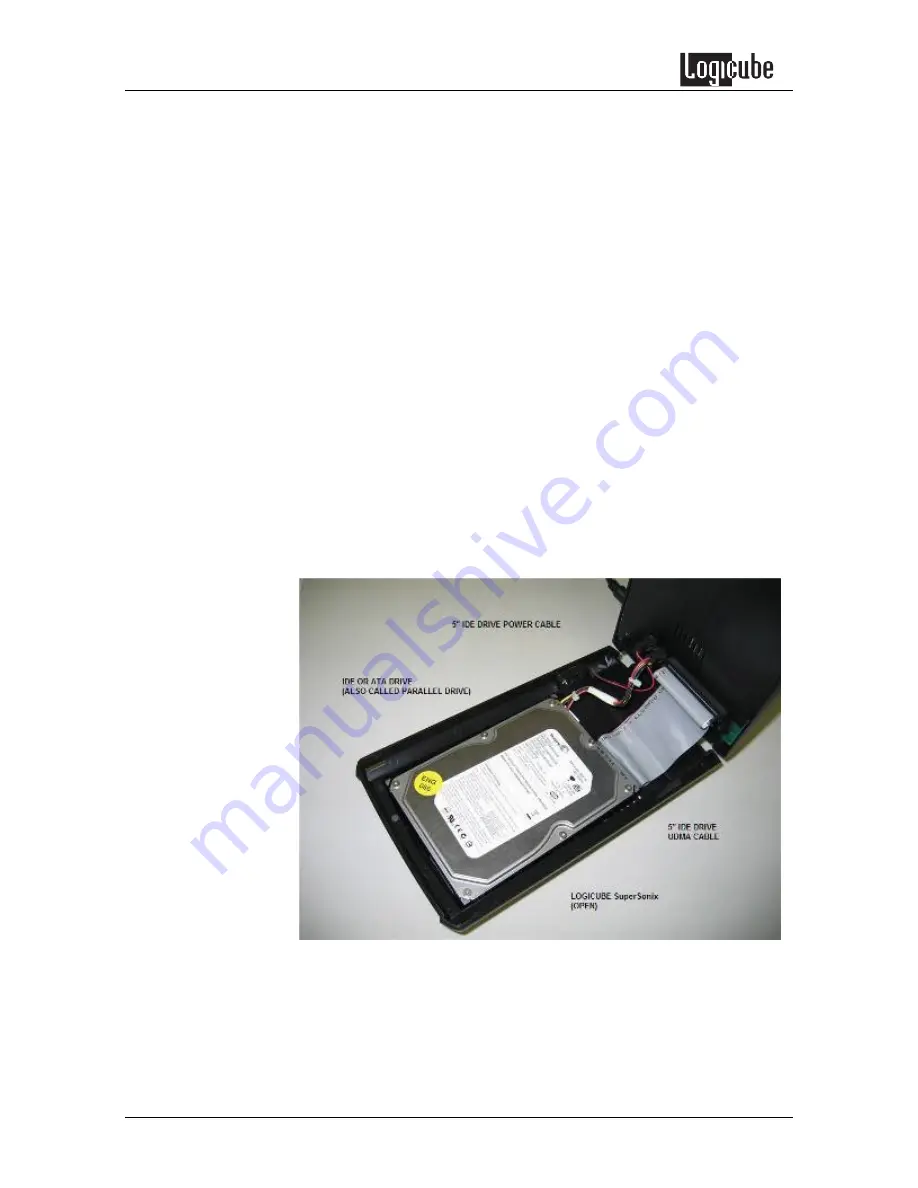
by lifting the top. You will notice three
connections: One for a UDMA cable (PATA or
IDE data cable) and another for a small drive
power cable. Underneath is the third
connector for the SATA cable.
Note
: See Figure 2, Connecting a PATA (IDE)
Master Drive
2. Connect a Master hard drive and close the
Logicube SuperSonix.
3. Plug in the set of 9” cables, to the connections
found on the right side of the Logicube
SuperSonix.
Note
: See Figure 3, Connecting a PATA (IDE) Target
Drive
4. Connect the Target drive to these cables.
Note
: The internal drive is always referred to as the
Master
drive and the outside drive is always referred
to as the
Target
drive.
5. Connect the external power supply to the
Logicube SuperSonix. The unit should turn on
and in about 10 seconds, the main screen
appears.
Figure 2. Connecting a PATA (IDE) Master Drive
Figure 3. Connecting a PATA (IDE) Target Drive


