background image

L23IP11_IB_Running Change110923_Annie.indd   62

11年10月13日   下午6:09

Summary of Contents for L23IP11

Page 1: ...23 LED SMART TV Instruction Manual L23IP11 L23IP11_IB_Running Change110923_Annie indd 1 11 10 13 6 06...

Page 2: ...L23IP11_IB_Running Change110923_Annie indd 2 11 10 13 6 06...

Page 3: ...7 Selecting the Input Source 17 Channel Selection 17 Display Channel Information 17 Volume Adjustment 17 Using the Features 18 TV Settings TV DTV or Radio Mode 18 Auto Scan ATV DTV mode 18 DTV Manual...

Page 4: ...s Network 39 Wireless Network Setup 39 WPS WiFi Protected Setup 40 Personal Account Setup 41 Access Personal Account 41 Using the i Player 42 i Player Search 43 i Player Advanced Setting 43 i Player U...

Page 5: ...ure reference If items are missing or damaged please contact Partmaster UK only Tel 0844 800 3456 for assistance Preparation TV TV Base P N 104130001 Mains Adapter P N 118010045 Glass Stand Screw A x...

Page 6: ...TV down on a flat surface with the back side facing up Please make sure to place a soft cushioned material such as a pillow or thick piece of foam beneath the screen screw unscrew Installing Removing...

Page 7: ...a channel or select a sub menu from the OSD menu 5 VOL Adjusts the volume Press to select and adjust a setting in the OSD menu 6 TV AV Press to select among different input signal sources DTV ATV SCAR...

Page 8: ...SCART output socket 6 Headphone out To connect to the earphones 7 Common Interface Slot Allows the insertion of a Common Access Module Refer to page 21 for details 8 Aerial To connect to the aerial s...

Page 9: ...se corrosion or battery leakage which could cause fire personal injury or damage to property Only use the battery type indicated in this manual When the batteries are exhausted the remote will not fun...

Page 10: ...take up to 10 minutes 10 Search Return to the previous viewing channel ATV DTV mode Search on the internet Internet Player mode 11 Exit Exit the OSD menu 12 Guide Displays the EPG Electronic Programme...

Page 11: ...o skip to the beginning of the next chapter track photo DVD Media mode Day Press to view the schedule of the next day 30 Coloured buttons Access the TELETEXT items or channel edit when using Digital F...

Page 12: ...e TV or the Source button on the remote control to display the Source List Use the buttons to select HDMI and then press the OK button to confirm Making Video and Audio Connections Not all AV devices...

Page 13: ...ected devices into the mains socket before switching on the TV 3 Press the STANDBY button on the top panel of the TV or the button on the remote control to turn on your TV 4 Press the TV AV button on...

Page 14: ...1 Use a SCART cable to connect the TV s SCART input socket to an external AV device s SCART output socket 2 Plug the connected devices into the mains socket before switching on the TV 3 Press the STA...

Page 15: ...splay the Source List Use the buttons to select any desired input source and then press the OK button to confirm Rear Right Side View of TV YPbPr Digital AV Aerial Common Interface Audio Cable not inc...

Page 16: ...cket after you have completed all the connections At this stage the TV switches to standby mode The red LED indicator will illuminate on the front panel of the TV 3 In standby mode press the STANDBY b...

Page 17: ...ou do not press the OK button to confirm the TV will automatically confirm the selected input source within 4 seconds Alternative Press the TV Radio button to switch to digital radio channels directly...

Page 18: ...s the buttons to select DTV Manual Tuning and then press the OK button 3 Press the buttons to select Country and then press the buttons to select the country where you will operate the TV 4 Press the...

Page 19: ...nu button to return back to the main menu 6 Press the Exit button to exit the menu Programme Edit ATV DTV Mode Allows you to edit TV programmes in the Channel List 1 Press the Menu button and then pre...

Page 20: ...en will pop up Press the buttons to select the programme you want to edit a Delete Press the RED button to delete the selected channel b Move Press the YELLOW button and then press the buttons to move...

Page 21: ...on 1 Press the Menu button and then press the buttons to select the TV SETTINGS menu 2 Press the buttons to select CI Information and then press the OK button to view the signal information CI Common...

Page 22: ...ong colour temperature Medium Warm User Cool Adjusts the colour components independently to achieve a warm or cool for User mode Red Increases red tint Green Increases green tint Blue Increases blue t...

Page 23: ...ns to adjust the settings Sound Mode Allows the selection of an audio enhancement technique Standard Music Movie Sports User Alternative You may press the S button to select the sound mode directly Tr...

Page 24: ...press the S button twice and then press the buttons to select Mono Nicam Stereo for the selected station Broadcast On Screen Display Mono Stereo MONO NICAM STEREO Mono sound selection If the stereo s...

Page 25: ...EXTRAS Schedule List Start Recording Sleep Timer Recorded List Timer Record PVR File System Off If you turn the TV off after setting the sleep timer the sleep timer setting will be erased 4 Press the...

Page 26: ...d List and then press the OK button to view the Recorded List Move Back MENU Select OK Quit EXIT EXTRAS Schedule List Start Recording Recorded List Timer Record PC Setup PVR File System Schedule List...

Page 27: ...35 once Mode 00 Minute 1005 07 20 Date Jan Month 00 Hour 00 Minute 00 Hour 1005 07 20 Date Jan Month Move Select OK Back MENU Select Disk C Check PVR File System Start PVR File System USB Disk Format...

Page 28: ...menu 2 Press the buttons to select PC Setup and then press the OK button 3 Press the buttons to select the following PC Setup options and then press the OK button Horizontal Pos Adjusts the position o...

Page 29: ...evious menu 4 Press the Exit button to exit the menu Move Back MENU Select OK Quit EXIT OPTIONS Subtitle Language Audio Language OSD Language Menu Time Out Country Restore Setting Fran ais Espa ol Eng...

Page 30: ...ge Menu Time Out Audio Language OSD Language E Espa ol English Deutsch Fran ais Hrvatski Move Back MENU Select OK Quit EXIT OPTIONS Subtitle Language Audio Language OSD Language Menu Time Out Country...

Page 31: ...procedure and then press the OK button to change Off to On 3 Press the Exit button to exit the menu 3 Press the buttons to select YES and then press the OK button to confirm All settings will be reset...

Page 32: ...he LOCK menu you must enter the password Enter the default password 0000 for first time use To change the password please refer to page 32 Set Password Lock System The Lock System is designed to preve...

Page 33: ...LOCK Lock Channel Set Password Lock System Parental Guidance Off Off Move Back MENU Select OK Quit EXIT LOCK Please enter new password Confirm new password Please enter old password Cancel Clear Lock...

Page 34: ...ecific programmes and ratings This TV is programmed to remember which option it was last set to even if you switch the TV off 1 Press the Menu button and then press the buttons to select the Lock menu...

Page 35: ...E 06 Nov 09 15 800 LA7 Crocodile Hunter 06 Nov 2007 No Information 09 00 09 55 802 StcomUNO Uno le stelle 803 FR_HD 804 NT1 1 1 No Information 801 LA7 Cartap R Programme Guide by Time Format Select a...

Page 36: ...s the YELLOW button to view the preset reminders or scheduled recordings in the Schedule List BLUE To Top Press the BLUE button and then press the buttons to select CHANNEL TIME The Programme Guide wi...

Page 37: ...he Channel List 2 Press the TXT button to display the teletext page 3 Press the 0 9 buttons to select a page number 4 Follow the instructions on digital teletext and move onto the next step by pressin...

Page 38: ...be adjusted For most home networks the TV will connect to automatically without any adjustments Since there are various connection configurations please follow the specifications and instruction of y...

Page 39: ...tons to select Automatic IP or Fixed IP Press the OK button to confirm Automatic IP Select this if the network supports is a DHCP Dynamic Host Configuration Protocol The IP address will automatically...

Page 40: ...ote control to display the online keyboard and then use the buttons and the OK button to select the desired characters to enter the Network Name SSID Press the buttons to select the icon and then pres...

Page 41: ...s to select Store User Data and press the OK button to confirm Personal Account Setup Use the setup a personal account 11 In iPTV mode press the User button to display the LOGIN screen Press the butto...

Page 42: ...in Menu will be displayed IPTV Services Widgets Widgets Press the buttons to select different Widgets or Apps Press the YELLOW or BLUE button to select different pages of each Widget 3 During watching...

Page 43: ...ine keyboard 4 Press the buttons and the OK button to enter the desired characters Press the buttons to select the icon and then press the OK button to enter the name of your search You do not need to...

Page 44: ...SD1 button to display the online keyboard and enter the desired characters As delivered the TV will report the weather for the region where it is connected to the internet This may not close to where...

Page 45: ...select YES Upgrade successful message will be displayed when finished If do not want to upgrade press the buttons and then press the OK button to select X The upgrade is available message will be disa...

Page 46: ...te control to turn on your TV 5 Press the TV AV button on the top panel of the TV or the Source button on the remote control to display the Source List Use the buttons to select USB and then press the...

Page 47: ...s to select MUSIC and then press the buttons to select your storage device and then press the OK button Move Menu MENU Disk C MUSIC Select OK 3 Press the buttons to navigate in the music folder and th...

Page 48: ...PEG 4 Full screen c 1 2 Return Up 1579 Cool Up Folder 1 Move Menu MENU Quit EXIT Delete Curent File Add Remove all add remove to playlist OK 2 1579 Resolution Audio Track Subtitle Program Size 720 x 5...

Page 49: ...oot menu 4 Press the OK button to display the function bar Press the buttons and then press the OK button to select the function Prev page Next page Prev Next Stop Music Playlist Info If this folder a...

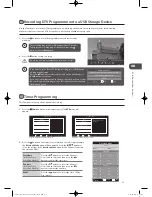
Page 50: ...utton Time Shift Mode and Recording functions may not work if the signal strength is weak Stop the time shift function before switching to another input source If the transfer rate of the USB storage...

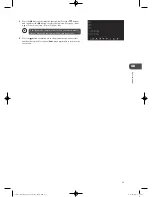
Page 51: ...ill appear 25 Date Recorded Mode 5 five Start Time 10 25 Date 00 Dec End Time 15 10 Dec 25 Once Mode Minute Hour Month Date Minute Hour Month Date Quit EXIT Select OK Move The recording progress bar w...

Page 52: ...mme from the recorded programme list or from a USB Storage Device 1 Press the TV AV button on the top panel of the TV or the Source button on the remote control then press the buttons to select the US...

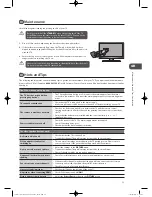
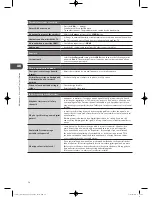
Page 53: ...d off before switching on your TV The remote control does not work Check to see if there are any objects between the TV and the remote control causing an obstruction Ensure that you are pointing the r...

Page 54: ...TV Don t worry it easy to do And once you ve done it you should get all the Freeview channels available to you If problems persist you may need to get your aerial checked Talk to your retailer or con...

Page 55: ...0 x 576 720P 1280 x 720 50 60 1080I 1920 x 1080 50 60 1080P 1920 x 1080 50 60 PC Mode Please check the display settings of your computer before connecting to the TV If the display setting of your comp...

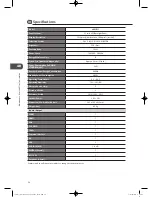
Page 56: ...E STANDBY mode 30W Average Annual Energy Consumption 44kWh Standby Power Consumption 0 45W Operating Temperature 0 C 40 C Operating Humidity 10 50 RH Mercury Content mg X Presence of Lead Reference Pe...

Page 57: ...57 GB Maintenance Hints and Tips Specification B A B C D E F G ENERG Y IE IJA IA 2010 1062 2011 44 kWh annum 30 Watt 58 4 cm 23 inch L23IP11 L23IP11_IB_Running Change110923_Annie indd 57 11 10 13 6 09...

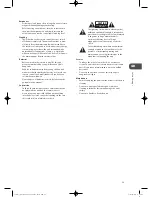
Page 58: ...supply before connecting disconnecting other devices or moving the unit Unplug the unit from the mains socket during a lightning storm Mains Adapter Cable Make sure the unit or unit stand is not resti...

Page 59: ...pervision Children should be supervised to ensure that they do not play with the unit and the remote control Never let anyone especially children push anything into the holes slots or any other openin...

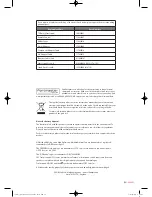
Page 60: ...pose of batteries with normal household waste For more information please contact the local authority or your retailer where you purchased the product HDMI the HDMI logo and High Definition Multimedia...

Page 61: ...L23IP11_IB_Running Change110923_Annie indd 61 11 10 13 6 09...

Page 62: ...L23IP11_IB_Running Change110923_Annie indd 62 11 10 13 6 09...

Page 63: ...L23IP11_IB_Running Change110923_Annie indd 63 11 10 13 6 09...

Page 64: ...L23IP11_IB_Running Change110923_Annie indd 64 11 10 13 6 09...

Reviews: