background image

14

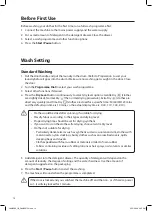
Wash Setting

Standard Washing

1.  Pull the door handle and put the laundry in the drum. (Refer to Preparation to sort your 

laundry before it goes into the drum.) Make sure no washing gets caught in the door. Close 

the door.

2.  Turn the 

Programme Dial

 to select your wash programme.

3.  Select other functions if desired.
4.  Press the 

Dry Level

 button continuously to select dry level options: Gentle Dry 

 (clothes 

are slightly dried), Normal Dry   (the normal drying procedure), Extra Dry 

 (clothes are 

dried very quickly) and Time Dry 

 (clothes are dried for a specific time: 30/60/90/120 mins 

and the default spin time is 10 mins, so the actual display time is: 0:40, 1:10, 1:40, 2:10).

Before First Use

Before washing your clothes for the first time, run a full wash programme first: 
1.  Connect the machine to the mains power supply and the water supply. 
2.  Put a small amount of detergent in the detergent drawer. Close the drawer.
3.  Select a wash programme and other function options.
4.  Press the 

Start / Pause

 button.

•  Clothes could be dried after spinning, if suitable for drying.
•  Classify fabrics according to their types and drying level.
•  Proper drying time should be set for drying synthetic.
•  If you want to iron the clothes after drying, choose Gentle Dry level.
•  Clothes not suitable for drying:

•  Particularly delicate items such as synthetic curtains, woolen and silk, clothes with 

metal inserts, nylon stockings, bulky clothes such as anoraks, bedcovers, quilts, 

sleeping bags and duvets

•  Clothes padded with foam-rubber or materials similar to foam-rubber
•  Fabrics containing residues of setting lotions or hair sprays, nail solvents or similar 

solutions

5.  Add detergent into the detergent drawer. The quantity of detergent will depend on the 

amount of laundry, the degree of soiling and the water hardness. Use the amount of 

detergent suggested on the packaging.

6.  Press the 

Start / Pause

 button to start the washing.

7.  The machine will sound when the programme is completed.

If the door is locked and you switched the machine off and then on - or if there’s a power 

cut - it will stay locked for 1 minute.

L8W5D20_IB_Final200723.indd   14

L8W5D20_IB_Final200723.indd   14

23/7/2020   3:45 PM

23/7/2020   3:45 PM

Summary of Contents for L8W5D20

Page 1: ...you install the machine If you do not it will cause strong vibrations when the machine is spinning Do not install your machine anywhere that is damp or exposed to explosive materials If you do it may...

Page 2: ...ld and similar applications such as staff kitchen areas in shops offices and other working environments farm houses by clients in hotels motels and other residential type environments bed and breakfas...

Page 3: ...cable It may overheat and cause a fire Make sure your home voltage matches the voltage displayed on the machine If you are not sure contact an electrician The mains plug must remain accessible to all...

Page 4: ...Children shall not play with the appliance Cleaning and user maintenance shall not be made by children unless they are older than 8 and supervised Children should be supervised to ensure that they do...

Page 5: ...RY OUT SERVICING OF REPAIRS WHICH INVOLVE THE REMOVAL OF COVERS TO AVOID THE RISK OF AN ELECTRICAL SHOCK DO NOT ATTEMPT REPAIRS YOURSELF READ OPERATOR S MANUAL IB safety_Washer Dryer_UK_Final200709 in...

Page 6: ...IB safety_Washer Dryer_UK_Final200709 indd 6 IB safety_Washer Dryer_UK_Final200709 indd 6 9 7 2020 3 48 PM 9 7 2020 3 48 PM...

Page 7: ...IB safety_Washer Dryer_UK_Final200709 indd 7 IB safety_Washer Dryer_UK_Final200709 indd 7 9 7 2020 3 48 PM 9 7 2020 3 48 PM...

Page 8: ...where you can drop off your waste for recycling please contact your local authority or where you purchased your product DSG Retail Ltd co no 504877 1 Portal Way London W3 6RS UK EU Representative DSG...

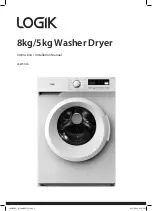
Page 9: ...8kg 5kg Washer Dryer Instruction Installation Manual L8W5D20 L8W5D20_IB_Final200723 indd 1 L8W5D20_IB_Final200723 indd 1 23 7 2020 3 45 PM 23 7 2020 3 45 PM...

Page 10: ...L8W5D20_IB_Final200723 indd 2 L8W5D20_IB_Final200723 indd 2 23 7 2020 3 45 PM 23 7 2020 3 45 PM...

Page 11: ...andard Washing 14 Selecting the Programme 15 Delay Start the Programme 16 Removing Washing Once programme is finished 16 Important Information 17 Washing Delicates wool and silk 17 Adding Delicate Lau...

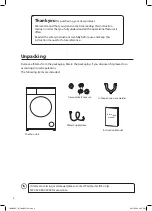
Page 12: ...Thank youfor purchasing your new product We recommend that you spend some time reading this instruction manual in order that you fully understand all the operational features it offers Read all the sa...

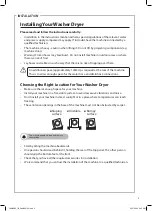
Page 13: ...to avoid excessive vibrations and noise Don t install your machine in direct sunlight or in a place where temperatures can reach freezing The ventilation openings in the base of the machine must not...

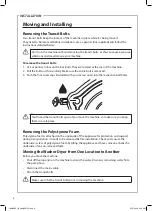
Page 14: ...er Before you move the machine Shut off the tap and run the machine to drain the water Drain any remaining water from the pump hose Disconnect the mains cable Attach the transit bolts To remove the tr...

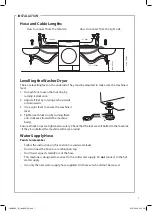
Page 15: ...anti clockwise towards the machine body Ensure all lock rings are tightened securely Check that the feet are still bolted to the machine if they re unbolted the machine will move around Water Supply H...

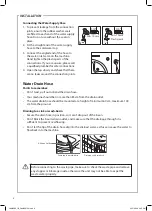
Page 16: ...r Don t twist pull out or bend the drain hose Your machine should be no more than 85cm from the drain outlet The water drain hose should be mounted at a height of minimum 60 cm maximum 100 cm from the...

Page 17: ...with the wiring rules Installation Check List By now you should have installed the machine Let s go through the checklist to ensure that the installation has been done correctly Questions Checkbox Tra...

Page 18: ...10 Product Overview The unit Detergent Compartment Control Panel Service Panel Window L8W5D20_IB_Final200723 indd 10 L8W5D20_IB_Final200723 indd 10 23 7 2020 3 45 PM 23 7 2020 3 45 PM...

Page 19: ...sed to delay start the wash Press continuously to select the time you want to start the wash Drum Clean Button Press to clean the drum and tube If you need to change a setting after the wash has start...

Page 20: ...ndry close zippers and reverse clothing with zips inside out To prevent any large heavy objects e g buckles large buttons etc from hitting the glass door turn your clothing inside out or remove the he...

Page 21: ...ormally To prevent powder detergent from staying in the drawer dry the inside of the drawer with a cloth Make sure the powder isn t lumpy when you add it into the drawer If the rinse cycle isn t remov...

Page 22: ...button Clothes could be dried after spinning if suitable for drying Classify fabrics according to their types and drying level Proper drying time should be set for drying synthetic If you want to iro...

Page 23: ...must O Means optional X Means not applicable Concerning EN 60456 2016 with EU No 1061 2010 the EU energy efficiency class is B energy test programme Cotton spin speed 1400 rpm temperature 60 C 40 C ot...

Page 24: ...the delay function To cancel the delay function before the programme starts press the Delay button repeatedly until 0 hr while the programme is running turn the dial to OFF Removing Washing Once progr...

Page 25: ...ed to use an extra rinse cycle to remove excess detergent from your clothes This depends on the amount of detergent you use and the amount of foam that develops in the main wash cycle How to Set the C...

Page 26: ...asher Dryer Clean the outside of your machine with a soft cloth and mild detergent such as kitchen detergent Don t splash water over the machine Do not use cream cleansers thinners or products contain...

Page 27: ...pply off at the tap 2 Remove the water supply hose from the tap 3 Manually remove the filter net located on the tap side of the water supply hose and clean using a small brush e g a toothbrush 4 Retur...

Page 28: ...nt of water If you have paused the programme and you restart the machine may drain some water Don t pour water in through the door Water adds up during washing This is normal water is supplied automat...

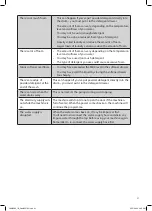
Page 29: ...ner drawer You may have spilt the liquid by closing the softener drawer too sharply There s a residue of powder detergent at the end of the wash This can happen if you ve put powder detergent directly...

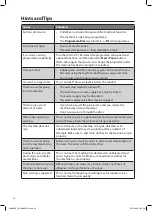
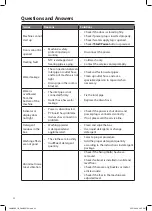
Page 30: ...ose has water leakage Fix the inlet pipe Replace the drain hose Indicator or display does not light Power is disconnected PC board has problems Harness has connection problem Check if the power is shu...

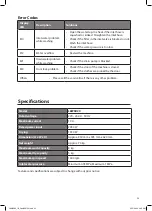
Page 31: ...the door of the machine is closed Check if the clothes are pinned by the door Others Please call the service line if there is any other problem Specifications Model L8W5D20 Rated voltage 220 240 V 50...

Page 32: ...IB L8W5D20 200723V1 L8W5D20_IB_Final200723 indd 24 L8W5D20_IB_Final200723 indd 24 23 7 2020 3 45 PM 23 7 2020 3 45 PM...

Reviews: