


GB-7
Saf
et
y
W
ar
nings
Pr
oduc
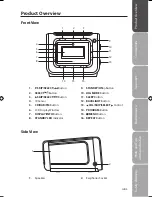
t O
ver
view
Connec
tions
M
ain
tenanc
e
Oper
ation
H
in
ts
and
Tips
and
Specifica
tion
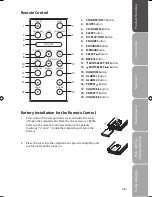
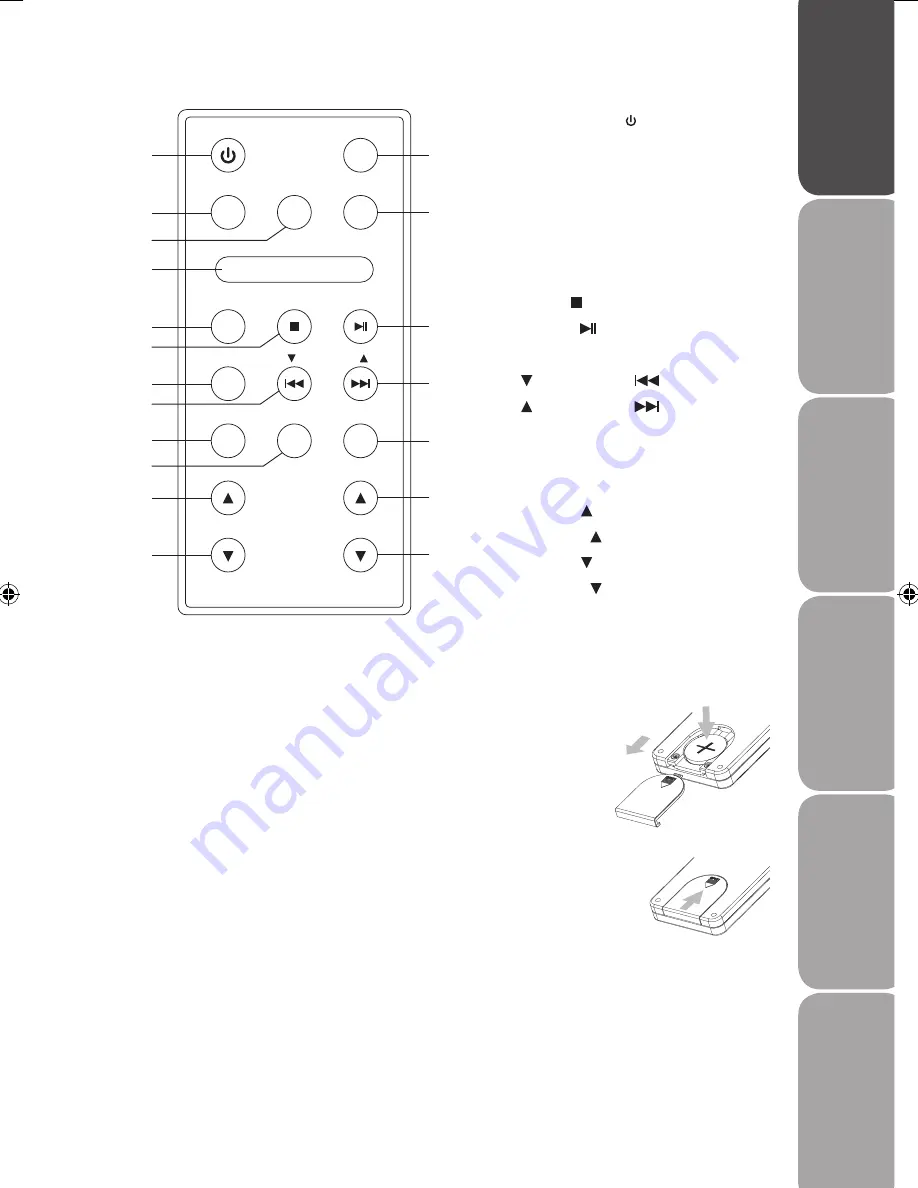
Remote Control
1. STANDBY/ON Button
2. MUTE Button
3. CD/DAB/FM Button
4. SLEEP Button
5. DISPLAY/INFO Button
6. SNOOZE Button
7. PROGRAM Button
8. MENU Button
9. SELECT Button
10. REPEAT Button
11. SKIP/SELECT
Button
12. SKIP/SELECT
Button
13. RANDOM Button
14. ALARM 1 Button
15. ALARM 2 Button
16. PRESET Button
17. VOLUME Button
18. PRESET Button
19. VOLUME Button
STANDBY
MUTE
CD/DAB/FM
DISPLAY/INFO
SLEEP
SNOOZE
PROGRAM
SELECT
MENU
REPEAT
SKIP/SELECT
RANDOM
ALARM 2
ALARM 1
PRESET
VOLUME
3
6
7
10
13
16
18
1
2
5
9
12
15
17
19
4
8
11
14
2. Place the cover into the compartment, press down lightly, and
push it inside until it snaps on.
Battery Installation for the Remote Control
1. Press down of the compartment cover, and slide the cover
off open the compartment. Place the one accessory CR2032
battery in the remote control according to the polarity
markings (“+” and “–”) inside the compartment and on the
battery.
Logik LCDCRDB10_IB_100811_Zell.indd 7
11/08/2010 5:06 PM