background image

DAB Clock Radio

Instruction Manual
LCRDAB10

LCRDAB10_IB_final111001_Zell.indd   1

01/11/2011   12:22 PM

Summary of Contents for LCRDAB10

Page 1: ...DAB Clock Radio Instruction Manual LCRDAB10 LCRDAB10_IB_final111001_Zell indd 1 01 11 2011 12 22 PM ...

Page 2: ...LCRDAB10_IB_final111001_Zell indd 2 01 11 2011 12 22 PM ...

Page 3: ...8 Adjusting the Volume 8 Setting the Time 9 Setting the Alarms 9 Checking the Alarm 10 Snooze Function 10 Setting the Sleep Time 10 System Reset 10 Using Earphones 11 DAB Operation 12 Auto Scan Modes 12 Manual Tuning 12 Secondary Services 13 Storing Stations 13 Recalling a Stored Station 13 DAB Display Modes 14 LCRDAB10_IB_final111001_Zell indd 3 01 11 2011 12 22 PM ...

Page 4: ...to FM Mode 15 Auto Scan 15 Manual Scan 15 Storing Stations 15 Recalling a Stored Station 16 FM Display Modes 17 Maintenance 18 Hints and Tips 18 Specification 19 Safety Warnings 20 LCRDAB10_IB_final111001_Zell indd 4 01 11 2011 12 22 PM ...

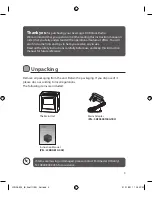
Page 5: ...AB Clock Radio We recommend that you spend some time reading this instruction manual in order that you fully understand all the operational features it offers You will also find some hints and tips to help you resolve any issues Read all the safety instructions carefully before use and keep this instruction manual for future reference If items are missing or damaged please contact Partmaster UK on...

Page 6: ...6 DC5V ANT 1 Radio Aerial 2 Earphones Socket Product Overview Front View 1 LCD Display Rear View 1 2 1 3 3 DC 5V IN LCRDAB10_IB_final111001_Zell indd 6 01 11 2011 12 22 PM ...

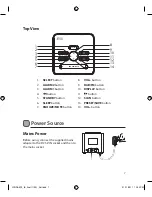
Page 7: ...ET SAVE SCAN VOL VOL SELECT SNOOZE MUTE 3 5 4 1 7 2 6 10 11 8 14 12 9 13 8 VOL button 9 DAB FM button 10 DISPLAY button 11 button 12 SCAN button 13 PRESET SAVE button 14 VOL button Power Source Mains Power Before using connect the supplied mains adapter to the DC 5V IN socket and then to the mains socket DC5V ANT LCRDAB10_IB_final111001_Zell indd 7 01 11 2011 12 22 PM ...

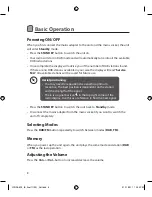
Page 8: ... socket the unit will enter Standby mode Press the STANDBY button to switch the unit on Your radio will start in DAB mode and will automatically tune into all the available DAB radio stations Once complete the display will advise you of the number of DAB stations found If there are no DAB stations available in your area the display will read Service N A All available stations will be saved for fut...

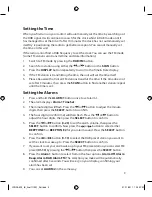
Page 9: ...arms 1 Press and hold the ALARM 1 button once to set alarm 1 2 The alarm displays Alarm 1 Time Set 3 The minute digits will flash Press the or button to adjust the minute digits then press the SELECT button to confirm 4 The hour digits in 24hr time will then flash Press the or button to adjust the hour digits then press the SELECT button to confirm 5 Press the or button 0 20 to set the alarm volum...

Page 10: ... from 5 options Sleep Off Sleep 90 mins Sleep 60 mins Sleep 30 mins Sleep 10 mins by pressing it repeatedly The selection you make will be automatically confirmed after 3 seconds System Reset There may be times when you need to reset your unit back to the factory settings If you experience reception problems you may want to reset and try again If you move the unit to another part of the country an...

Page 11: ...ect the desired volume using the VOL and VOL buttons You can press the MUTE button to turn off the sound and press it again to return to the previous volume level Long term exposure to loud music may cause hearing damage It is best to avoid extreme volume when using earphones especially for extended periods LCRDAB10_IB_final111001_Zell indd 11 01 11 2011 12 22 PM ...

Page 12: ... station Manual Tuning As well as the auto tune function you can manually tune the receiver This can help you when aligning your aerial or when adding stations that were missed while auto tuning 1 Press and hold the DISPLAY button the display will now show Manual tune then press the SELECT button 2 Press the or button to cycle through the DAB channels which are numbered from 5A to 13F 3 After your...

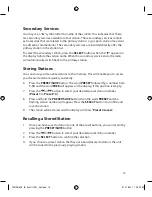
Page 13: ...y and easily 6 Press the PRESET SAVE button The word PRESET followed by a number from 1 10 and the word FREE will appear on the display if this position is empty 7 Press the or button to select your desired preset station number Preset 1 to Preset 10 8 Press and hold the PRESET SAVE button then the word PRESET and the flashing station number will appear Press the SELECT button to confirm and save ...

Page 14: ... and date information automatically you cannot manually set this information on this unit Programme Type This describes the Style or genre of music that is being broadcast e g Rock or Classical Audio Type Bit Rate The display will show the audio type and digital audio bit rate being received DLS Dynamic Label Segment Dynamic label segment is a scrolling message that the broadcaster may include wit...

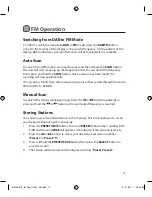
Page 15: ...ce it has cycled through the entire FM band 87 5 108MHz Manual Scan To search FM stations manually simply press the or button repeatedly or press and hold the or button until your desired frequency is reached Storing Stations You can store your favourite stations to the memory This will enable you to access your favourite stations quickly and easily 1 Press the PRESET SAVE button The word PRESET f...

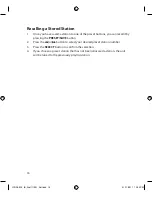
Page 16: ...he PRESET SAVE button 2 Press the or button to select your desired preset station number 3 Press the SELECT button to confirm the selection 4 If you choose a preset station that has not been allocated a station the unit will be tuned to the previously playing station LCRDAB10_IB_final111001_Zell indd 16 01 11 2011 12 22 PM ...

Page 17: ...DS station is received the name of that station Program Service Name PS will be displayed Radio Text As with DAB the broadcaster can include a scrolling text that displays information about the current program If Radio text information is not available then the display will show Radio Text N A Time Date The broadcaster Radio station provides clock and date information automatically so there s no n...

Page 18: ...cy Radio channel reception is poor Adjust the aerial location and position to obtain a better signal reception Tune to the correct radio channel frequency Function disturbed If none of the above solutions work try switching off and unplugging your unit leaving it for two minutes and then reconnect to the mains socket and switch it on again Ensure to unplug the unit from the mains socket before cle...

Page 19: ...39 200 MHz Speaker Output 2 5W RMS Speakers 3 inches full range speaker x 1 piece LCD LCD display with blue back light Earphones 3 5mm stereo earphone socket Power Consumption 5 W Power Consumption Standby 0 8W Features and specifications are subject to change without prior notice LCRDAB10_IB_final111001_Zell indd 19 01 11 2011 12 22 PM ...

Page 20: ...nit well away from heat sources such as radiators or gas electric fires Avoid exposure to direct sunlight and other sources of heat Naked Flames Never place any type of candle or naked flame on the top of or near the unit Moisture To reduce the risk of fire electric shock or product damage do not expose this unit to rain moisture dripping or splashing No objects filled with liquids such as vases s...

Page 21: ...y with the unit Never let anyone especially children push anything into the holes slots or any other openings in the case this could result in a fatal electric shock CAUTION RISK OF ELECTRIC SHOCK DO NOT OPEN The lightning flash with arrowhead symbol within an equilateral triangle is intended to alert the user to the presence of uninsulated dangerous voltage within the unit s enclosure that may be...

Page 22: ...here are separate collection systems for recycling in the EU For more information please contact the local authority or your retailer where you purchased the product All trademarks are the property of their respective owners and all rights are acknowledged P N LCRDAB10 003 Visit Partmaster co uk today for the easiest way to buy electrical spares and accessories With over 1 million spares and acces...

Page 23: ...LCRDAB10_IB_final111001_Zell indd 23 01 11 2011 12 22 PM ...

Page 24: ...LCRDAB10_IB_final111001_Zell indd 24 01 11 2011 12 22 PM ...

Reviews: