background image

Connections

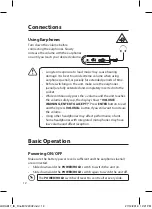
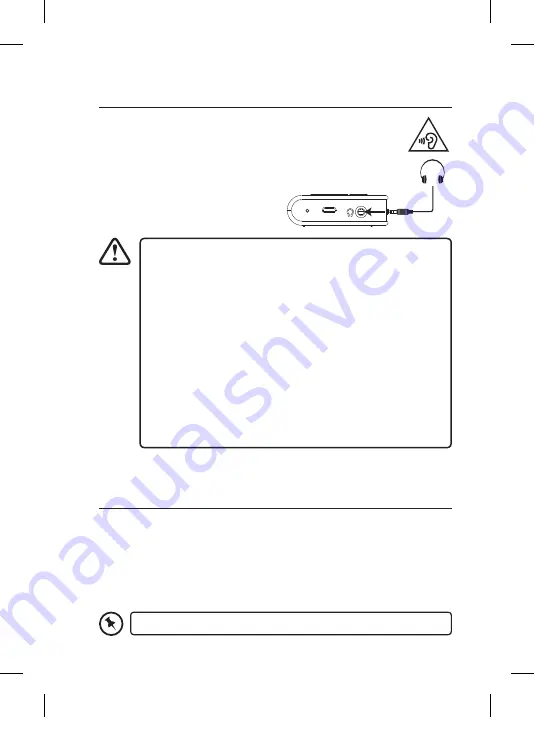
Using Earphones

Turn down the volume before 

connecting the earphones. Slowly 

increase the volume with the earphones 

on until you reach your desired volume. 

•  Long-term exposure to loud music may cause hearing 

damage. It is best to avoid extreme volume when using 

earphones (aerial), especially for extended periods of time.

•  Before switching on the unit, make sure the earphones 

(aerial) are fully extended and completely inserted into the 

socket.

•  While continuously press the + volume and the unit reaches 

the volume safety cap, the display shows “VOLUME 

WARNING, ENTER TO ACCEPT!”. Press ENTER button to exit 

and then press  button if you still want to increase 

the volume.

•  Using other headphones may affect performance of unit. 

Some headphones with integrated microphones may have 

low volume and affect reception.

Basic Operation

Powering ON/OFF

Make sure the battery power level is sufficient and the earphones (aerial) 

are connected.
•  Slide downwards the POWER/HOLD switch to switch the unit on.
•  Slide downwards the POWER/HOLD switch again to switch the unit off.

The POWER/HOLD switch will revert to centre after every slide.

RESET DC IN

12

LHDAB17_IB_Final181223V2.indd   12

27/12/2018   12:21 PM

Summary of Contents for LHDAB17

Page 1: ...Pocket DAB radio Instruction Manual LHDAB17 LHDAB17_IB_Final181223V2 indd 1 27 12 2018 12 21 PM ...

Page 2: ...LHDAB17_IB_Final181223V2 indd 2 27 12 2018 12 21 PM ...

Page 3: ...FF 12 Selecting Modes 13 Key Lock 13 Adjusting Volume 13 Automatically Setting the Clock 13 System Settings 13 Sleep 13 Setting the Time and Date 14 Backlight 14 Factory Reset 15 Software Version 15 DAB Operation 16 Full Scan 16 Manual Tuning 16 Prune Invalid 17 Presetting Stations 17 Recalling a Preset Station 17 DAB Display Modes 17 FM Operation 19 LHDAB17_IB_Final181223V2 indd 3 27 12 2018 12 2...

Page 4: ...9 Manual Scan 19 Scan Setting 19 Audio Setting 20 Presetting Stations 20 Recalling a Stored Station 20 FM Display Modes 21 Maintenance 22 Cleaning the Unit 22 Hints and Tips 22 Specifications 23 LHDAB17_IB_Final181223V2 indd 4 27 12 2018 12 21 PM ...

Page 5: ...rees of temperature either hot or cold Place the unit well away from heat sources such as radiators or gas electric fires Avoid exposure to direct sunlight and other sources of heat Naked Flames Never place any type of candle or naked flame on the top of or near the unit Moisture To reduce the risk of fire electric shock or product damage do not expose this unit to rain moisture dripping or splash...

Page 6: ...penings in the case this could result in a fatal electric shock CAUTION RISK OF ELECTRIC SHOCK DO NOT OPEN The lightning flash with arrowhead symbol within an equilateral triangle is intended to alert the user to the presence of uninsulated dangerous voltage within the unit s enclosure that may be of sufficient magnitude to constitute a risk of electric shock The exclamation point within an equila...

Page 7: ...duct may present a risk of fire or chemical burn if mistreated Do not attempt to open the product or replace the battery It is built in and not changeable Use of other batteries may present a risk of fire or explosion and the warranty will be terminated Only recharge your battery with the provided approved USB cable designated for this product Dispose of batteries according to local regulations Pl...

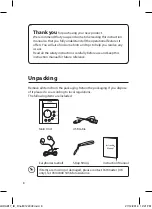
Page 8: ...e use and keep this instruction manual for future reference USB Cable ENTER MODE PRESET INFO MENU SCAN Instruction Manual Earphones aerial 8 Unpacking Remove all items from the packaging Retain the packaging If you dispose of it please do so according to local regulations The following items are included If items are missing or damaged please contact Partmaster UK only Tel 0344 800 3456 for assist...

Page 9: ...view Front View 1 Screen Display 2 Volume Button Button 3 ENTER Button 4 MODE Button 5 SCAN Button 6 PRESET Button 7 INFO MENU Button ENTER MODE PRESET INFO MENU SCAN 1 2 3 LHDAB17_IB_Final181223V2 indd 9 27 12 2018 12 21 PM ...

Page 10: ...WER HOLD Switch 1 RESET Button 2 DC IN Port 3 Earphones Aerial Socket RESET DC IN 1 2 3 1 You may attach the strap string onto the main unit for easy carrying Rear of the unit Strap string LHDAB17_IB_Final181223V2 indd 10 27 12 2018 12 21 PM ...

Page 11: ...ble When the unit is in off mode the screen display will show charging to indicate the unit is in charging charging 100 will appear when the unit is fully charged It takes 4 hours approx to fully charge the battery A fully charged unit has up to 10 hours of playback time at 1 2 volume level RESET DC IN USB to Micro USB Cable included Computer USB Charging device LHDAB17_IB_Final181223V2 indd 11 27...

Page 12: ...it reaches the volume safety cap the display shows VOLUME WARNING ENTER TO ACCEPT Press ENTER button to exit and then press VOLUME button if you still want to increase the volume Using other headphones may affect performance of unit Some headphones with integrated microphones may have low volume and affect reception Basic Operation Powering ON OFF Make sure the battery power level is sufficient an...

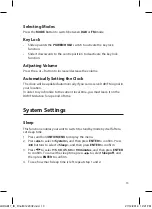
Page 13: ...ise to the current local time you must leave it on the DAB FM station for a period of time System Settings Sleep This function enables your unit to switch to standby mode by itself after a set sleep time 1 Press and hold INFO MENU to display the menu 2 Press to select System and then press ENTER to confirm Press buttons to select Sleep and then press ENTER to confirm 3 Press to select 15 30 45 60 ...

Page 14: ...o confirm Set 12 24 hour Press buttons to select Set 24 hour or Set 12 hour then press ENTER to confirm Set date format Press buttons to select MM DD YYYY or DD MM YYYY then press ENTER to confirm Backlight 1 Press and hold INFO MENU and then press buttons to select System Press ENTER to confirm 2 Press buttons to select Backlight and then press ENTER to confirm 3 Press buttons to select High Medi...

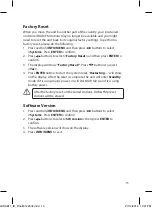
Page 15: ...tory Reset Press buttons to select Yes 4 Press ENTER button to start the system reset Restarting will show on the display After the reset is complete the unit will enter Standby mode if it is using mains power or will start DAB full scan if it is using battery power After the factory reset all the tuned stations DAB FM preset stations will be erased Software Version 1 Press and hold INFO MENU and ...

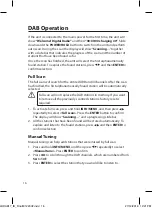
Page 16: ...ion will be automatically selected Full scan will not replace the DAB stations in memory If you want to remove all the previously scanned stations factory reset is required 1 To activate full scan press and hold INFO MENU and then press repeatedly to select Full scan Press the ENTER button to confirm The display will show Scanning and a progressing slide bar 2 All the stations that have been found...

Page 17: ...on number and then press ENTER to confirm 3 The station will be stored and the screen will show Preset stored Recalling a Preset Station 1 Once you have saved a station you can recall it by pressing the PRESET button 2 Press to select the desired preset station number 3 Press ENTER to confirm 4 If you choose a preset station number that has not been allocated a station Preset Empty will be display...

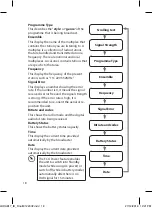
Page 18: ...Hz Signal Error This displays a number showing the error rate If the number is 0 it means the signal received is error free and the signal strength is strong If the error rate is high it is recommended to re orient the aerial or re position the unit Bitrate and codec This shows the radio mode and the digital audio bit rate being received Battery Status This shows the battery status capacity Time T...

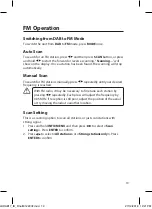
Page 19: ...til your desired frequency is reached With FM radio it may be necessary to fine tune each station by pressing repeatedly Each press will adjust the frequency by 0 05 MHz If reception is still poor adjust the position of the aerial or try moving the radio to another location Scan Setting This is a scanning option to scan all stations or just scan stations with strong signal 1 Press and hold INFO ME...

Page 20: ...ions to the memory This will enable you to access your favourite stations quickly and easily 1 To store a preset you must first be listening to the station that you would like to save Press and hold PRESET The display will show Save to P 2 Press to select the desired preset station number and then press ENTER to confirm 3 The station will be stored and the screen will show Preset Saved Recalling a...

Page 21: ...he frequency of the present station such as 87 50 MHz and the station name Audio Info This displays if the station being received is in mono or stereo Battery Status This shows the battery status capacity Time This displays the current time provided automatically by the broadcaster Date This displays the current date provided automatically by the broadcaster Radio Text Frequency Station Name Audio...

Page 22: ... high Adjust the volume FM station not found Weak signal Search manually DAB station not found No DAB coverage in your area or poor reception Adjust the position of the aerial The display is blank This may occur if the broadcaster changes the label of a service or removes a label while tuned The unit will try to re tune or perform a scan The unit does not respond when pressing any buttons The unit...

Page 23: ...A Built in Battery 3 7 V 1000 mAh Radio Frequency FM 87 5 108 MHz DAB 174 240 MHz Dimension 60 mm W 18 mm D 75 mm H Net Weight approx 67 g Features and specifications are subject to change without prior notice 23 LHDAB17_IB_Final181223V2 indd 23 27 12 2018 12 21 PM ...

Page 24: ...that this product must not be disposed of with your other household waste Instead it is your responsibility to dispose of your waste equipment by handing it over to a designated collection point for the recycling of waste electrical and electronic equipment The separate collection and recycling of your waste equipment at the time of disposal will help conserve natural resources and ensure that it ...

Reviews: