background image

14

 Maintenance

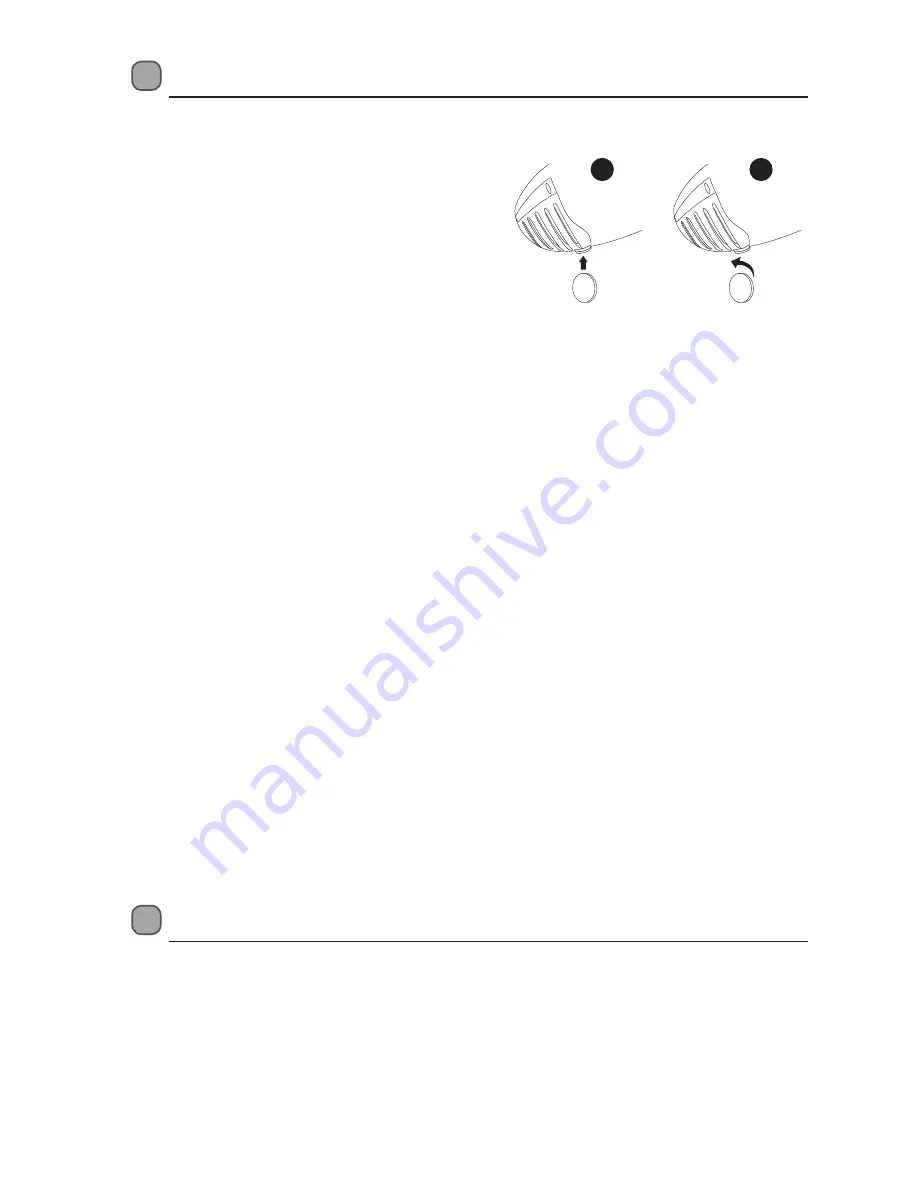
Changing the Internal Light

1.  Before carrying out the bulb replacement always 

adjust the thermostat control dial to Position 0, 

then disconnect the mains supply.

2.  While holding the lamp cover place coin 

between lamp cover lip and internal wall of the 

refrigerator and twist the coin.

3.  Remove the lamp cover.
4.  Remove the old bulb by unscrewing in an anti-clockwise direction.
5.  Replace with a new bulb (220~240V, max. 15W). Please make sure that it is secure in the bulb 

cover.

6.  Refit the light bulb cover and reconnect the unit to the mains supply and switch on.

Care When Handling / Moving the Unit

Hold the unit around its sides or base when moving it.

Servicing

The unit should be serviced by an authorised engineer and only genuine spare parts should be 

used. Under no circumstances should you attempt to repair the unit yourself. Repairs carried 

out by inexperienced persons may cause injury or serious malfunction. Contact a qualified 

technician.

Switching Off for Long Periods of Time

When the unit is not in use for a long period of time, disconnect it from the mains supply, empty 

all food and clean the unit, leaving the door ajar to prevent unpleasant smells.

Condensation

Condensation may appear on the outside of the unit. This may be due to a change in room 

temperature. Wipe off any moisture residue. If the problem continues, please contact a qualified 

technician for assistance.

 Disposal

Old units still have some residual value. An environmentally friendly method of disposal will 

ensure that valuable raw materials can be recovered and used again. The refrigerant used in 

your unit and insulation materials require special disposal procedures. Ensure that none of the 

pipes on the back of the unit are damaged prior to disposal.
Up to date information concerning options of disposing of your old unit and packaging from 

the new one can be obtained from your local council office.
When disposing of an old unit break off any old locks or latches and remove the door as a 

safeguard.

1

2

Summary of Contents for LUL50S13

Page 1: ...Instruction Installation Manual Undercounter Fridge LUL50S13...

Page 2: ...ation 12 Switching On Your Unit 12 Adjusting the Temperature 12 Noises Inside the Unit 12 Tips for Keeping Food in the Unit 13 Cleaning 13 Defrosting 13 Cleaning the Interior and the Exterior of the U...

Page 3: ...not use mechanical devices or other means to accelerate the defrosting process other than those recommended by the manufacturer Do not use electrical appliances inside the food storage compartments of...

Page 4: ...they do not play with the unit If your unit is fitted with a lock to prevent children being trapped inside keep the key out of reach and not in the vicinity of the unit Do not store volatile or flamm...

Page 5: ...oor Shelf Egg Tray The Main Unit If items are missing or damaged please contact Partmaster UK only Tel 0844 800 3456 for assistance Instruction Manual Thank youfor purchasing your new Logik Undercount...

Page 6: ...erform properly This unit is not designed for use in a garage or outdoor installation Do not drape the unit with any covering Levelling the Unit To do this adjust the two levelling feet at the front o...

Page 7: ...cooling performance Reduce running costs Prolong product life span Ensure the unit is unplugged and empty To take the door off it is necessary to tilt the unit backwards You should rest the unit on s...

Page 8: ...ce Lift the door and place it on a padded surface to prevent it from scratching 4 Swap the bottom bushing and bottom bushing cap of the upper door The bottom bushing key must be in the correct positio...

Page 9: ...oor back into place Ensure the fridge door is aligned horizontally and vertically so that the seals are closed on all sides before finally tightening the top hinge Insert the hinge bracket and screw i...

Page 10: ...ution of bicarbonate soda Then rinse with warm water using a wrung out sponge or cloth Wash the drawers in warm soapy water and dry completely before replacing in the unit Clean the exterior of the un...

Page 11: ...11 Product Overview Adjustable Glass Shelves Salad Bin Cover Salad Bin Internal Light and Thermostat Control Dial Lower Door Shelf Levelling Feet Upper Door Shelves Egg Tray...

Page 12: ...eck the temperature you will need a special fridge freezer thermometer These are available from most supermarkets and hardware shops Place the thermometer in the centre of the unit where it can be rea...

Page 13: ...ning Defrosting Frost may accumulate on the inner rear surface of the appliance which will automatically defrost during the off cycle of the compressor Water is channelled via the drain hole to the co...

Page 14: ...jury or serious malfunction Contact a qualified technician Switching Off for Long Periods of Time When the unit is not in use for a long period of time disconnect it from the mains supply empty all fo...

Page 15: ...the appliance is used and where it is located Household Appliances Category Category 1 Refrigerator Energy Grading A EU Ecolabel N A Defrosting Type Auto Defrost Climate Class N ST This appliance is...

Page 16: ...uld be disposed at the end of its life separately from your household waste There are separate collection systems for recycling in the EU For more information please contact the local authority or you...

Reviews: