background image

INSTALLATION GUIDE

www.logiquip.com

|


3


INSTALLATION INSTRUCTIONS

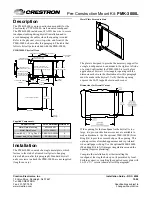
Step 1A - Install Casters 

(

PART


7

 and 

8

)

. If units are stationary proceed to Step 1B

1.  Install the caster into the caster cnsert with a rubber mallet (Fig. 1)

Step 1B - Install Leveling Feet

1.  Using the mallet, pound in the leveling foot insert 

(

PART


6

)

 (Fig. 2)

2.  Thread the leveling foot 

(

PART


5

)

 into the insert (Fig. 3)

Step 2 - Frame Construction

1.  Using the provided nuts and bolts, attach the cross bars 

(

PART


2

 or 

3

 )  

to the top and bottom of one Frame (

PART


1

). Assemble all four (4) cross  

bars to the frames (Fig.4)

2.  After you secure the cross bar to the first frame, repeat the same steps  

on the additional frame. LogiQuip recommends you only connect a  

maximum of four frames as a single unit (three complete modules).

3.  After all cross bars are attached to the frames stand the ParStor

® 

unit upright

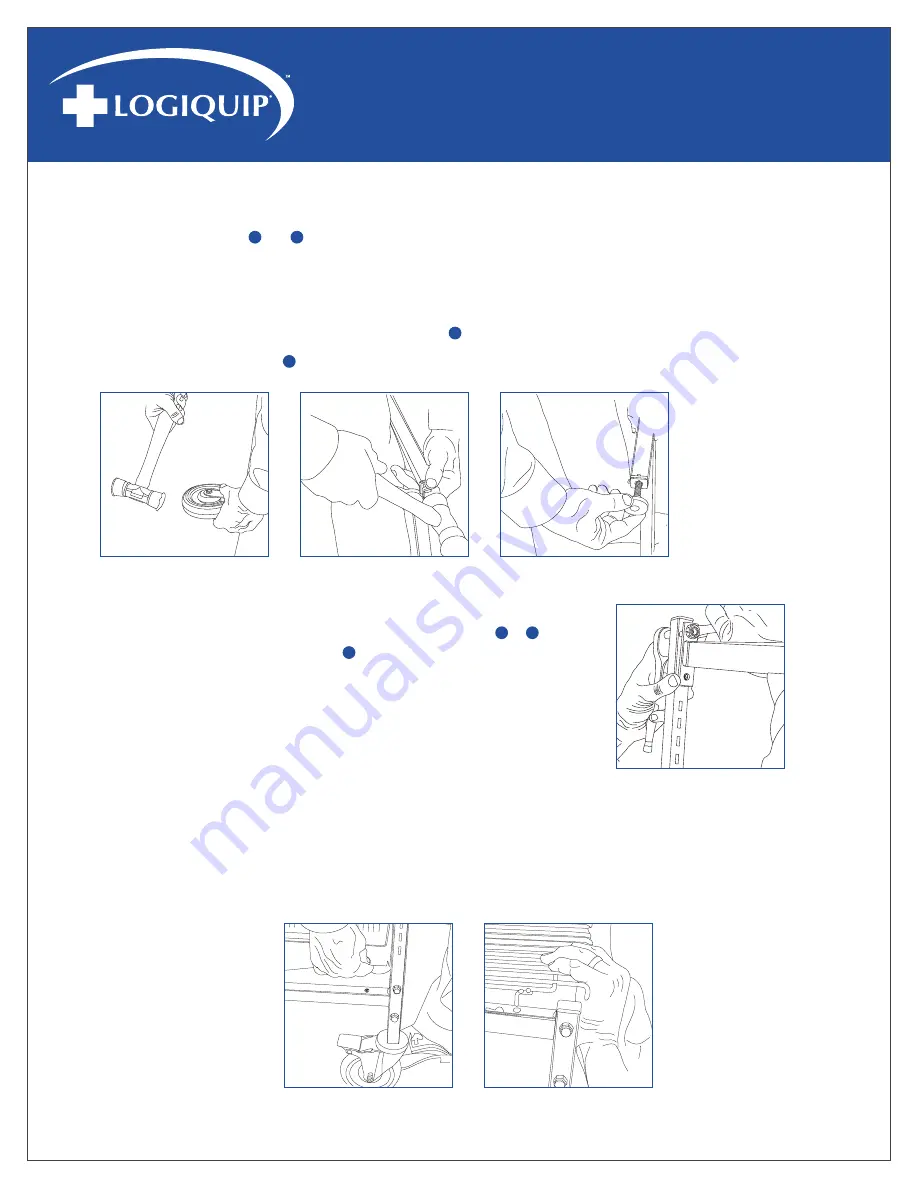
Step 3 - Assembly Accessories

1.  Attached the bottom shelf liner or “insert” to the cross bars by using the provided glue dots

 (Fig.5)

2.  Attach the top shelf to the top of the frame. There are pegs underneath the top shelf that sit in side slots atop the frame (Fig. 6)

Fig. 1

Fig. 2

Fig. 3

Fig. 4

Fig. 6

Fig. 5

Summary of Contents for ParStor

Page 1: ...iquip com customersupport logiquip net INSTALLATION GUIDE CAUTION Read and understand all of the instructions and safety information in this document before assembling and installing this product ParStor INSTALLATION GUIDE ...

Page 2: ...ER USE QTY 1 Frame FR68 VHD Structural Support 2 2 Cross Bar CB18JB V Structural Support 4 3 Narrow Cross Bar CB16JB V Structural Support For TU1420RPS 4 4 Slides SLV SLT V Drawer Extension Slides 2 5 Leveling Foot PSLF Leveling 4 6 Leveling Foot Insert Part of PSLF Leveling 2 7 Caster Swivel 5C DS Mobile 2 8 Caster Swivel Brake 5CB DS Mobile 2 2 4 5 6 7 8 ...

Page 3: ... the top and bottom of one Frame PART 1 Assemble all four 4 cross bars to the frames Fig 4 2 After you secure the cross bar to the first frame repeat the same steps on the additional frame LogiQuip recommends you only connect a maximum of four frames as a single unit three complete modules 3 After all cross bars are attached to the frames stand the ParStor unit upright Step 3 Assembly Accessories ...

Page 4: ...ide frame Place the frame on the slide just like the wire baskets and shelves Fig 10 Make sure you have the frame in the right position the smaller frame brace is facing forwarded 6 Place the tub inside of the slide frame Fig 11 7 A slanted slide has swiveling bracket tabs Fig 12 to allow the front and back of the slide to be placed at different levels To attach the slanted slide one level at a ti...

Page 5: ... Year Warranty from date of receipt against defect in materials or workmanship under normal use and service excluding Electronic Components Cart Covers Custom Products and LogiCell Tambour Doors During this period LogiQuip will in its sole discretion repair defects in materials or workmanship that existed when the product was received or replace the product Visit LogiQuip com Warranty for more det...

Reviews: