50
180
6.
Secure the log with the log clamps. Adjust the height
of the log clamps. Ensure that they will not come into
contact with the blade when you are sawing.
7.
Set the height of the sawhead for the first cut
by turning the crank that adjusts depth of cut. You
raise the sawhead by turning the crank clockwise,
while turning the crank counterclockwise will lower
the sawhead.
8.
Check that the blade will not come into contact
with the log supports and log clamps.
9.
Set the adjustable blade guard taking into
account the widest part of the log.
10.
Open the valve for blade cooling to provide a
small trickle onto the blade guide roller/band blade.
11.
Before each cut, perform all safety checks
described in the chapter
Safety Instructions
under
the section
Before each cut
.
12.
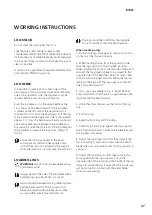
Stand behind the push handle of the saw carriage
and start the engine. Give gas by squeezing the
throttle handle all the way in to its end position. This
brings the engine up to its operating speed and the
band wheels/blade start rotating.
13.
With both hands on the push handle, gently
push the saw carriage forward until the blade
begins to cut into the log. When the band blade
is completely inside the log, you can increase the
feed rate. Adjust the feed rate so the cut becomes
straight with a clean finish. Lower the feed rate
when cutting through knots in the wood and
choose a lower speed when cutting large or hard
logs. Also lower the feed rate when you come to the
end of the log.
14.
As soon as you have sawn through the log,
release the throttle handle and let the blade come to
a complete stop. Tip: If you release the throttle just
before the blade comes out through the log end,
the blade will stop faster.
15.
Remove the slab from the log.
16.
Raise the sawhead slightly and, by hand, roll the
saw carriage back to the starting position.
17.
SSet the height for the next cut. Use the crank
and the depth of cut scales.
18.
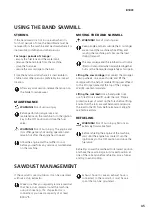
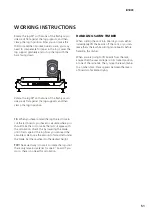
Rotate the log 180° so that the freshly sawn
surface rests on the log bed.
Lower the log supports and the log clamps so that
they will not come into contact with the blade and
clamp the log in position. Continue sawing until you
reach the desired cant width.
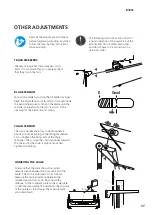
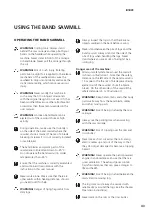
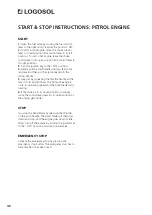
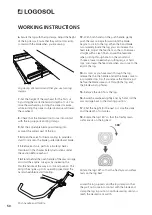
Log clamp. We recommend that you use two log
clamps.
Push handle and throttle
Rotate the log 180° so that the freshly sawn surface
rests on the log bed
WORKING INSTRUCTIONS


