Once printed, this document is no longer controlled
www.cesphn.org.au
Last updated October 2018
Page 2 of 7
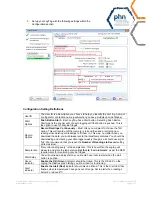
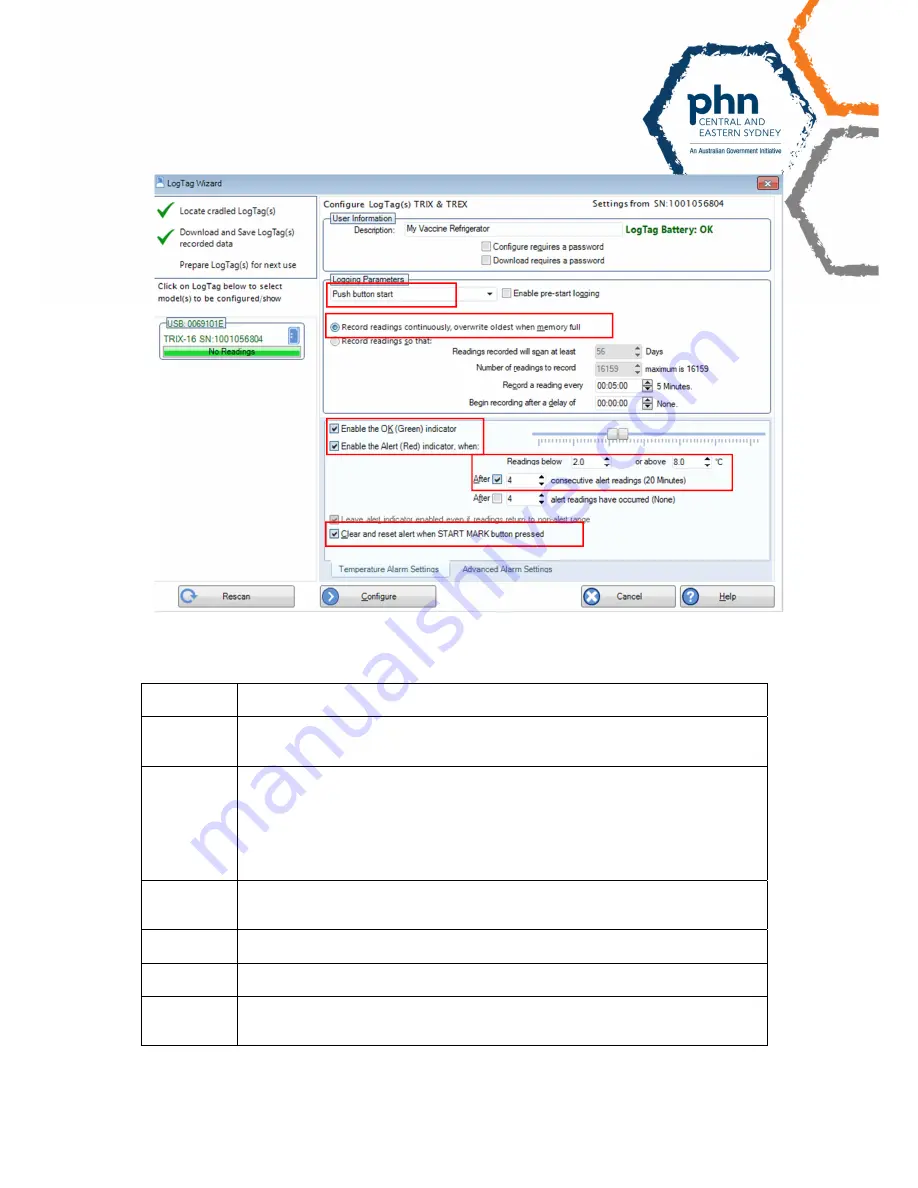
3. Set up your LogTag with the following settings within the
Configuration section
Configuration Setting Definitions
UserID
The User ID is a description you choose to help you identify the unit. E.g. name of
a refrigerator or practice name (useful when you have multiple vaccine fridges)
Start
Options
Push Button Start
– Each LogTag has a Start button. Selecting Push Button
Start means the Logger will not begin logging until that button is pushed. This is
the option to use for vaccine fridges.
Record
Options
Record Readings Continuously
– Most often you will want to choose the first
option. This will record until the memory is full and then keep recording new
reading while deleting old readings to fit them in. This way, no matter when you
download the data, you will always record the latest temperatures. You should be
downloading and clearing your data logger weekly though, so it should never get
‘full’. We recommend that you leave the
Number of Readings to Record
setting
at its maximum.
Sample rate
“Record a reading every” is the sample rate. This is how often the Logtag will
measure and store the temperature.
Set this to ‘5 min intervals’
as per the NSW
requirements for monitoring vaccine fridges
Start delay
You will not need a delay start as you should have it set to start when the start
button is pushed.
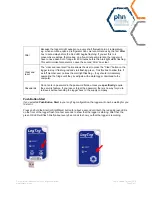
Green
indicator
Enable the OK (Green)
indicator should be ticked. This is the OK LED on the
Logtag that flashes green letting you know that it is functioning.
Alert
indicator
Enable the Alert (Red)
indicator should also be ticked. This is the Alert LED that
flashes when temperatures have gone out of range. Set to alert when readings
below 2 or above 8
o
C


