Operating Instructions
207
6.
You can now enter or select the appropriate test parameters which are listed and described
in the
PVS Setup
screen section.
7.
Tap on the Back button
to display the Save Settings pop-up screen. Then tap on the
green tick 'OK' button to save the changes and close the screen. The Tracker feature is now
enabled and can be selected for use with any product
Enabling PV Testing for a Product
To enable PV testing for a product, proceed as follows:
1.
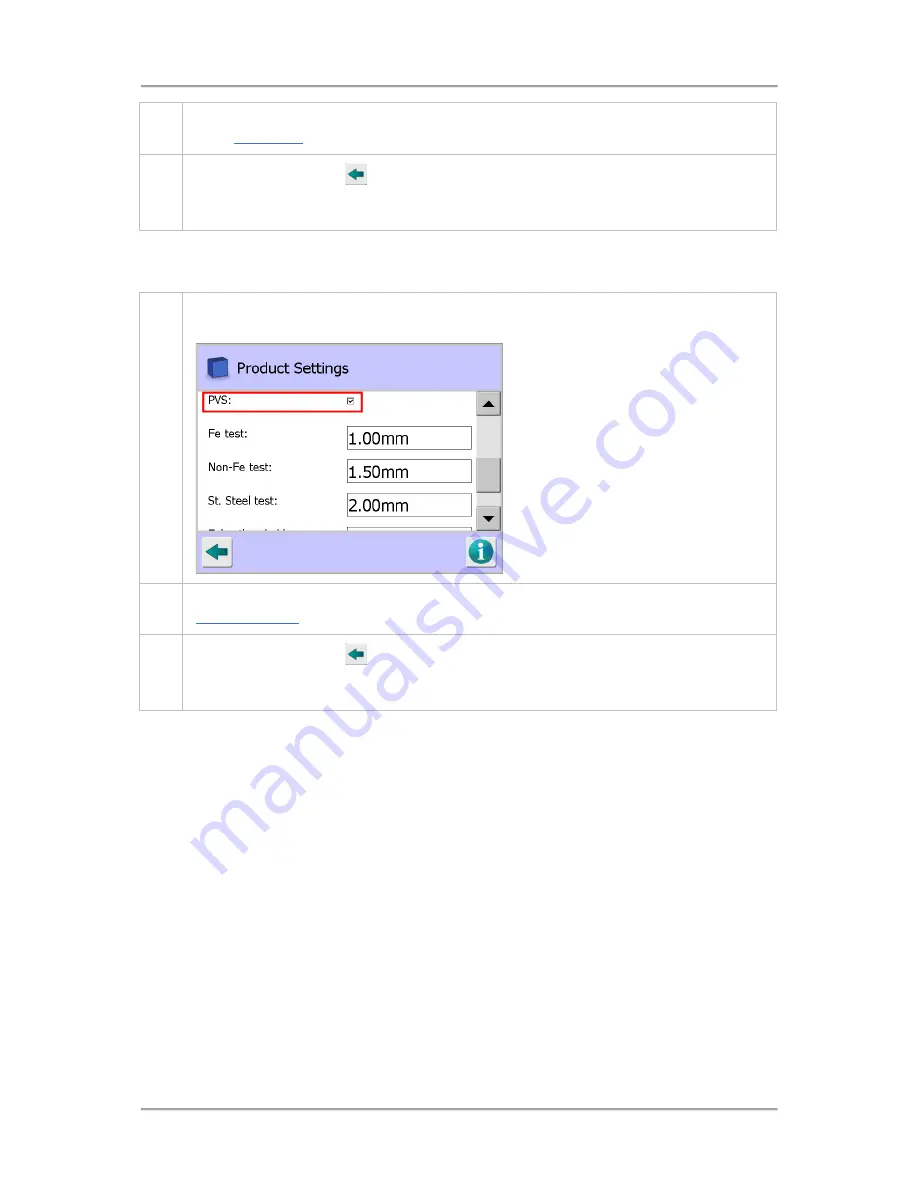
Navigate to the Product Settings screen for the required product and tap on the PVS option
check box to enable the option. A number of other parameters will then be displayed.
2.
You can now enter values for the PVS test parameters which are listed and described in the
Product Settings
screen section.
3.
Tap on the Back button
to display the Save Settings pop-up screen. Then tap on the
green tick 'OK' button to save the changes and close the screen. The Tracker feature is now
enabled for the selected product
Summary of Contents for IQ3+
Page 2: ......
Page 36: ...Safety First 26 THIS PAGE IS INTENTIONALLY LEFT BLANK ...
Page 43: ...Installation 33 ...
Page 60: ...Installation 50 THIS PAGE IS INTENTIONALLY LEFT BLANK ...
Page 70: ...About the Metal Detector Range 60 THIS PAGE IS INTENTIONALLY LEFT BLANK ...
Page 218: ...Operating Instructions 208 THIS IS PAGE INTENTIONALLY LEFT BLANK ...
Page 244: ...Maintenance 234 THIS PAGE IS INTENTIONALLY LEFT BLANK ...
Page 248: ...Glossary 238 THIS PAGE IS INTENTIONALLY LEFT BLANK ...


