background image

- 16 -

Workshop Manual 12 LD _ cod. 1.5302.460 - 3° ed_ rev. 02

10

125

250

500

1000

2500

5000

(***)

(***)

(***)

(*)

(*)

(*)

(**)

(**)

(***)

(°)

(***)

(°)

3

ENGINE OIL LEVEL

OIL BATH AIR CLEANER

DRY AIR CLEANER

FUEL PIPES

COOLING SYSTEM CLEANING

VALVE-ROCKER ARMS CLEARANCE
ADJUSTMENT
SETTING AND INJECTORS CLEANING

RUBBER INTAKE HOSE (DRY AIR
CLEANER - INTAKE MANIFOLD)
ENGINE OIL RADIATOR CLEANING

ALTERNATOR AND STARTING MOTOR

FUEL TANK CLEANING

ENGINE OIL

EXTERNAL OIL FILTER

FUEL FILTER

RUBBER INTAKE HOSE (DRY AIR
CLEANER - INTAKE MANIFOLD)
FUEL PIPES

DRY AIR CLEANER EXTERNAL
CARTRIDGE
DRY AIR INTERNAL EXTERNAL
CARTRIDGE

PARTIAL

TOTAL

Engine oil replacement.

Oil filter replacement.

EXTRAORDINARY MAINTENANCE

AFTER THE FIRST

50 WORKING HOURS

ORDINARY MAINTENANCE

OPERATION DESCRIPTION

FREQUENCY x HOURS

CHECK

REPLACEMENT

OVERHAUL

AFTER 6 CHECKS WITH CLEANING

(*)

-

In case of low use: every year.

(**)

-

In case of low use: every 2 years.

(***)

-

The period of time that must elapse before cleaning or replacing the filter element depends on the environment in which the engine operates.
The air filter must  be cleaned and replaced more frequently In very dusty conditions.

(°)

-

Alternately when the clogging indicator, if present, indicates it’s necessary to replace the filter.

Failure to carry out the operations described in the table may lead to technical damage to the machine
and/or system

ROUTINE ENGINE MAINTENANCE

AFTER 3 CHECKS WITH CLEANING

MAINTENANCE - RECOMMENDED OIL TYPE - REFILLING

Summary of Contents for 12LD 435-2

Page 1: ...12LD 435 2 12LD 435 2 B1 12LD 475 2 12LD 475 2 EPA WORK SHOP MANUAL 12LD Series engines cod 1 5302 460_3rd ed ...

Page 2: ... perform the subject service operation 3 The person or people performing service work on LOMBARDINI series engines has read the pertinent information regarding the subject service operations and fully understands the operation at hand This manual was written by the manufacturer to provide technical and operating information to authorised LOMBARDINI after sales service centres to carry out assembly...

Page 3: ...____________________________ 16 19 ACEA Regulations ACEA Sequences 17 API MIL Sequences 17 FUEL SPECIFICATIONS 19 International specifications 17 LUBRICANT 17 PRESCRIBED LUBRICANT 18 ROUTINE ENGINE MAINTENANCE 16 SAE Classification 17 4 DISASSEMBLY REASSEMBLY_____________________________________________________ 20 31 Alternator 21 Camshaft end play 30 Camshaft timing 30 Center main bearing support...

Page 4: ...alve timing without considering timing marks 30 Valves 23 5 LUBRICATION SYSTEM ____________________________________________________________ 32 34 LUBRICATION SYSTEM AND BREATHER RECIRCULATION SYSTEM 32 Oil filter cartridge external 33 Oil filter cartridge internal 33 Oil preassure relief valve 33 Oil pressure curve at full speed 34 Oil pressure curve at idling speed 34 Oil Pump 33 6 FUEL SYSTEM __...

Page 5: ...uel device 43 Injection pump delivery setting 43 Injection pump delivery setting with engine at the torque dynamometer 44 Stop setting 44 9 STORAGE __________________________________________________________________________ 45 External engine protection 45 Injection systems protection 45 Internal engine protection 45 PROCEDURES TO BE CARRIED OUT BEFORE START THE ENGINE 45 STORAGE 45 10 TORQUE SPECI...

Page 6: ... 6 Workshop Manual 12 LD _ cod 1 5302 460 3 ed_ rev 02 Chapter index Notes ...

Page 7: ...ty workmanship or materials Any other responsibility obligation for different expenses damages and direct indirect losses deriving from the engine use or from both the total or partial impossibility of use is excluded The repair or replacement of any component will not extend or renew the warranty period Lombardini warranty obligations here above described will be cancelled if Lombardini engines a...

Page 8: ...removal of seals demounting and refitting of parts not described in the operation and maintenance manual by unauthorized personnel shall relieve Lombardini from all and every liability for deriving accidents or for failure to comply with the laws in merit On starting make sure that the engine is as horizontal as possible unless the machine specifications differ In the case of manual start ups make...

Page 9: ...uid circuit is under pressure Never carry out any inspections until the engine has cooled and even in this case only open the radiator plug or expansion chamber with the utmost caution wearing protective garments and goggles If there is an electric fan do not approach the engine whilst it is still hot as the fan could also start operating when the engine is at a standstill Only clean the coolant s...

Page 10: ...ction Defective starter switch Defective starting motor Clogged air filter Excessive idle operation Incomplete running in Engine overloaded Advanced injection timing Retarded injection timing Incorrect governor linkage adjustment Governor spring broken or unhooked Too low idle speed setting Worn out or stuck piston rings Worn cylinders Worn valve guides Valves sticking or damaged Worn out bearings...

Page 11: ... Maximum operating speed E Number of the customer version form K F Approval data Approval data The approval reference directives EC are on the engine plate The data plate for EPA Standards is applied on the air shroud It contains the following information 1 Currentyear 2 Engine displacement 3 Rated power measured in kW 4 EPA family ID 5 Injection timing 6 Injection opening preassure 7 Valve cleara...

Page 12: ...grees Oil bath air cleaner or dry air cleaner Air fan integral to the flywheel Counter clockwise 1st P T O side 2 in line Four stroke diesel POWER AND TORQUE CONSUMPTION AT MAXIMUM POWER GENERAL DETAILS Operating cycle Cylinders Bore x stroke Displacements Compression rate Intake Cooling Crankshaft rotation Combustion sequenc Timing system Valves Shaft Tappets Fuel injection Dry weight of engine M...

Page 13: ... Internal Standard nominal current Alternator Internal Optional nominal current Starter motor power Bosh GF Type of lubrication Circuit supply Maximum oil quantity Maximum oil quantity Oil pressure at min speed oil temperature 120 C Oil filter cartridge external Maximum operating pressure Maximum combustion pressure Filter capacity By pass valve setting Filtering surface Oil filter cartridge inter...

Page 14: ...VERLOAD CAPABILITY Continuos heavy duty with constant speed and constant load MN Torque curve N curve MB NB curve MA NA curve C Specific fuel consumption curve The above power values refer to an engine fitted with air cleaner and standard muffler after testing and at the environmental conditions of 20 C and 1 bar Max power tolerance is 5 Power decreases by approximately 1 every 100 m altitude and ...

Page 15: ... 15 Workshop Manual 12 LD _ cod 1 5302 460 3 ed_ rev 02 2 12LD 435 2 435 2 B1 475 2 EPA OVERALL DIMENSIONS Technical information ...

Page 16: ...ilter replacement EXTRAORDINARY MAINTENANCE AFTER THE FIRST 50 WORKING HOURS ORDINARY MAINTENANCE OPERATION DESCRIPTION FREQUENCY x HOURS CHECK REPLACEMENT OVERHAUL AFTER 6 CHECKS WITH CLEANING In case of low use every year In case of low use every 2 years The period of time that must elapse before cleaning or replacing the filter element depends on the environment in which the engine operates The...

Page 17: ... choosing the kind with the right characteristics Usually a specification showing a following letter or number is preferable to one with a preceding letter or number An SF oil for instance is more performing than a SE oil but less performing than a SG one API MIL SEQUENCES PETROL A1 Low viscosity for frictions reduction A2 Standard A3 High performances LIGHT DUTY DIESEL ENGINES B1 Low viscosity fo...

Page 18: ...izure piston ring sticking and accelerated wear of the cylinder liner bearing and other moving components increases significantly Always use oil with the right viscosity for the ambient temperature in which your engine is being operated Use the chart when chosing your engine oil Danger Attention The used engine oil can cause skin cancer if kept frequently in contact for prolonged periods If contac...

Page 19: ...ire outbreaks do not smoke or use naked flames during the operations Fuel vapours are highly toxic Only carry out the operations outdoors or in a well ventilated place Keep your face well away from the plug to prevent harmful vapours from being inhaled Dispose of fuel in the correct way and do not litter as it is highly polluting To achieve optimum performance of the engine use good quality fuel w...

Page 20: ...n order to fix assemblies and or components securely the operator must tighten the fastening parts in a criss cross or alternating pattern Assemblies and or components with a specific tightening torque must initially be fastened at a level lower than the assigned value and then subsequently tightened to the final torque RECOMMENDATIONS FOR OVERHAULS AND TUNING Important To locate specific topics t...

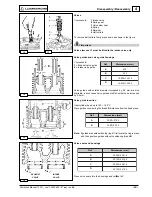
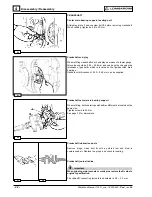
Page 21: ...starter ring gear heat it up to 200 250 C and rapidly drive it onto the flywheel Alternator Remove stator and place it inside the rotor to prevent metal particles from being attracted by the magnets When refitting tighten rotor screws and stator bolts at 10 Nm See pages 40 and 41 for alternator characteristics Valve I Rocker arm clearance Caution Warning Setting should be performed when the engine...

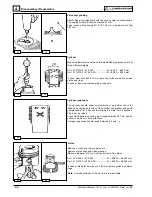
Page 22: ...h the journal bore Tighten screws to 25 Nm Injector projection The end of nozzle A should project 3 0 3 5 mm 2 00 2 50mm for EPA engines from the cylinder head plane Adjust injector projection by means of copper shims B measuring 1 5 and 1 00 mm in thickness Cylinder Head Important Do not remove it when hot to avoid deformation If cylinder head is deformed level it hot by removing a maximum of 0 3...

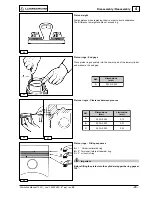
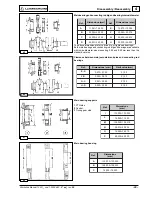
Page 23: ...lve only Valve guides and valve guide housings Components 1 Exhaust valve guide 2 Intake valve guide Valve guides with outside diameter increased by 0 5 mm are also available in such cases valve guide bore C should also be increased by 0 5mm Valve guide insertion Heat cylinder head up to 160 180 C Press guides considering the A and B distances from the head piane Note If guides are seated with sto...

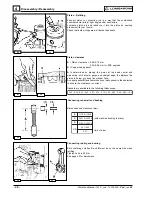
Page 24: ...ce piston rings only Piston Remove circlips and remove piston pin Remove piston rings and clean grooves Measure diameter at 2 mm from the bottom of the piston Per 12 LD 435 2 435 2B1 Ø 85 920 85 940 mm Per 12 LD 475 2 475 2 EPA Ø 89 925 89 940 mm In case of diameter wear above 0 05 mm replace piston and piston rings Note Oversize pistons of 0 5 and 1 0 mm are available Cylinder roughness The cylin...

Page 25: ...n weight should not exceed 6 g Limit value mm Dimensions mm Ref Dimensions mm Ref Piston rings End gaps Place piston rings squarely into the unworn part of the lower cylinder and measure the end gap Pistons ringis Clearance between grooves Piston rings Fitting sequence A 1 Chromium plated ring B 2 Torsional internal tapered ring C 3 oil control ring Important Before fitting the piston into the cyl...

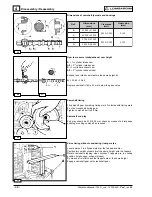
Page 26: ...r seats with machine bushing in place limit of wear Piston clearance A Piston clearance 0 65 0 70 mm 0 55 0 60 mm for EPA engines B Copper head gasket A is determined by placing the piston at top dead center and measuring with a feeler gauge and straight edge the distance the piston is below or above the cylinder face A copper gasket B available in various thicknesses is then selected to ensure th...

Page 27: ...s of two M8x1 25 screws with fully threa ded length of 40 mm or a puller Part N 7271 3595 048 Note To avoid deformation it is not recommended to replace the bearing bushing complete assembly s of bushing and support are available in standard 0 25 mm and 0 50 mm undersize configurations as spare parts See page 29 for dimensions Main bearing support PTO Side Remove it by means of two M8x1 25 screws ...

Page 28: ...located on the flywheel side main bearings Gaskets with thickness of 0 30 0 50 mm can be supplied Crankshaft lubrication ducts Remove plugs clean duct A with a pointed tool and blow in compressed air Replace the plugs and check for sealing Crankshaft journal radius Important When grinding main journals or crank pins restore the R value to original specification The radius R connecting journals to ...

Page 29: ...0 4 5 4 0 0 4 C 0 5 3 5 5 0 4 3 5 5 G 5 3 4 5 5 4 0 4 5 5 D 0 5 9 4 5 1 3 9 4 5 H 0 2 0 5 5 0 0 0 5 5 45 4 46 Clearance between main journals crank pins and connecting rod bearings Main bearing supports 1 PTO side 2 Central 3 Timing gear side Limit value mm Dimensions mm Ref Dimensions mm Ref Main bearing housing Dimensions mm Ref Dimensions mm Ref Dimensions mm Ref Mainbearingandconnectingrodbige...

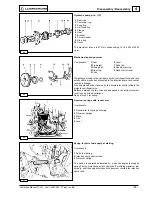
Page 30: ...aking timing mark 1 coincide with timing mark 2 on the crankshaft timing gear Tighten camshaft bolt to 60 Nm Camshaft end play End play should be 0 10 0 26 mm check by means of a dial gauge pushing or pulling camshaft as required Valve timing without considering timing marks Locate piston 1 on flywheel side at the top dead center Position two small cylinders A of the same height onto the tappets R...

Page 31: ...el in spite of load variations See picture 52 for timing Governor springs with rocker arm Components 1 Rocker arm for spring anchoring 2 Governor springs 3 Plate 4 Link 5 Lever Spring for extra fuel supply at starting Components 1 Extra fuel spring 2 Injection pump control yoke 3 Governor spring The device is operated automatically when the engine is stopped spring 1 acts on injection pump control...

Page 32: ...tation speed Use suitable oil in order to protect the engine Nothing more than lubrication oil can influence the performances and life of an engine Use of an inferior quality oil or failure to regularly change the oil will increase the risk of piston seizure will cause the piston rings to jam and will lead to rapid wear on the cylinder liner the bearings and all other moving parts Engine life will...

Page 33: ...Features Filtering capacity 70 µm By pass valve opening pressure 0 60 0 75 bar Max working pressure 4 5 bar Oil filter cartridge external Starting from engine serial n 4877736 Components 1 Gasket 5 Filtering element 2 Steel shroud 6 Bypass valve 3 Gommino 7 Spring 4 Spring Characteristics Maximum operating pressure 7 bar Maximum blast pressure 20 bar Filtering capacity 15 µ µ µ µ µ By pass valve s...

Page 34: ...e speed of 1200 r p m in no Ioad conditions and at a room temperature of 25 C Pressure is given in bar and temperature in centigrade Oil pressure curve at full speed The curve is obtained at the oil filter level with engine working at 3000 r p m at a room temperature of 25 C and at 25 84 HP Pressure is given in bar and temperature in centigrade Lubrication System ...

Page 35: ...peration Components 1 Drive rod shelf 1 470 2 070 mm 2 Gasket 3 Camshaft eccentric Characteristics when the control eccentric rotates at 1500 r p m minimum delivery is 90 l h while self regulation pressure is 0 5 0 7 bar Fuel filter inside fuel tank Components 1 Spring 2 Disc 3 Ring 4 Cartridge 5 Gasket 6 Gasket 7 Cap 8 Ring 9 Bolt Fuel filter removed from the tank upon request 1 Bleeding screw 2 ...

Page 36: ... from max deliv point Control rod max force stroke stroke Delivery Max plunger difference Rod stroke from max deliv point Control rod max force stroke stroke How to reassemble injection pump components After replacing the worn out components reassemble the pump as follows Introduce sector gears into the pump body by making reference points C match with the B points on the rack Fix barrels with the...

Page 37: ... system Injection static advance adjustment Assemble the valve lowering tool serial number 1460 285 on the cylinder head to be checked Make sure that the dial indicator tracer is correctly placed on the valve Gravity feed the injection pump Position STOP lever 3 half a stroke so that the delay supplement mark is excluded By pressing tool lever 1 pic 75 on the valve turn the flywheel using a spanne...

Page 38: ... Intermediate flange 13 Sump 7 Nozzle Fuel system Piston lowering value mm R p m Advance degrees Engine type Fasten capillary tube 4 on the delivery union of the cylinder on which the valve lowering tool is installed Turn the flywheel and alternatively fill the capillary tube until the fuel flows out Turn the flywheel clockwise pic 77 and during the compression phase turn it slowly Stop as soon as...

Page 39: ...uld be performed at a 10 bar greater pressure 220 230 bar for standard engines 268 280 bar for EPA engines to allow for bedding during operation Check needle valve sealing by slowly moving hand pump until approximately 180 bar Replace nozzle in case of dripping Fuel system Injector for EPA engines Components 1 Injector housing 7 Nozzle 2 Intake fitting 8 Cup 3 Shim 9 Needle valve 4 Spring 10 Sump ...

Page 40: ...ng light Note Battery which is not supplied by Lombardini should feature 12 V voltage and capacity not below 70 Ah 12 5 V 14 A Alternator Features a fixed armature winding mounted on the air shroud bracket The rotating permanent magnet inductor is located in the fan spindle Dimensions mm Note Clearance between armature winding and inductor air gap should be 0 48 0 60 mm Alternator battery charger ...

Page 41: ...r air gap must be 0 48 0 60 mm To avoid wrong connections 3 different sizes are supplied The voltage regulator fits to both circuits with and without battery charging light in the latter case connections LE SAPRISA and L DUCA TI are not used Alternator battery charger curve 12 V 18 A This curve is obtained at 25 C with 12 5 V battery voltage Voltage regulator Type LOMBARDINI supplied by SAPRISA an...

Page 42: ...etween the positive pole and the B of the voltage regulator corresponding to ref 1 in picture 89 Start a couple of times until battery voltage drops below 13 V When battery voltage reaches 14 5 V the ammeter current suddenly drops down to almost zero Replace regulator it recharge current is zero with voltage below 14 V Characteristic curves for starting motor type Bosch DWL 12 V 1 7 kW Curves were...

Page 43: ...ets and power welders the torque setting device acts as a delivery limiter only It therefore does not feature spring M or stroke H Injection pump delivery setting This setting should be performed at the torque dynamometer if not setting is only approximate The following steps are required Loosen delivery limiting device C by 5 turns Bring engine to full speed in no load conditions i e 3200 r p m T...

Page 44: ...t the torquedynamometerbyvaryingtheloadandadjustingthegovernor Under stable engine conditions check consumption again 5 Tighten limiting device C until the engine r p m decreases Lock the limiting device by means of lock nut 6 Release brake completely and check at what speed the engine becomes stable Speed governor should comply with the requirements of the class indicated by the manufacturer of t...

Page 45: ...ves After having performed the air bleeding start the engine verify any possible fuel leakage then stop the engine External engine protection Clean the cooling fins of the cylinders and heads Protect the external non painted surfaces with AGIP RUSTIA 100 F Seal with adhesive tape the intake and exhaust systems Coat the engine with a nylon or plastic sheet Keep in a dry place If possible not in dir...

Page 46: ...lter cartridge nipple Oil filter center plate nipple Head stud Main bearing support fixing stud bolt flywheel side Crankcase stud bolt Fuel feeding pump stud bolt Blower housing stud Tank bracket gasket TORQUE SPECIFICATIONS AND USE OF SEALANT Table of tightening torques for the main components POSITION Diam and pitch mm Torque Nm Connecting rod Injection pump union Rocker arm cover Central suppor...

Page 47: ... 12x1 5 M 14x1 5 M 16x1 5 M 18x1 5 M 18x2 M 20x1 5 M 20x2 M 22x1 5 M 24x2 M 27x2 M 30x2 R 400N mm2 R 500N mm2 R 600N mm2 R 800N mm2 R 1000N mm2 R 1200N mm2 Nm 10 21 20 36 38 56 84 122 117 173 164 229 293 431 600 Nm 14 28 26 48 45 75 113 163 157 230 218 305 390 575 800 Nm 13 26 24 45 42 70 105 153 147 213 204 287 367 533 750 Nm 17 35 33 59 56 94 141 203 196 288 273 381 488 719 1000 Nm 20 42 39 71 6...

Page 48: ...ool for static injection timing check 1 Spacers h 40mm 2 Dial gauge indicator 3 Dial gauge extension High preassure pump for static injection timing check Static timing tool Tool for valve stem O ring assembly Tool for valve cotters assembly disassembly Special tools and equipment for maintenance Valve ring assembly tool Flywheel puller Valve guide seal installation tool SPECIAL TOOLS ...

Page 49: ... 49 Workshop Manual 12 LD _ cod 1 5302 460 3 ed_ rev 02 Notes ...

Page 50: ... by Lombardini Lombardini behält sich alle Rechte vor diese Angaben jederzeit zu verändern La Lombardini se reserva el derecho de modificar sin previo aviso los datos de esta publicación 42100 Reggio Emilia Italia ITALY Via Cav del Lavoro Adelmo Lombardini 2 Cas Post 1074 Tel 39 0522 3891 Telex 530003 Motlom I Telegr Lombarmotor R E A 227083 Reg Impr RE 10875 Cod fiscale e Partita IVA 01829970357 ...

Reviews: