background image

60

User Manual

Deleting selected  User Point

'MENU' + "ADVANCED SETTINGS" + 'ENTER' + "USER POINTS" + 'ENTER' +

"CLR-ONE' + 'ENTER'

Deletes the selected User Point. A warning message appears, select "YES" and press

'ENTER' ('CLEAR' otherwise).

Deleting all User Points with the same symbol

'MENU' + "ADVANCED SETTINGS" + 'ENTER' + "USER POINTS" + 'ENTER' +

"CLR-SYM' + 'ENTER'

Deletes all User Points which have the same identifier of that shown in the selected

row. A warning message appears, select "YES" and press 'ENTER' ('CLEAR' other-

wise).

Deleting all User Points with the same type

'MENU' + "ADVANCED SETTINGS" + 'ENTER' + "USER POINTS" + 'ENTER' +

"CLR-TYP' + 'ENTER'

Deletes all User Points which have the same type of that shown in the selected row.

A warning message appears, select "YES" and press 'ENTER' ('CLEAR' otherwise).

Deleting all stored User Points

'MENU' + "ADVANCED SETTINGS" + 'ENTER' + "USER POINTS" + 'ENTER' +

"CLR-ALL' + 'ENTER'

A warning message appears, select "YES" and press 'ENTER' ('CLEAR' otherwise)

to delete all stored User Points.

Send/Receive User Points

Sends all User Points to an external device using the serial port:

'MENU' + "ADVANCED SETTINGS" + 'ENTER' + "USER POINTS" + 'ENTER' +

"SEND"

Reads all User Points from NMEA Input port:

'MENU' + "ADVANCED SETTINGS" + 'ENTER' + "USER POINTS" + 'ENTER' +

"RECEIVE"

4.1.2 ROUTES

The following functions are used for the route management. The chartplotter

handles routes from 1-25, which are permanently stored in the memory as they are

created. Only one route can be selected for work at any one time.

4.1.2.1

Selecting Route

'MENU' + "ADVANCED SETTINGS" + 'ENTER' + "ROUTE" + 'ENTER' +

"CURRENT ROUTE" + 'ENTER'

Summary of Contents for Compact 7 Plus

Page 1: ...Display Color Chartplotter with Internal GPS Receiver and Antenna CODE S3igLZ7c 1001c844 220305 EXCALIBUR 7 Speed Sun Color Sunlight Readable Display Color Chartplotterwith External GPS Receiver and S...

Page 2: ...ill not be liable for errors contained herein or for incidental or consequential damages in connection with the performance or use of this material Exposure of display to UV rays may shorten life of t...

Page 3: ...ection 22 2 5 3 External NMEA Connection 22 2 5 4 C COM GSM Plus Connection 23 2 5 5 Beacon Receiver Connection 24 2 5 5 1 For Chartplotter with External GPS Receiver 24 2 5 5 2 For Chartplotter with...

Page 4: ...SINGLE DESTINATION 36 3 4 1 Distance and Bearing to Target 36 3 4 2 Time To Go 36 3 4 3 Deleting Target 37 3 5 C MAP NT MAX INFORMATION 37 3 5 1 Map Menu 38 3 5 1 1 Perspective View 38 3 5 1 2 Palett...

Page 5: ...he same type 60 Deleting all stored User Points 60 Send Receive User Points 60 4 1 2 Routes 60 4 1 2 1 Selecting Route 60 4 1 2 2 Deleting route 61 4 1 2 3 Reversing route 61 4 1 2 4 Finding informati...

Page 6: ...r C CARD 72 4 5 5 Changing UserC CARD 72 4 6 C LINK 73 4 6 1 How C Link system works 73 4 7 C LINK NAVIGATION DATA TRANSFER 73 4 7 1 Operations 74 4 7 1 1 Introductive elements 74 4 7 1 2 C Link seria...

Page 7: ...5 1 Arrival Alarm 84 5 5 2 XTE Alarm 85 5 5 3 Anchor Alarm 85 5 5 4 Depth Alarm 85 5 5 5 Grounding Alarm 85 5 5 6 Grounding Alarm Range 86 5 5 7 Grounding Alarm Report 86 5 6 SIMULATION MENU 86 5 6 1...

Page 8: ...B 1 TECHNICAL SPECIFICATIONS 107 B 1 1 Pysical Characteristics 107 B 1 2 Electrical Characteristics 107 B 1 3 GPS Performance 107 B 1 4 Environmental Characteristics 108 B 2 WIRING 108 B 3 SOFTWARE I...

Page 9: ...come familiar with your new instrument Chapter For the Experienced User introduces the advanced features of the chartplotter 1 1 CONVENTIONS Throughout this user manual the keys are shown in capitals...

Page 10: ...check it for the following contents if any parts are missing contact the dealer the chartplotter was purchased from Quick disconnect bracket and its protective cover Chartplotter s protective cover Us...

Page 11: ...Depth Areas Depth Areas Min Max Rocks Min Max Land Lan Elevation values Roads POIs Chart Lat Lon Grid Chart Boundaries Value Added data Map Menu Zoom Type Fonts Symbols Perspective View Live Nav Aids...

Page 12: ...FM Mt Altitude Unit Ft FL Mt Temperature Unit C F Alarms Handling Arrival Alarm XTE Alarm Anchor Alarm Depth Alarm Grounding Alarm Grounding Alarm Range Grounding Alarm Report MOB Function Simulation...

Page 13: ...C from 32 F to 131 F Memory Non volatile with battery back up Keyboard Backlighted silicon rubber 1 3 BASICS The chartplotter is controlled by using ten keys There is also a cursor key to move a curso...

Page 14: ...16 User Manual...

Page 15: ...ess and immediately release the right side of POWER to adjust the back light press and immediately release the left side of POWER to adjust the contrast of the display The key Press MENU to select the...

Page 16: ...s the cursor about on the display screen quickly and accurately Italsoscrollsthedesiredoptioninthemenupage s IfinNavigate Home mode it allows to exit from Navigate mode The and keys Press ZOOM IN show...

Page 17: ...POWER do not press and hold the key or the power off message will be displayed the backlight increases Repeat this operation the backlight decreases Pressandimmediatelyreleasetheleftsideof POWER theco...

Page 18: ...R Connect the GPS to the Port 3 see the picture in Fig 2 5 1 Control the input setting following the procedure MENU BASIC SETTINGS ENTER INPUT OUTPUT ENTER PORT 3 INPUT ENTER NMEA 4800 N81 N ENTER The...

Page 19: ...21 User Manual Fig 2 5 1 GPS Connection on Port 3...

Page 20: ...OUTPUT ENTER Then choose your preferred setting among the NMEA available settings NMEA 0183 4800 N81 N NMEA 0180 NMEA 0180 CDX the default setting is NMEA 0183 4800 N81 N and press ENTER to confirm T...

Page 21: ...A device can be connected also to the Port 2 and 3 in this case select the format on the used port Doing connection remember that only the Port 1 is optoisolated in input 2 5 4 C COM GSM PLUS CONNECTI...

Page 22: ...the used port 2 5 5 BEACON RECEIVER CONNECTION 2 5 5 1 For Chartplotter with External GPS Receiver To connect a Differential Beacon Receiver see Fig 2 5 1 2 5 5 2 For Chartplotter with Internal GPS R...

Page 23: ...since the chart plotter may lock up 2 6 1 INSERTING C CARD Hold the C CARD by the short inclined side so that you can see the C MAP label Fig 2 6 1 Inserting C CARD I Gently push the C CARD into one o...

Page 24: ...y information such as how time is displayed from the main Menu Refer to Chapter 5 for more information MENU 2 8 DATA ENTRY Information is keyed into the chartplotter when editing a Waypoint enter ing...

Page 25: ...isplay see Par 2 2 and 2 3 Once this is done you can use your chartplotter for navigation 3 1 SCREEN DISPLAY CONFIGURATION The screen display can be shown in different modes wrap around among cartogra...

Page 26: ...e screen with partial information on SOG Fig 3 1 1a Charts and text windows If Target is set in the previous Fig 3 1 1a instead of the only SOG information window a text line with DST BRG XTE SOG and...

Page 27: ...des Depth graph dis played only on 1 3 of the screen Fig 3 1 2 The Depth Graph 1 3 of the screen or Depth graph displayed on 1 2 of the screen Fig 3 1 2a The Depth Graph 1 2 of the screen 3 1 3 GPS DA...

Page 28: ...olution As example the satellite with PRN 10 is used for solution with S N 44 Azimuth 127degree and Elevation 70degree When a valid fix is received the Lat Lon Date Time Altitude VDOP HDOP SOGand COGa...

Page 29: ...ENTER SCREEN AMPLIFIER ENTER 3 2 3 ADVANCED FUNCTIONS The chartplotter can operate in two different modes Advanced Mode and Basic Mode In Advanced Mode it is possible to have more available functions...

Page 30: ...perature C F The default setting is C MENU BASIC SETTINGS ENTER TEMPERATURE ENTER 3 2 7 NAV AIDS PRESENTATION Allows to set the Nav Aids presentation as US or INTERNATIONAL The defaultsetting is INTER...

Page 31: ...shows a message to advise the user that the related input will be disabled 3 2 8 3 Port 1 Port 2 Port 3 NMEA Output Messages Selection The chart plotter allows customizing the NMEA 0183 sentence tran...

Page 32: ...nit Primary Station or the Slave unit Secundary Station MENU BASIC SETTINGS ENTER INPUT OUTPUT ENTER C LINK ENTER Secundary Station Primary Station ENTER 3 2 8 7 Cable Wiring Page Shows a window conta...

Page 33: ...utput Port for the Voice function The default setting is Port 1 MENU BASIC SETTINGS ENTER C VOICE ENTER OUTPUT PORT ENTER 3 3 A B C D FUNCTION The A B C D function allows you to create the A B C D poi...

Page 34: ...IGATING TO A SINGLE DESTINATION 3 4 1 DISTANCE AND BEARING TO TARGET Once you have positioned the cursor on your desired location a generic point on the map press GO TO Fig 3 4 1 Navigation to a singl...

Page 35: ...INFORMATION MAX is a major evolution of the NT NT product technology Key points are New Data Features Tides and Currents intuitive arrows show direction and strength World Background Charts with terre...

Page 36: ...t data may be projected in perspective mode during navigation This function allows setting the panoramic View of the chart As the upper side of the map is more compressed than the lower side a wider m...

Page 37: ...eading up wards Course the map is displayed with the currently selected course leg upwards The default setting is North It is possible to select the resolution angle for the Map Orientation 3 5 1 4 Zo...

Page 38: ...at most two zoom levels above the current zoom level For this reason the map is drawn three times firstly it draws the two levels before the current level and then the current level The area covered b...

Page 39: ...r Depths soundings Wrecks obstructions Tracks routes Attention ar eas Nav Aids Clear View Displays when Clear View function is On Dangers Redwhen GuardianTechnology detectsoneofthefollowingobjects Lan...

Page 40: ...f On Nav Aids On On On On Off On Light Sectors On Off Off Off Off On Attention Areas On On Off Off Off On Tides Currents On Off Off Off On On Seabed Type On Off Off Off Off On Ports Services On On Off...

Page 41: ...tors On Off The default setting is On MENU MAP SETTINGS ENTER Other Map Configurations ENTER Light Sectors ENTER Attention Areas On Off The default setting is On The Attention Areas will al ways be co...

Page 42: ...er Map Configurations ENTER Depth Range Max ENTER Rocks Sets a min reference rocks value MENU MAP SETTINGS ENTER Other Map Configurations ENTER Rocks ENTER Rocks Sets a max reference rocks value MENU...

Page 43: ...points lines and areas The Automatic Info On Points shows information when the cursor is placed on points as Port Services Tides lights wrecks rocks buoys beacons obstruc tions land markers etc The Au...

Page 44: ...hange Picture Size When the picture is shown it is possible to fit it to screen by pressing ENTER 3 5 3 INFO TREE AND EXPANDED INFO PAGE This page combines the Info Tree and the Expanded Info pages th...

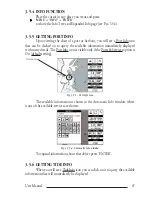
Page 45: ...ormation immediately displayed with many details The Port Info icon is visible only if the Ports Services option is On default setting Fig 3 5 5 Port Info icon The available information is shown in th...

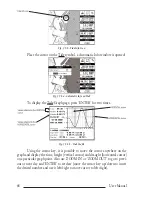
Page 46: ...imes Fig 3 5 6b Tide Graph Using the cursor key it is possible to move the cursor anywhere on the graph and display the time height vertical cursor and draught horizontal cursor on a particular graph...

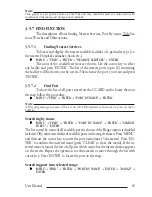
Page 47: ...ort To show the list of all ports stored on the C CARD and to locate them on the map follow the procedure MENU FIND ENTER PORT BY NAME ENTER Note A Warning message is shown if there is no C CARD inser...

Page 48: ...FIND ENTER WRECKS ENTER Use the cursor key to select the port and ZOOM IN ZOOM OUT to select next previous page Press ENTER to locate the selected Wreck on the map 3 5 7 5 Finding Obstructions Search...

Page 49: ...MOB select CANCEL and press ENTER again The MOB sym bol remains on the screen shaded until the next screen redraws Note If the Advanced Settings item in the menu Basic Settings is activated On see Par...

Page 50: ...52 User Manual...

Page 51: ...VANCED FUNCTIONS ENTER ON ENTER When Advanced Functions is Off the chartplotter operates in Basic Mode 4 1 MORE ABOUT CREATING AND USING ROUTES At anytime you may add or delete Waypoints see a route s...

Page 52: ...pressing ENTER is continued to create the route until you have reached the last Waypoint your final destination Segments connecting the Waypoints are shown and the starting point is identified by a c...

Page 53: ...rwise The route remains on the screen shaded until the screen is redrawn To delete route see also Par 4 1 2 2 and 4 1 2 5 4 1 1 5 Distance and Bearing to Target Once you have positioned the cursor on...

Page 54: ...om the screen but the Waypoint remains Note If you select NEXT PREV and press ENTER the Target icon is moved on the next previous Waypoint in the route Otherwise in both Modes when the cursor is place...

Page 55: ...aypoints of a route the following function is available Place cursor on route leg Fig 4 1 1 7 Placing Waypoint between two existing ones I Press ENTER Select INSERT and press ENTER The line between th...

Page 56: ...t between two existing ones III 4 1 1 8 Editing Waypoint Select Advanced Mode Place cursor on Waypoint Press ENTER Select EDIT and press ENTER to modify a Waypoint A window will be shown with Name Sym...

Page 57: ...ld is selected press ENTER a window with 8 different colors appears use the cursor key to select the desired color and press ENTER Fig 4 1 1 8b Edit Waypoint III 4 1 1 9 Finding information about Wayp...

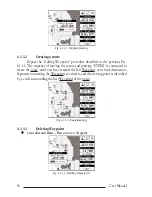
Page 58: ...in the selected row A warning message appears select YES and press ENTER CLEAR otherwise Deleting all stored User Points MENU ADVANCED SETTINGS ENTER USER POINTS ENTER CLR ALL ENTER A warning message...

Page 59: ...the screen is redrawn To delete route see also Par 4 1 1 4 and 4 1 2 5 4 1 2 3 Reversing route MENU ADVANCED SETTINGS ENTER ROUTE ENTER RE VERSE ROUTE ENTER Reversing a route plan is most typically u...

Page 60: ...ETTINGS ENTER ROUTE ENTER ROUTE REPORT ENTER REVERSE ENTER Reversing a route plan is most typically used to return to the point where the route originally started See also Par 4 1 2 3 Deleting route M...

Page 61: ...hown 4 2 1 2 Deleting Mark Select Advanced Mode Place cursor on Mark Press ENTER Select DELETE and press ENTER the Mark remains on the screen shaded until the next screen is redrawn Note If you try to...

Page 62: ...il the screen is redrawn Note If you try to move a Mark that belongs to many routes the chart plotter emits three beeps and on the screen a Warning message appears If you want to move the Mark press E...

Page 63: ...ADVANCED SETTINGS ENTER USER POINTS ENTER A full window is opened showing information about all stored User Points Marks Events and Waypoints Move up down the cursor key to select the User Point you...

Page 64: ...ears If you want to delete the Event press ENTER 4 2 2 3 Goto Place cursor on Event Press GO TO a circle encloses the Event symbol A straight line is shown on the screen connecting the Target with the...

Page 65: ...o Place cursor on Event the information window related to the Event appears press CLEAR to close the window and then press ENTER select the Waypoint option and press ENTER The Event is connected to th...

Page 66: ...cursor key move the cursor on the screen a dotted line connecting the point to move with the new position appears By pressing ENTER the point is placing in the new position 4 3 5 INSERTING THE A B C...

Page 67: ...PATTERN MENU ADVANCED SETTINGS ENTER TRACK ENTER LINE PATTERN ENTER Selects the desired line pattern for the selected track Note FOR COLOR CHARTPLOTTER LINE PATTERN item is substitued by the COLOR ite...

Page 68: ...of track storing is Distance you can store a fix when the distance from its last stored position is greater than a defined distance Choose in the range 0 01 0 05 0 1 0 5 1 0 2 0 5 0 10 0 Nm the distan...

Page 69: ...EVENT ROUTE or TRACK Note When naming a file you may have trouble finding a name that uniquely identifies the file s contents Dates forexample areoftenusedinfilenames however theytakeupseveralcharacte...

Page 70: ...ise This operation remove old or unnecessary files to clean up your User C CARD Remember that this option permanently erases the file 4 5 4 FORMATTING USER C CARD MENU ADVANCED SETTINGS ENTER USER C C...

Page 71: ...C CARD slots search ing for MIRROR C CARDs When one or more MIRROR C CARD is found in one or both CPs a specialconnectionisestablishedbetweentheCPstoabilitatetheMIRRORC CARDs If a regular C CARD which...

Page 72: ...pro prietary sentences PCMPN 1 and PCMPN 2 WhenthenavigationisactivatedontheMaster itstartsoutputtingtheC Link navigation data If the Slave is connected all c link navigation data received are stored...

Page 73: ...the Destination is placed the master chart plotter will start transmitting all C Link navigation data In Master mode the C Link navigation data received from the NMEA port is ig nored So if the two ch...

Page 74: ...not activated Notes WhilenavigatingtotheexternaldestinationtheOperatingModeisswitchedtoMaster mode the navigation to the external destination will be terminated An appropriate warning message will be...

Page 75: ...ternal Route from PCMPN 0 Cruising Speed Planned Cruising Speed from PCMPN 1 Fuel Consumption Rate Planned Fuel Consumption Rate from PCMPN 1 Total Route length Route Length from First to Last Wpt fro...

Page 76: ...Waypoint Calculated using Cruising Speed TTG to Last Wpt Estimated Time to travel the Distance to Last Wpt Calculated using Cruising Speed ETA to Destination Estimate Time of Arrival to the Destinatio...

Page 77: ...CARD menu see Par 4 5 MENU ADVANCED SETTINGS ENTER Once you are in the Advanced Setting menu use your cursor key to highlight the item and press ENTER to activate or to proceed to the next selection...

Page 78: ...onnected to the chartplotter can be stored into the chartplotter if the GPS is NMEA 0183 protocol compatible and support the BWC sentence this symbol remains on the screen for 30 seconds You may save...

Page 79: ...CORRECTION ENTER 5 2 3 CORRECTION OFFSET Manual correction of fix position MENU ADVANCED SETTINGS ENTER FIX ENTER COR RECTION OFFSET ENTER A window with the cursor coordinates appears insert the prefe...

Page 80: ...SETTINGS ENTER NAVIGATE ENTER 5 3 1 COORDINATE SYSTEM Sets your preferred Coordinate System among ddd mm ss ddd mm mm ddd mm mmm UTM OSGB TD The default setting is ddd mm mmm MENU ADVANCED SETTINGS EN...

Page 81: ...NTER 5 3 5 ROLLING ROAD SCALE Sets you preferred Rolling Road Scale among 0 2 0 5 1 0 2 0 4 0 10 0 The default setting is 0 2 MENU ADVANCED SETTINGS ENTER NAVIGATE ENTER ROLL ROAD SCALE ENTER 5 3 6 RE...

Page 82: ...other words since the compass of the boat must be compensated due to the iron masses we use the same values given by the chartplotter This means that for example if the BRG to the next Waypoint readou...

Page 83: ...ovided with a function that by querying the map s data verifies potential danger to navigation due to shallow water land rocks obstructions and shoreline constructions The maps are scanned periodicall...

Page 84: ...ilt in Simulator function allows you to become proficient in the use of the chartplotter No current position fix is required because the chartplotter simu lates position data internally MENU ADVANCED...

Page 85: ...ADVANCED SETTINGS ENTER SIMULATION ENTER CURSOR CONTROL ENTER 5 7 C STAFF The C Staff functions are based on STAFF Concept Satellite Tracking Aided Fleet Fishing The STAFF Concept is designed for prof...

Page 86: ...INDER MENU The chart plotter combined with the sonar performance of the Fish Finder is one of the most advanced marine navigation system available MENU FISH FINDER SETUP ENTER For more information see...

Page 87: ...89 User Manual 6 For the Technician 6 1 DIMENSIONS Fig 6 1 EXCALIBUR models Dimensions...

Page 88: ...90 User Manual Fig 6 1a COMPACT models Dimensions 6 2 INSTALLATION AND REMOVING Fig 6 2 EXCALIBUR models Installation...

Page 89: ...ress the bracket button 1 as indicated in the following Fig 6 2b left side of the picture for EXCALIBUR models and right side of the picture for COMPACT models and then eject to the top the chart plot...

Page 90: ...92 User Manual 6 3 EXTERNAL WIRING Fig 6 3 External Wiring for chartplotter with external GPS receiver Fig 6 3a External Wiring for chartplotter with internal GPS receiver...

Page 91: ...93 User Manual 6 4 TYPICAL CONNECTIONS Fig 6 4 Beacon Receive Connection for chartplotter with internal GPS receiver...

Page 92: ...94 User Manual Fig 6 4a GPS Connection on Port 3 for chartplotter with external GPS receiver...

Page 93: ...95 User Manual Fig 6 4b Autopilot Connection on Port 2 Fig 6 4c External NMEA Connection on Port 1 Fig 6 4d C COM Connection on Port 1...

Page 94: ...shield for the antenna If after 15 minutes the chartplotter does not get the fix turn it Off and On again The chartplotter screen becames very dark after a long exposure to direct sun light Control th...

Page 95: ...tc by reading them from a special data C CARDs contact your local dealer All units must have the WorldWide Background upload function that is activated from the system Worldwide Background Update The...

Page 96: ...sible to correct the problem by clearing RAM This operation will erase all Marks Events Routes stored track plots and desti nations It will also return all selections Input Data Format Autopilot selec...

Page 97: ...1 Port 2 or Port 3 the Baud Rate between 4800 or 9600 the Data Bits Word Length between 7 or 8 the Parity between even odd or none the Stop Bits between 1 or 2 Input Data Display Allows the chartplot...

Page 98: ...100 User Manual...
Page 99: ...PRACTICE AREA RESTRICTED AREA SEAPLANE LAND ING AREA When the area is small it is identified only by the boundary Azimuth The angular measurement from the horizon to a satellite or another object Basi...

Page 100: ...rse To Steer The optimum direction the boat should be steered in order to efficiently make headway back to the courseline while also proceeding toward the destination Waypoint Cultural Features Any ma...

Page 101: ...ation The angle between the magnetic and geographic meridians at any place expressed in degrees West or East to indicate the direction of magnetic North from true North It changes from point to point...

Page 102: ...Maritime to transmit Differential GPS corrections SOG Speed Over Ground A calculation of the rate of movement of the ship over the ground Speed The current velocity at which you are travelling relati...

Page 103: ...tion and strength of the Tide Fig A 1a Tides Currents Ifnodata timeisavailablefromtheGPSorthechartplotterisnotinSimulationmode theicononthe map is generic one The colour of the arrow denotes the stren...

Page 104: ...ed text Value Added Data is shown on the details of the VAD object WAAS Wide Area Augumentation System TheFederalAviationAdministration FAA incooperationwithotherDOTorganizationsandDOD is augmenting t...

Page 105: ...in an easy to use package Note The characteristics of your Receiver could not be the same as the following explained Contact the dealer the chartplotter was purchased from for more information B 1 TE...

Page 106: ...TTL voltage levels RS 232 polarity B 1 4 ENVIRONMENTAL CHARACTERISTICS Operating Temperature 0 C 60 C Storage Temperature 20 C 85 C Relative Humidity 95 non condensing Water Resistance 100 waterproof...

Page 107: ...n the antenna 1 inch 14 TPI is an industry standard thread used on a wide range of mounting brack ets including the swivel joints commonly used for angled surfaces However due to the manufacturing pro...

Page 108: ...emplate and let the cable go through the central hole 4 Apply a small coat of RTV to the underside of the antenna 5 Place the antenna and then screw it with the three M3 screws Fig B 5 4 1b Installing...

Page 109: ...aring 101 Bearings 84 Beeper 80 BRG 101 Buoy 101 Buoys ID 42 C C CARD 24 98 C CARD Connector 99 C CARD Test 98 C COM 23 C COM Connection 23 C COM GSM Plus 23 C Link 34 73 C Staff 87 C Voice 34 Cable W...

Page 110: ...Extern Waypoint 80 External Connections 20 External NMEA Connection 22 External Wiring 92 F Features 37 File 71 102 Filter 81 Filter Dump 81 Find Function 49 Find Port 49 Finding Port Services 97 Fin...

Page 111: ...cal Characteristics 14 Pictures 103 POIs 44 Port 1 Port 2 Port 3 Input 32 Port 1 Port 2 Port 3 NMEA Output 33 Port 1 Port 2 Port 3 Output 33 Port Info 47 104 Ports Services 43 104 Position Filter 81 p...

Page 112: ...e Line 105 Time Reference 79 Time To Go 36 56 105 title page 19 track 68 Track memorizing type 70 Tracks Routes 44 105 TRN 105 TTG 56 105 Turning 105 Turning Off 19 Typical Connection 93 U Underwater...

Reviews: