background image

13

High Resolution Color Day/Night Professional Camera

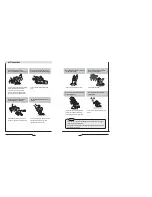
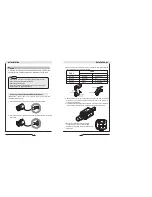
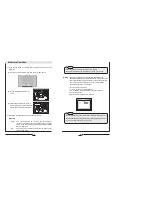
3. Remove the cover of the auto iris lens connection plug and solder the

lens cable to the connector pin in the plug.

4. Replace the auto iris lens connection plug cover and take off the lens

protection cap, and then attach the auto iris lens to the camera by

screwing it in clockwise.

5. Insert the connection plug that is connected to the auto iris lens cable into

the auto lens connector, which is located on the back of the camera.

6. Set the lens selection switch, located on

the back of the camera, to DC or VIDEO

depending on the type of auto iris lens which is

being used.

Pin No.

LENS

DC

VIDEO

No.1 Pin

Damping-

Red(power)

No.2 Pin

NC

No.3 Pin

Drive+

White(video signal)

No.4 Pin

Dreve-

Black(GND)

AC 24V IN
DC 12V IN

IRIS  JACK

VIDEO

VIDEO OUT

DC

POWER

SET

Installation 

12

High Resolution Color Day/Night Professional Camera

Installation

A Varifocal auto iris lens is included with this camera. Lenses such

as auto iris lens, CS-Mount lens and C-Mount lens can be used.

IMPORTANT: Ignore steps 1 to 5 if you are using the lens that was

included with this camera.
1. Peel off about 8mm of the outer skin of the auto iris lens cable.

2. Peel off about 2mm of the outer skin of the insulated conductor inside the

lens cable.

Lens

Note

• Use of the DC auto iris lens is recommended to achieve the best

results for operating this product effectively.

• Please keep the lens clean.

• Any foreign objects and fingermarks on the lens can cause inferior

image quality in low light level conditions.

When using an auto iris lens (included with this camera)

Summary of Contents for CVC8010

Page 1: ...ence at his own expense WARNING Changes or modifications not expressly approved by the manufacturer could void the user s authority to operate the equipment CAUTION To prevent electric shock and risk...

Page 2: ...that auto matically selects the mode that is appropriate for daytime or night time conditions The COLOR mode operates in daytime conditions to provide optimum colors and BW mode operates in night time...

Page 3: ...Connecting to a monitor Connecting to power 12 15 15 Components 8 5 HighResolutionColorDay NightProfessionalCamera Camera Operation Troubleshooting Menu Settings LENS selection SHUTTER condition and...

Page 4: ...dity is high Do not install the camera under unstable lighting conditions Do not touch the front lens of the camera 7 HighResolutionColorDay NightProfessionalCamera It can cause malfunctions to occur...

Page 5: ...rew Loosen the clamp screw with a screwdriver before adjusting the Back Focal length 8 HighResolutionColorDay NightProfessionalCamera Components 1 COLOR BOX CAMERA 2 AUTO IRIS LENS CONNECTION PLUG 3 L...

Page 6: ......

Page 7: ...C No 3 Pin Drive White video signal No 4 Pin Dreve Black GND AC 24V IN DC 12V IN IRIS JACK VIDEO VIDEO OUT DC POWER SET Installation 12 HighResolutionColorDay NightProfessionalCamera Installation A Va...

Page 8: ...protection cap and attach the C mount adaptor 2 Attach the C Mount lens to the camera by screwing it in clockwise When using a C Mount lens 15 HighResolutionColorDay NightProfessionalCamera Connect t...

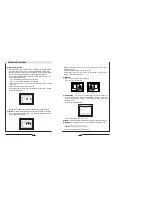
Page 9: ...ACY MIRROR SHARPNESS RESET RETURN 17 HighResolutionColorDay NightProfessionalCamera Settings can be made using the 5 buttons located on the back of the camera 1 Press the SET button Settings can now b...

Page 10: ...buttons 2 Select the type of the lens setting to use by pressing the LEFT or RIGHT button LENS selection SETUP LENS DC SHUTTER WHITE BAL ATW BACKLIGHT OFF Note If appears at the mode selected it means...

Page 11: ...fessionalCamera The screen colours can be adjusted using the WHITE BALANCE function 1 Position the cursor to point to WHITE BAL on the SETUP menu by using the UP and DOWN buttons 2 Select the mode you...

Page 12: ...unction does not operate BLC Back Light Compensation SETUP LENS MANUAL SHUTTER ESC WHITE BAL ATW BACKLIGHT OFF AGC LOW DNR LOW 23 HighResolutionColorDay NightProfessionalCamera 1 Position the cursor t...

Page 13: ...SHUTTER ESC WHITE BAL ATW BACKLIGHT OFF AGC LOW DNR LOW SENS UP OFF SPECIAL When AGC is turned off DNR does not operate Note 25 HighResolutionColorDay NightProfessionalCamera 1 Position the arrow to...

Page 14: ...TION DET OFF PRIVACY OFF MIRROR OFF SHARPNESS ON RESET RETURN 27 HighResolutionColorDay NightProfessionalCamera If the wrong name has been input Press the SET button after moving the cursor to CLR and...

Page 15: ...d the modes do not change automatically 29 HighResolutionColorDay NightProfessionalCamera SYNC Two sychronisation modes are available INTERNAL and EXTERNAL LINE LOCK In LINE LOCK mode it synchronises...

Page 16: ...sstheSETbuttontosavethechangesandcompletethesetting PRIVACY Thismodeconcealstheareasyoudonotwishtoappearonthescreen OFF CancelsthePRIVACYmode ON OperatesthePRIVACYmode Please press the SET button 31 H...

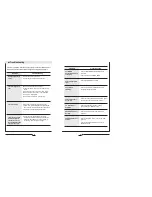
Page 17: ...ctly and also check the connections If necessary adjust the brightness level Check if an appropriate power source to the camera complies with the manufacturer s standard requirement or if the voltage...

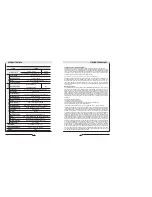
Page 18: ...connection with the Product or in any modification or repair is made to the Product be other than a service depot authorized by LOREX This warranty does not apply to defects or damages arising by use...

Page 19: ...department to obtain a return authorization number Return the unit to Lorex Service Center 2375 Hadely Road Plainfield IN 46168 ii If the unit was purchased in Canada proceed as follows Contact our c...

Page 20: ...Model CVC8010 High Resolution Color Day Night Professional Camera Instruction Guide Lorex Technologies Inc Model CVC8010 High Resolution Color Day Night Professional Camera Printed in KOREA...

Reviews: