9.1
Troubleshooting
There is no picture at night.
•
Camera is capable of seeing in extremely low light conditions, but it cannot see in total dark-
ness. It is recommended to install the camera where there is some
ambient light (e.g. street lighting, starlight, moonlight, etc.) or leave a light on in the area
where the camera is installed.
No image at startup.
•
The camera may take up to 1 minute to power up after being connected to the NVR. Wait 2
minutes before following steps below.
•
Check to ensure your camera is properly connected (see 3
•
If you are using a PoE switch, it must be PoE+ rated (PoE class 4). Standard PoE switches
are not adequate to power the camera. PoE+ switches are available for purchase on
(model #:
ACCLPS241B (4–channel model) or ACCLPS281B (8–channel model)
).
•
Ensure the camera is connected to a router on the same network as the NVR.
•
If the camera is connected to the LAN, you must search your network for cameras using the
NVR. See your NVR’s instruction manual for details.
•
Make sure that the cable run is within the limitations specified in 3
,
page 4. All Ethernet cables must be rated CAT5e or higher.
•
If using the included power adapter, connect it to a different outlet.
•
Ethernet cable may be damaged or not connected properly. Check your cable run or try a dif-
ferent cable.
•
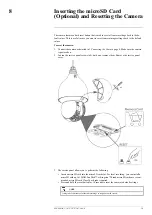
Reset the camera to factory default settings. See 8
Inserting the microSD Card (Optional)
, page 30 for details.
No image or camera image is unclear.
•
Dome cover is dirty. Clean the dome cover with a soft, slightly damp cloth. Do not use any-
thing other than water to clean the dome cover, as chemicals such as acetone can permanently
damage the plastic.
Image is distorted.
•
Digital zoom is activated. Activating digital zoom may reduce the resolution of the camera
image. Zoom out completely to return to the camera’s optimal resolution. See 5
, page 17to be directed to instructions on using the zoom
controls.
•
Image may become unclear when camera is tilted too close to the camera base (e.g. pointed
parallel to the ceiling). Tilt the camera using NVR PTZ controls.
Image is too bright.
•
Ensure your camera isn’t pointed directly at a source of light (e.g. sun or spot light).
•
Check your NVR’s brightness and contrast settings.
•
Move your camera to a different location.
•
Enable HDR (High Dynamic Range) in your NVR. HDR is optimized for outdoor environ-
ments to help with over- or under-exposed images of scenes with both bright and dark areas
in the same picture.
Image is too dark.
•
Check your NVR’s brightness and contrast settings.
•
Move your camera to a different location.
•
Enable HDR (High Dynamic Range) in your NVR. HDR is optimized for outdoor environ-
ments to help with over- or under-exposed images of scenes with both bright and dark areas
in the same picture.
NVR motion detection is constantly triggering.
•
Turn off motion detection on the channel the PTZ camera is connected to. NVRs use video
motion detection, which means they detect motion by looking for changes between frames
(images) in the video. If the camera is moving, the NVR will detect this as motion.
#LX400116; r. 1.0/57307/57307; en-US
31
Summary of Contents for E881AP Series
Page 1: ...Instruction Manual E881AP Series ...
Page 2: ......
Page 3: ...Instruction Manual E881AP Series LX400116 r 1 0 57307 57307 en US iii ...
Page 6: ......
Page 9: ...Getting Started 2 Drill Screwdriver LX400116 r 1 0 57307 57307 en US 3 ...
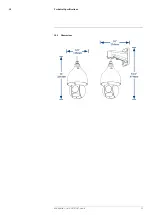
Page 39: ...Technical Specifications 10 10 1 Dimensions LX400116 r 1 0 57307 57307 en US 33 ...
Page 40: ... LX400116 r 1 0 57307 57307 en US 34 ...
Page 41: ......


