background image


Step 3: Create Data Path from Internet to Lorex Module 

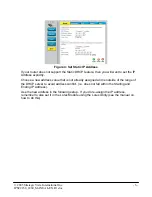
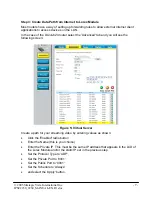
Most routers have a way of setting up forwarding rules to allow external Internet client 
applications to access devices on the LAN. 

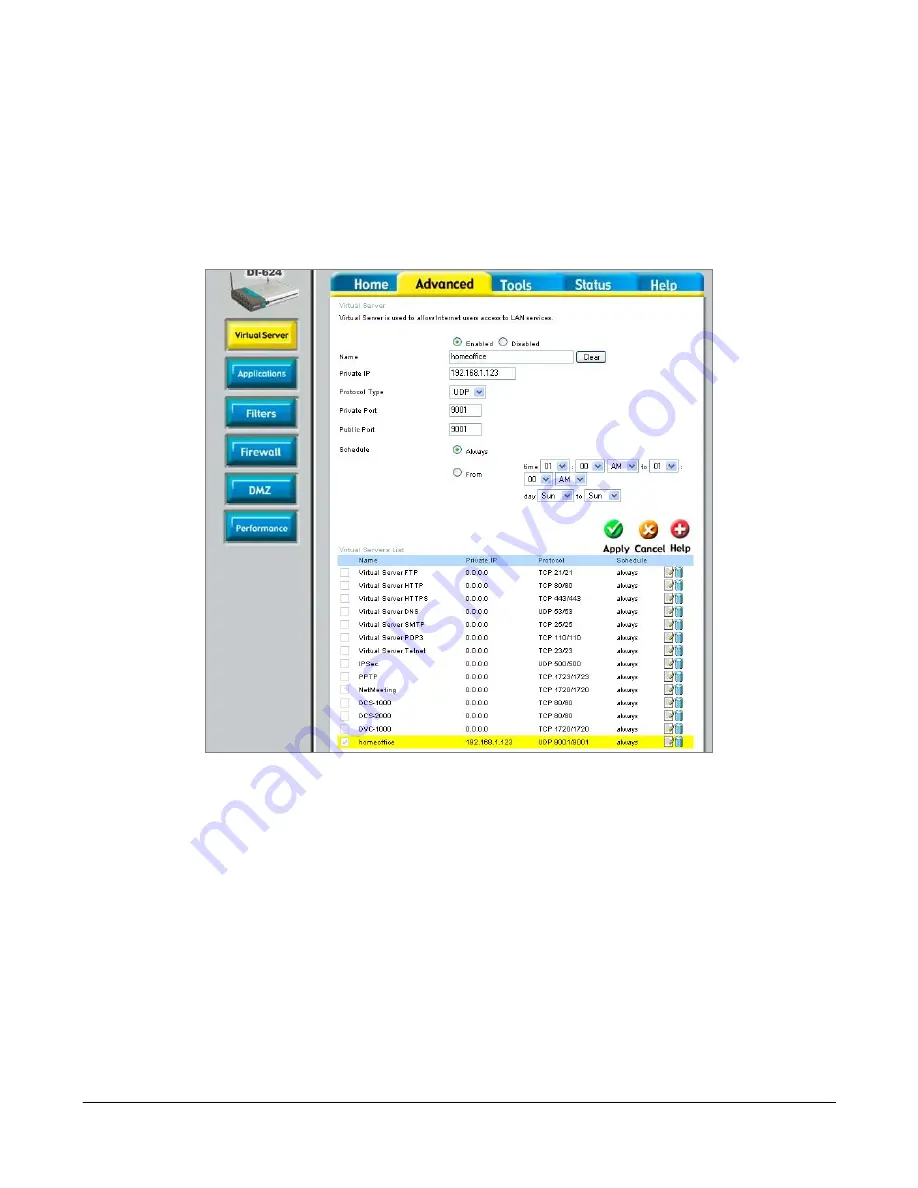
In the case of the DLink-624 router select the 'Advanced' tab and you will see the 
following screen: 


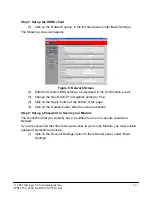
Figure 5: Virtual Server 

Create a path for your streaming video by entering values as shown: 


Click the 'Enabled' radio button 


Enter the Name (this is your choice) 


Enter the Private IP. This must be the same IP address that appears in the LCD of 
the Lorex Module and/or the static IP set in the previous step. 


Set the Protocol Type to 'UDP', 


Set the Private Port to '9001' 


Set the Public Port to '9001' 


Set the Schedule to 'Always' 


and select the 'Apply' button. 

© 2005 Strategic Vista International Inc.  


- 7 - 

IPSC2230_2260_MANUAL-EN.R1.doc 

Summary of Contents for IPSC2230

Page 1: ...LOREX MODULE REMOTE ACCESS SETUP GUIDE Instruction Manual DLINK DI 624 English Version1 0 www lorexcctv com Copyright 2005 Strategic Vista International Inc...

Page 2: ...ate the Lorex Player for the new password 14 Step 2 Set up Remote access from the Internet 15 List of Figures Figure 1 DLink 624 Wireless Broadband Router 3 Figure 2 Password Prompt 4 Figure 3 WAN Sta...

Page 3: ...Start guide or the Lorex Manual before you continue with remote access setup This document will help you do the following Configure your router to enable access from outside the LAN Register for the D...

Page 4: ...rver Use a web browser on a computer that is connected to the LAN side of the router to access your broadband router Typically this will be at an IP Address such as 192 168 1 1 or maybe 192 168 0 1 Co...

Page 5: ...ses that are distributed using DHCP If your router supports this feature you will want to set it up to ensure that the internal IP address never changes In the case of the Dlink 624 click the DHCP but...

Page 6: ...igned and is outside of the range of the DHCP server to avoid address conflict i e does not fall within the Starting and Ending IP Address Use the new address in the following setup If you do re assig...

Page 7: ...l Server Create a path for your streaming video by entering values as shown Click the Enabled radio button Enter the Name this is your choice Enter the Private IP This must be the same IP address that...

Page 8: ...e favourite targets of hackers and so doing this last step may make your Lorex Module a little less secure Click the Enabled radio button Set the Name this is your choice as long as it is unique Set t...

Page 9: ...registers the IP address of the router with the external DNS system NOTE In order to be able to locate your home network you must sign up to use a Dynamic DNS system NOTE You need only have one device...

Page 10: ...umber NOTE The MAC address is found on the back label of the IPSC2230 video server MAC Media Access Control Address the hardware address that is unique to this product After you select Create New Acco...

Page 11: ...r in this part of the setup The Lorex Module can be configured using the Lorex Utility application or using a web browser The following description is for the web browser 1 Bring up a web browser on a...

Page 12: ...pply button at the bottom of the page 5 Click on the Update button after the screen refreshes Step 2 Set up a Password to Secure your Module The connection that you currently have is suitable for use...

Page 13: ...ly You will need this to access the module from now on This is a different password than the one used to register with DDNS in Register for Dynamic Domain Name Service DDNS page 9 3 Select Apply and c...

Page 14: ...2 Right click on the Camera Server found in the Servers Cameras panel 3 Choose Edit Camera Server Figure 10 Choose Edit Camera Server 4 Select the User tab and enter the same User Name and Password as...

Page 15: ...igure 12 Add Camera Location 2 Enter a name that indicates that this is for Internet access and define the cameras exactly as before Figure 13 Camera Location and Camera Server Settings 3 In the addre...

Page 16: ...ssword will be the same as entered in Configure the Lorex Module for DDNS and Password Access page 11 6 Click Next Figure 16 Define the Camera 7 Define the camera as before by clicking the New button...

Page 17: ...click on the camera icon to start the video You will be able to view the video as before from anywhere in the world Figure 17 Camera Icon 2005 Strategic Vista International Inc 17 IPSC2230_2260_MANUAL...

Page 18: ...all on the web www lorexcctv com Product Information User Manuals Quick Start Guides Specification Sheets Software Upgrades Firmware Upgrades V I S I T Strate www lorexcctv com gic Vista International...

Reviews: