4
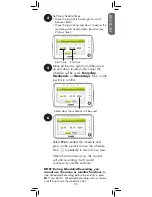
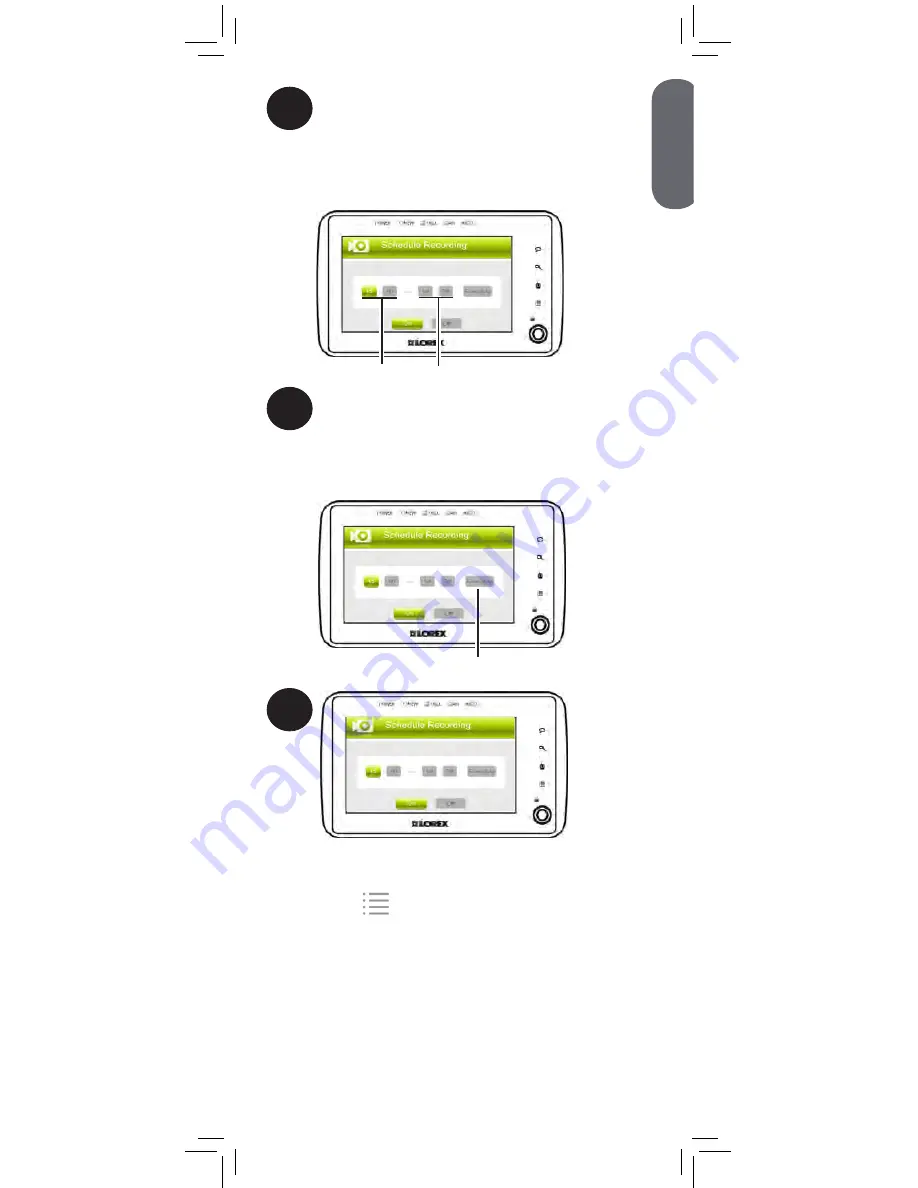
Set the schedule times:
•
Move the joystick left and right to switch
between fields.
•
Move the joystick up and down to adjust the
recording start and end time (monitor uses
24-hour time).
Start time
End time
5
Move all the way right to and then press
up and down to select which days the
schedule will be used:
Everyday
,
Weekends
, or
Weekdays
. Press on the
joystick to confirm.
Select days the schedule will be used
6
Select
On
to enable the schedule and
press on the joystick to save the schedule.
Press
repeatedly to return to live view.
When the start time occurs, the monitor
will start recording. It will record
continuously until the end time.
NOTE:
During Scheduled Recording, you
cannot use the menu or monitor functions.
To
stop Scheduled Recording before the end time, press
M
. If you do this, Scheduled Recording will not resume
until the next time the schedule starts.
ENGLISH
25
Summary of Contents for LIVE SD 4.2 Series
Page 138: ......

