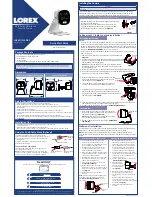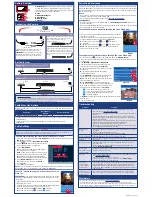
Problem
Solution
No picture / signal
• Ensure the camera is connected to a compatible NVR. For full camera
compatibility, visit
lorex.com/compatibility
.
• The camera may take up to 1 minute to power up after being connected to
the NVR.
• Ensure the camera is connected to your NVR or to your local network.
• If you are not using PoE, you must connect the camera to a 12V DC power
adapter (not included).
• If the camera is connected to the LAN, you must search your network for
cameras using the NVR. See the NVR’s instruction manual.
• Ensure your NVR is properly connected to a TV/monitor.
• There may be an issue with your extension cable run. Connect the camera
to the NVR using a different Ethernet cable.
Picture is too
bright
• Ensure your camera isn’t pointed directly at a source of light (e.g., sun or
spot light).
• Move your camera to a different location.
• Check the brightness and contrast settings on the NVR.
Picture is too dark
• Check the brightness and contrast settings on the NVR.
Night vision is not
working
• The night vision activates when light levels drop. The area may have too
much light.
Picture is not clear
• Check the camera lens for dirt, dust, spiderwebs. Clean the lens with a
soft, clean cloth.
• Make sure that the cable run is within the limitations specified in the
section ‘
Cable Extension Options
’.
Bright spot in
video when viewing
camera at night
• Night vision reflects when pointing a camera through a window. Move the
camera to a different location.
No audio
• Audio is only supported on Lorex NVRs. For a list of compatible recorders,
visit
lorex.com/compatibility
.
• Ensure NVR volume is turned on / turned up.
• Ensure audio function on camera is turned on (see ‘
Audio Settings
’).
• Ensure audio is turned up on viewing device.
The camera
warning light is
not switching on
automatically
• Ensure that you have enabled and configured white light deterrence using
a compatible NVR. See your NVR’s documentation for more information.
• Ensure the active areas and schedule for white light deterrence are set
properly. The default schedule for the warning light is night times (between
5PM and 7AM).
The camera siren
is not switching on
automatically
• The camera siren cannot switch on automatically. You can control the
camera siren manually using the Lorex Cloud app or a compatible NVR.
Troubleshooting
LNB8211X_QSG_EN_R1
Connecting the Camera
Connect the Ethernet cable to the camera.
Connect the other end of the Ethernet cable
to the NVR’s PoE ports. The camera may
take a minute to power up after
being connected.
Connect the other end of the Ethernet cable
to a router or switch on your network. See
your NVR manual for details on connecting
the camera to your NVR using a switch or
router.
Camera
NVR
OR
(Optional)
12V DC Power
NOTE:
A 12V DC power adapter (model#:
ACCPWR12V1
, not included) is only required if
connecting the camera’s Ethernet cable to a
router or switch that does not support PoE.
Ethernet Cable
Setup Diagram
Camera
HD NVR
Scenario 1:
Connect Cameras to NVR
Scenario 2:
Connect Cameras to Local Area Network (LAN)
Router
Camera
HD NVR
Router
PoE Switch
ATTENTION:
• This camera is only compatible with select NVRs. For a list of compatible recorders, visit
lorex.com/compatibility
.
• For the smoothest possible 4K video streaming experience, connect your NVR to a Gigabit router (use
available 1000Mbps / 1Gbps Ethernet port). If you are connecting cameras to an external network switch, it
is recommended to use a 10/100/1000Mbps port on a Gigabit network switch.
Activating Deterrence
The camera’s deterrence features deter suspicious activities from occurring by flashing
a warning light and/or sounding a siren from the camera. You can manually control these
features using the Lorex Cloud app. You can also configure automatic deterrence using
the Lorex Cloud app.
NOTES
:
• See your NVR’s documentation for more information about enabling and automating
deterrence features using a compatible NVR.
• For a full list of compatible recorders, visit
lorex.com/compatibility
.
REQUIREMENTS
:
• Connect the camera to a compatible NVR. See ‘
Connecting the Camera
’ section for
more information.
• Ensure the compatible NVR is set up remotely via the Lorex Cloud app. See your NVR’s
documentation for more information.
To activate deterrence manually through the Lorex Cloud app:
1. From live view, double-tap the deterrence camera to open the
channel in full screen.
2. Tap the deterrence icons on the camera display to switch on/
off the following deterrence features (see
Figure 1
):
A.
Tap the icon to switch on (
) / off (
) the camera
warning light.
B.
Tap the icon to switch on (
) / off (
) the camera siren.
NOTE:
The camera warning light / siren will automatically
switch off after 10 seconds.
A
B
Audio Settings
ATTENTION:
Audio recording and listen-in audio are disabled by default.
Audio recording and / or use of
listen-in audio without consent is illegal in certain jurisdictions. Lorex Corporation assumes no
liability for use of its products that does not conform with local laws.
To enable audio recording and listen-in audio through a Lorex NVR:
1. From Live View, right-click and click
Main Menu
. Enter the system user name (default:
admin
) and password.
2. Click (
) and select
Recording
>
Recording
.
3. Under
Channel
, select the channel where the
audio-capable camera is connected.
4. Under
Audio/Video
:
A.
Check the box on the left to enable audio
recording and listen-in audio.
NOTE
: Listen-in audio requires a monitor with
speakers or speakers connected to the NVR.
B.
(Optional) Check the middle checkbox to
enable audio streaming to mobile applications.
5. Under
Audio Encode
, select the format
that will be used to record audio.
G711A
is
recommended.
6. Click
OK
to save changes.
A
B
To enable / disable listening and talking through the Lorex
Cloud app:
NOTE:
These instructions are based on current NVR interface. For the most up-to-date
instructions, see your NVR’s instruction manual on
lorex.com.
1. From live view, double-tap the audio-capable camera to open the
channel in full screen.
2. Tap the following icons on the camera display to enable/disable
listening and talking through the Lorex Cloud app:
A.
Tap the icon to enable (
) / disable (
) listening.
B.
Tap the icon to enable (
) / disable (
) talking.
REQUIREMENT:
You must enable audio on the camera’s sub stream
through a connected NVR. Follow the above instructions for more
information.
A B
A. Reset Button:
Use a Phillips screwdriver (not included)
to open the service compartment cover on top of the
camera. Press and hold the reset button for 5 seconds to
reset the camera to default settings.
B. Lens
C. Motion (PIR) Sensor
D. Microphone
E. Warning Lights
F. Speaker
Camera Overview
A
B
C
D
E
F
Disclaimers
• For a full list of compatible recorders, visit
lorex.com/compatibility
• Not intended for submersion in water. Installation in a sheltered location recommended.
• This camera includes an Auto Mechanical IR Cut Filter. When the camera changes between Day/
Night viewing modes, an audible clicking noise may be heard from the camera. This clicking is
normal, and indicates that the camera filter is working.
Cable Extension Options
Extend the cable run for your camera. Additional extension cables sold separately. See
table below:
Cable Type
Max Cable Run
Distance
Max # of Extensions
CAT5e (or higher) Ethernet cable
300ft (92m)
3
• You can use a RJ45 coupler or switch (not included) to connect male ends of Ethernet
cable together.
• To extend the cable run beyond 300ft (92m), a switch will be required (sold
separately).
To configure automatic deterrence through the Lorex Cloud app:
1. From live view, tap
to access the Menu, and then tap
Device Manager
.
2. From the list of devices that appear, tap the device to which the deterrence camera
is connected.
3. Tap
Settings > Video Detect > Deterrence
.
• : Tap to add boxes to the active area.
• : Tap to remove boxes from the active area.
• : Tap and pinch the image to zoom in/out.
• : Tap when finished.
A
B
C
D
In
Figure 3
example, only motion in the parking lot will trigger
warning light.
Figure 1
4. Tap the channel of the deterrence camera to
configure. Do the following (see
Figure 2
):
A
. Tap to enable/disable automatic warning light
deterrence.
B
. Tap to view/hide advanced deterrence
configuration options.
C
. Tap
Schedule
to set a schedule during which
the warning light will automatically turn on.
NOTE:
The default schedule is active during the
night, between 5pm and 7am.
D.
Tap
Area Setting
to set the active area for
automatic deterrence. The camera image appears
with a grid of red boxes over top. The red area is
the active area for deterrence (see
Figure 3
).
5. Tap to save changes.
Figure 2
Figure 3


