Configuring Camera Settings Using a Browser
15
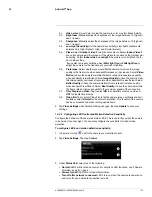
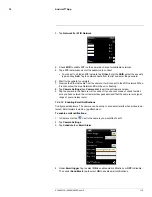
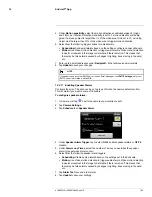
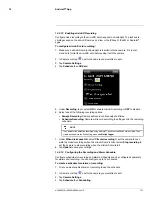
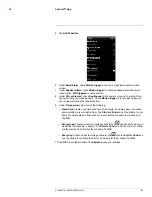
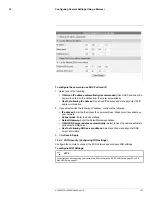
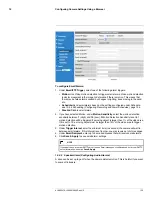
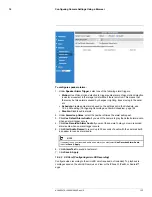
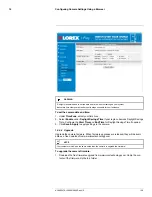
To configure camera video quality settings:
TIP:
Change only one camera image quality setting at a time before clicking
Save & Apply
so you can judge the effects.
1. Configure the following, as needed:
•
Internet speed:
Select the upload speed of your Internet connection. If your Inter-
net connection is faster than 1.5Mbps, select 1.5Mbps.
•
Adjust resolution and frame rate automatically:
Select to allow the camera to
adjust the video resolution and frame rate based on available bandwidth.
•
Use the following values:
Select to manually select the video resolution and frame
rate for the camera. Note that the image quality may decrease if there is not enough
bandwidth for your selected settings.
•
Resolution:
Manually select either
320x240
,
640x480
,
1024x768
, or
1280x800
resolution. Higher resolution will give you a better, more detailed picture, but re-
quires more bandwidth. Lower resolution allows the camera to maintain a higher
frame rate when available bandwidth is low.
•
Frame rate:
Manually select the frame rate between
30fps
(highest) and
1fps
(low-
est). 30fps is real time video, meaning that movement in the image will appear
smooth, with no choppiness.
•
Favor/Preference:
Select whether you would like the camera to reduce the image
quality or the frame rate when bandwidth increases or decreases. Select
Video Mo-
tion
to have the camera maintain the frame rate and reduce image quality when
bandwidth is insufficient. Select
Image Quality
to have the camera maintain image
quality and reduce frame rate when bandwidth is insufficient. Select
Better Quality
to have the camera maintain frame rate and increase quality when bandwidth is suf-
ficient. Select
Best Quality
to have the camera maintain the frame rate and in-
crease quality to the maximum speed of the connection.
•
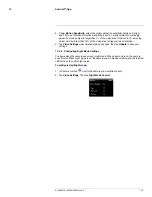
Brightness:
Manually adjust the brightness of the image between
10
(highest) and
1
(lowest).
•
Sharpness:
Manually adjust the sharpness of the image between
10
(highest) and
1
(lowest).
•
Low Light Sensitivity:
Set the camera’s sensitivity in low light environments be-
tween
Very High
(highest),
High
, and
Normal
(lowest).
•
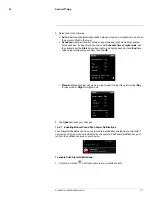
Video color:
Select
Colored
to view the camera in color or select
Black & white
.
•
Video flip:
Select
Video Flip
to flip the camera image vertically and horizontally or
select
Normal
for the normal orientation. This is useful if the camera has been
mounted to a wall or ceiling upside down.
•
Outdoor video/Indoor video/Indoor video + sun light:
Select
Outdoor video
for well lit environments. Select
Indoor Video
if you notice strip lines in the image
or if the picture is too dark on the Outdoor video setting. Select
Indoor video +
sunlight
if the picture is too bright on the Indoor Video setting.
•
60Hz light freq/50Hz light freq:
If necessary, select
60Hz light freq
or
50Hz light
freq
to adjust the camera for the frequency of your indoor lighting. These settings
are not available when the camera is set to Oudoor video.
•
Enable audio microphone/Disable audio microphone:
Select
Disable audio
microphone
to disable the built-in microphone in the camera or select
Enable
audio microphone
to enable it.
•
Enable time display/Disable time display:
Select
Disable time display
to turn
off video time stamps or
Enable time display
to turn on video time stamps.
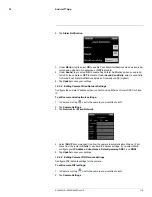
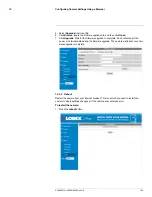
2. Click
Save & Apply
to apply the settings to the camera. You may need to reconnect to
the camera after making settings changes.
#LX400072; r.28402/28402; en-US
129
Summary of Contents for LNC254 series
Page 1: ...USER S GUIDE LNC254 Series ...
Page 2: ......
Page 3: ...USER S GUIDE LNC254 Series LX400072 r 28402 28402 en US iii ...
Page 153: ......

