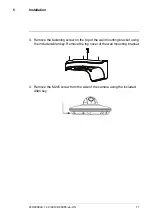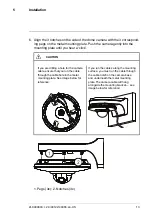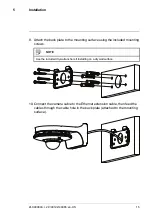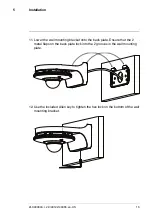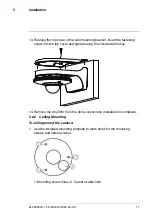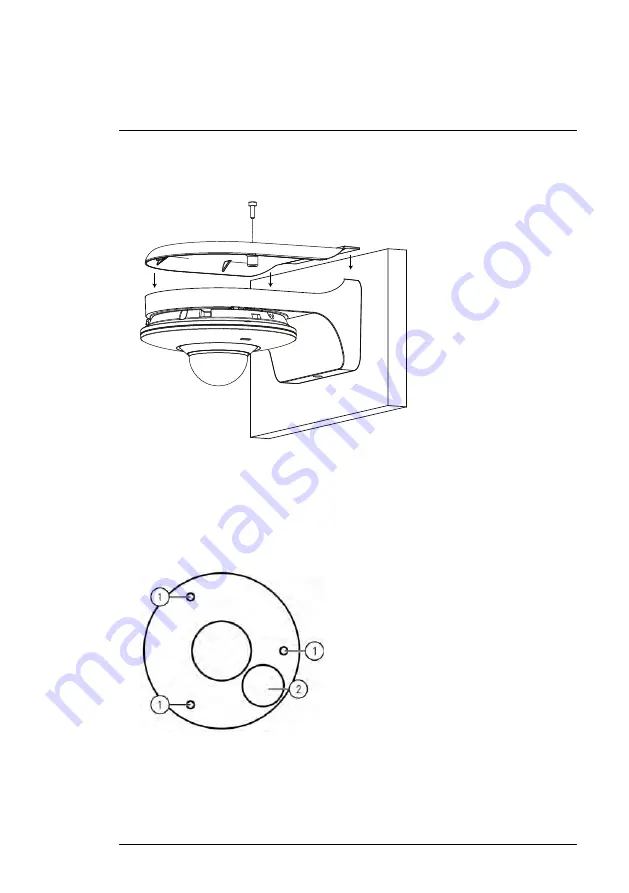
13. Replace the top cover of the wall mounting bracket. Insert the fastening
screw into the top cover and tighten using the included Allen key.
14. Remove the vinyl film from the dome cover once installation is complete.
5.2.2
Ceiling Mounting
To ceiling mount the camera:
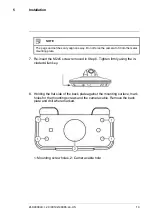
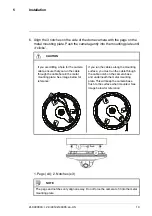
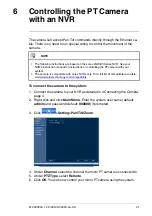
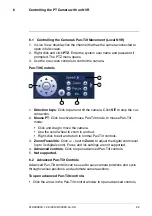
1. Use the included mounting template to mark holes for the mounting
screws and camera cable.
1. Mounting screw holes; 2. Camera cable hole
#LX400043; r. 2.0/40122/40365; en-US
17
Summary of Contents for LNZ3522
Page 1: ...Instruction Manual LNZ3522 HD MICRO PT DOME CAMERA ...
Page 2: ......
Page 3: ...Instruction Manual LNZ3522 HD MICRO PT DOME CAMERA LX400043 r 2 0 40122 40365 en US iii ...
Page 6: ......
Page 39: ......
Page 41: ...Manuel d utilisation LNZ3522B MICRO CAMERA DÔME HD PT ...
Page 42: ......
Page 43: ...Manuel d utilisation LNZ3522B MICRO CAMERA DÔME HD PT LX400043 r 2 0 40918 40918 fr CA iii ...
Page 46: ......
Page 48: ......
Page 81: ......
Page 83: ...Manual de instrucciones CÁMARA LNZ3522 HD MICRO PT DOME ...
Page 84: ......
Page 85: ...Manual de instrucciones CÁMARA LNZ3522 HD MICRO PT DOME LX400043 r 2 0 40918 40918 es MX iii ...
Page 88: ......
Page 90: ......

