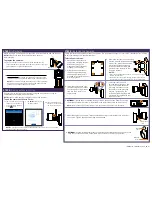
STEP 1:
Initial Setup
To prepare the cameras:
Before you begin, you will need to prepare the wire-free cameras and Power Packs.
2. Peel off the
PLEASE REMOVE
label covering the contacts on
each Power Pack. Insert the charged Power Packs into each
camera base. Push up until the Power Pack
‘clicks’
into place.
NOTE:
Power Packs come fully charged with no need for
initial charging.
1. Attach an antenna to each camera. Twist the adjustment ring
counterclockwise to reposition each camera as shown to the right.
Twist clockwise to tighten when finished.
Adjustment ring
STEP 2:
Pairing with Lorex Cirrus
To pair the camera with Lorex Cirrus:
Pair your add-on camera to your recorder using the free Lorex Cirrus app for
smartphones and tablets (iOS and Android).
1. From Live view, tap any free
channel you would like to
pair a camera to (marked
with a
icon).
2. Tap
PAIR
. A timer for 30
seconds appears.
3. Press and hold the pair
button on the back of the
camera for 3 seconds.
NOTE:
A “pairing successful” message should appear on screen. If you do not see this
message, repeat the steps above.
NOTE:
Make sure the camera is within 3ft (1m) of the recorder.
To install your cameras:
1. Set the mounting bracket in
the desired mounting position.
Mark holes through the
mounting bracket (shown as
orange X’s on the right).
2. Drill holes where marked for
the mounting screws using
the included drill bit (item C
provided in the toolkit with your
wire-free system).
3. Secure the bracket to the mounting
surface with the included mounting
screws (×4). Make sure all screws
are fastened tightly using the
included screwdriver (item A+B
provided in the toolkit with your
wire-free system).
NOTES:
• Insert the included drywall anchors if you are mounting the
camera onto drywall.
• The hole at the top of the mounting bracket will be used in
step 5, once the camera is attached to the mounting plate.
STEP 3:
Installing the Cameras
Follow the instructions below to mount the cameras. It is recommended that you refer to the “Installation Tips” section
to help you select good mounting locations.
4. Lower the camera base onto
the mounting bracket so the 2
tabs in the mounting bracket
lock into the 2 slots in the
camera base.
6.
OPTIONAL:
Tighten the pre-installed locking screw on the base of the Power Pack using
the included screwdriver (item A+B provided in the toolkit with your wire-free system).
7. Adjust the angle of the camera. Twist the adjustment ring counterclockwise to reposition
the camera. Tighten the adjustment ring when finished.
8.
OPTIONAL:
Use the included cable clips to complete the installation. Remove the protective
strip to uncover the adhesive on the cable clip to attach to the mounting surface.
NOTE:
You will need to loosen the locking screw to remove the Power Pack in the future.
Adjustment
ring
Power
cable
Mounting
surface
5. Insert the security screw
through the fasteners on the
top of the camera base and
mounting bracket to secure
the camera to the mounting
bracket. Tighten using the
included screwdriver (item A+B
provided in the toolkit with your
wire-free system).
NOTE:
The camera will
'beep'
when the Power Pack is properly
inserted. If you do hear this alert, remove the Power Pack by
pushing on the release tabs then re-insert.
LWB4801AC_LWB4901AC_QSG_EN_R1


