Features:
•
Weather Resistant camera for Indoor/ Outdoor use*
•
4 Channel selectable camera
•
New Ultra Slim design
•
Automatic IR illumination in low light conditions**
•
Listen-in audio
•
300 ft. wireless transmission (open space)†
Standard AC Adapter
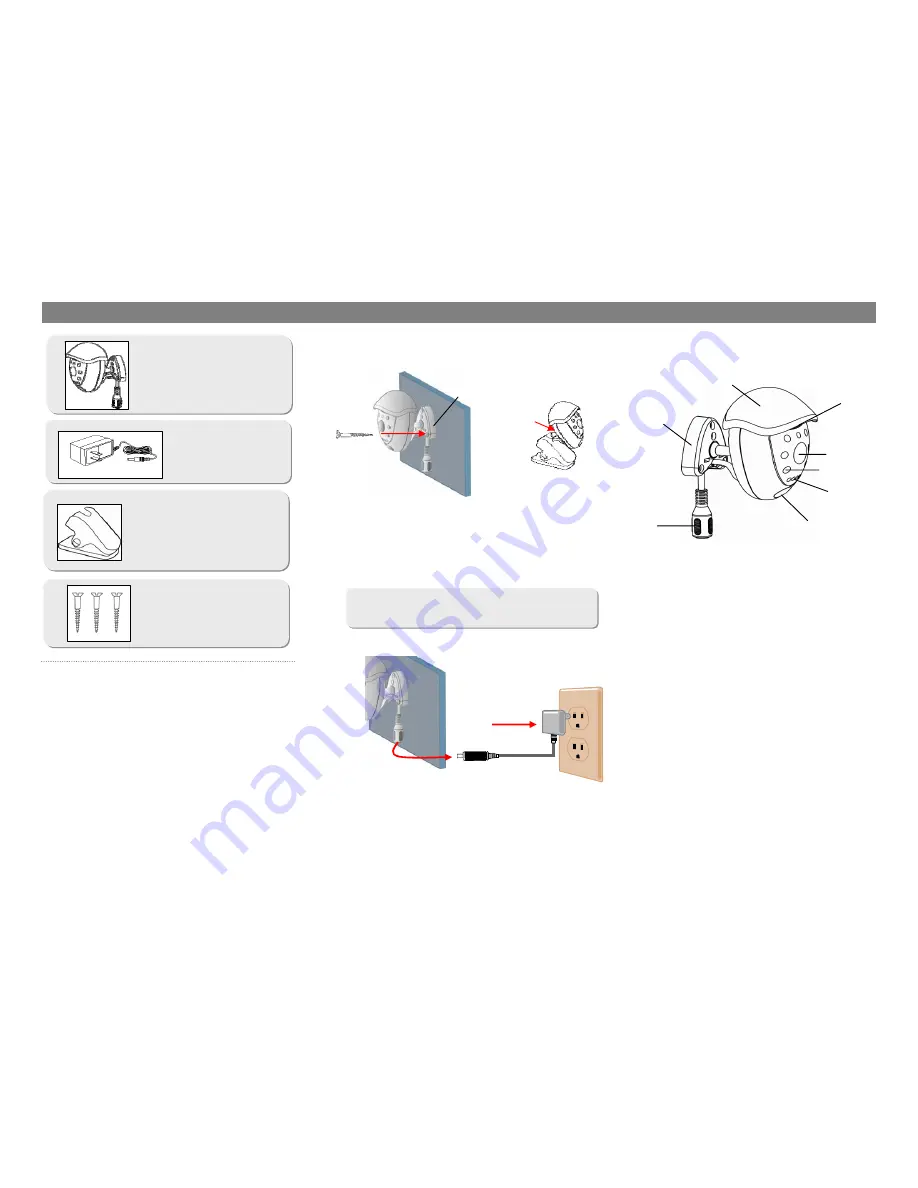
1. Microphone – Built-in condenser microphone
provides listen-in audio capability from camera to
monitor
2. Lens – B&W CMOS Image Sensor
3. 6 Infrared LED’s – Enhances the picture quality in low
light conditions
4. Channel Selector/Power Button – Selects channels 1-
4. Hold for 3 seconds to turn the power ON/OFF.
5. Bracket – Plastic bracket connects to camera for
mounting to walls, ceilings or table
6. DC IN Jack – Connects to the 9V DC (500mA)
adapter.
7. Sunshade Visor – Protects camera from the elements
and blocks from the camera from the direct glare of the
sun.
8. LED Channel Indicator – Shows the channel (1-4)
that the camera is set to.
c)
Connect the supplied 9V DC adapter to the DC
IN jack at the rear of the camera.
d)
Plug the 9V DC adapter to the power outlet.
e)
To turn the camera power ON/OFF, hold the
Channel button for 3 seconds (by default the
camera is ON).
Mounting Screws
Bonus clip-on camera stand
a)
Install the camera to the supplied bracket (wall
mount or clip-on). Refer to options below:
b)
For option #1 attach the bracket to the wall or
ceiling where you want to install the camera.
For option #2 connect the clip-on stand onto
any object
Wall
Wall mount
bracket
1. Confirm Package Contents
2. Install the Camera
4. Camera Controls & Functions
FRONT/SIDE VIEW
The mounting bracket (option #1) is designed to
permanently mount the camera (i.e. to wall or ceiling)
SG6223 camera with sunshade visor
and mounting bracket
* IP44 rated for Indoor and Outdoor use. Not recommended for direct exposure to water,
rain or snow.
** IR illumination range of 6 ft. under ideal conditions. Objects at or beyond this range may
be partially or completely obscured, depending on the camera application.
† Maximum open space transmission range. Actual range dependent upon building
materials and other obstruction in path of wireless signal.
To power outlet
DC IN jack
2
3
4
5
6
1
7
8
Clip-on
Option #1
Option #2
3. Connect the Power


