IM-995
Installation, Operation & Maintenance Manual
12
Bearing Installation
(refer to safety section)
The following section gives some general instructions on bearing installation. If bearings are to be field installed, the specific
installation manual for the bearings will be provided and should be followed carefully. If provided, check the assembly drawings
and bearing manufacturer's instructions for location of the fixed and expansion bearings. The positions of these bearings cannot
be interchanged. Always follow the bearing manufacturer's instructions.
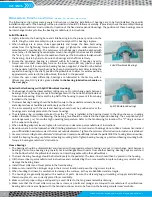
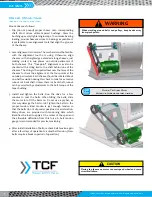
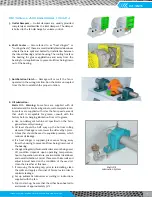
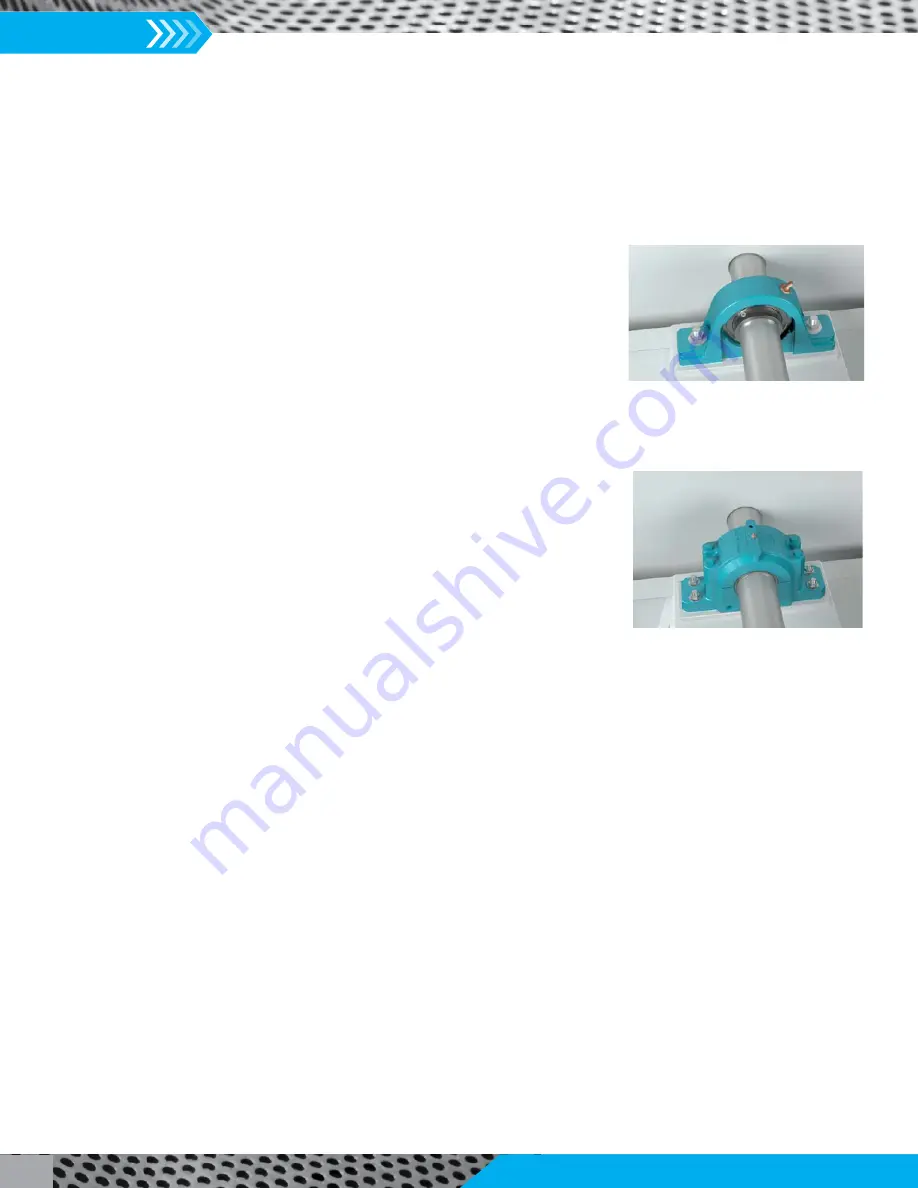
Solid Pillowblock
1. Lightly lubricate the bearing bore and slide bearing into the proper position on the
shaft. Sling the rotor assembly into place and loosely bolt the bearings in place.
2. When bearings are in place, shim appropriately and torque the base bolts using
values from the Tightening Torque table on page 9. Tighten the collar setscrews to
manufacturer’s specification. The setscrews on both bearings should be aligned with
one another. If the bearing has an adapter mount, hand tighten the locknut to establish
the “zero” point. Next, tighten the number of turns per the instructions furnished with
the bearing. Rotate by hand to be sure the bearings and shaft rotate freely.
3. Ensure the expansion bearing is centered within its housing. If bearings need to
forced onto the shaft then apply force on the inner race/collar only (does not apply
to adapter mount.) If an expansion bearing has been supplied, it should not be bolted
to the pedestal until the fixed bearing has been bolted and locked. After locking the
expansion bearing to the shaft, position the pillowblock to allow for axial expansion,
approximately centered in the pillowblock, then bolt to the pedestal.
4. Unless the user orders differently, bearings are lubricated in the factory with a
lithium complex, NLGI grade 2 grease.
Refer to the bearing lubrication schedule on
the next page.
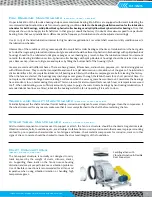
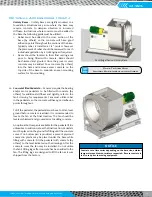
Spherical Roller Bearings with Split Pillowblock Housings
1. The bearings should be disassembled, taking care not to interchange parts between
bearings. Tops of housings are not interchangeable with the bottom half pillowblock
from another bearing. Pins locate the top half of the housing to prevent it from being
installed in the reverse.
2. The lower bearing housing should be bolted loosely to the pedestal and seals; bearing
and adapter sleeve should be placed loosely on the shaft.
3. The rotor assembly with the seals and bearings should next be positioned over the
housings and carefully placed into the lower housings.
4. The stabilizing ring, sometimes referred to as the “C” ring, is installed in the bearing closest to the drive sheave or coupling
unless otherwise noted in the drawing. The bearing race should be centered in the expansion bearing. The exception may be
on Arrangement 3 or 7 fans with a high operating temperature. Refer to the fan drawing for location. The “C” ring is not used
in the expansion bearing.
5. When installing adapter sleeves, tighten for reduction in clearance per manufacturer’s instructions.
6. Bend down a tab on the lockwasher after finishing adjustment. Some brands of bearings do not utilize a lockwasher. Instead
you will find allen-head setscrews in the locknut outside diameter. Tighten the setscrew after reduction in clearance is attained.
7. Grease or oil according to manufacturer’s instructions. Grease/Lube will likely include the partial fill of the housing internal cavities.
8. Install the bearing housing cap bolts and bearing mounting bolts. Tighten bearing housing cap bolts and bearing mounting bolts.
Torque to bearing manufacturer's instructions.
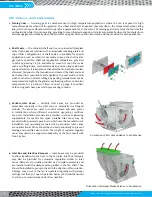
Sleeve Bearings
1. The bearings should be disassembled and cleaned with appropriate solvent, taking care not to interchange parts between
bearings. Parts of one bearing are generally not interchangeable with parts from another bearing. Bearing caps are matched
to the bottom half of the pillowblock and are not interchangeable with other pillowblocks.
2. The lower bearing housings should be bolted loosely to the pedestal. The lower liner should then be placed in the housing.
3. Oil the lower liners per manufacturer’s instructions and carefully sling the rotor assembly into place, being very careful not to
damage the bearing liners.
4. Install thrust collars and thrust plates in the fixed bearing
5. Make sure to install the oil slinger rings in their correct location and peen the ring screws in place.
6. When handling the liners, be careful not to damage the surfaces, as they are babbitted and are fragile.
7. The housings are generally tapped with a number of ports. Be sure the oil level gauge, circulating oil supply and discharge,
thermocouples, etc., are correctly placed for accessibility.
8. Make sure that proper oil type and quantity is used. Refer to the fan general assembly drawing.
9. Make sure that the thrust collar screws, liner screws, cap bolts and plunger are torqued to manufacturer’s specifications.
Bearing instructions are shipped with the fan. Instructions can also be found on the bearing manufacturer’s website.
Split Pillowblock Bearings
Solid Pillowblock Bearings
Summary of Contents for CD-1261
Page 1: ... 0 1 2121 3 4 1 5 6 ...
Page 2: ... ...
Page 3: ... ...
Page 4: ... ...
Page 5: ... ...
Page 6: ... 0 1 2 3 4 5 6 5 6 7 1 1 5 6 5 6 5 6 1 0 0 ...
Page 7: ... ...
Page 8: ... 0 1 2 0 3 0 ...
Page 9: ... ...
Page 10: ... 0 12 2 0 3 4 5 5 5 0 0 ...
Page 11: ... 6 12 0 0 7 5 5 0 8 0 8 5 0 50 9 4 12 0 0 9 4 0 9 64 0 5 0 0 1 0 0 ...
Page 12: ... 0 2 0 0 3 0 6 6 6 6 6 0 0 0 5 5 0 6 0 ...
Page 14: ... ...
Page 15: ... 0 0 1 1 2 1 1 3 0 4 5 1 0 1 0 0 2 1 2 1 0 0 0 2 1 1 1 1 1 0 0 0 1 0 0 0 1 0 1 6 1 1 ...
Page 17: ... 1 0 3 0 0 1 1 1 71 0 0 1 1 1 0 1 1 ...
Page 18: ... ...
Page 25: ... 8 ...
Page 28: ... 1 7 4 0 4 1 4 1 1 4 1 1 1 4 85 4 4 1 4 1 4 0 6 4 1 1 1 01 0 1 4 6 4 1 1 4 L 1 ...
Page 29: ... 4 ...
Page 30: ... 0 1 2 3 24 3 5 6 4 5 6 4 5 5 1 5 4 74 8 5 9 1 4 27 3 5 4 74 8 5 5 29 13 27 3 1 29 13 5 1 ...
Page 31: ... 8 8 80 1 2 3 5 6 4 5 6 4 5 5 1 5 A 9 1 B 4 27 3 888 7 8 0 B 4 C D 5 29 13 B 27 3 888 7 29 13 ...
Page 32: ... 4 24 3 5 6 4 5 6 4 5 5 4 7 M 7 4 7 N 2 0 7 2 M 0 N M ...
Page 35: ... 8 G 8 0 G 4 88 8E 1 2 3 5 6 4 5 6 4 5 5 1 4 1 4 27 3 1 088 7 5 4 1 5 29 13 H 27 3 088 7 ...
Page 36: ... E 5 ...
Page 37: ... 9 4 5 H 0 1 2034 2034 2034 2034 0 5 1 6 71 6 1 2 1 1 1 0 1 81 1 9 9 ...
Page 38: ... 1 5 1 5 1 3 05 3 1 0 1 1 6 A 6 1 A 6 B 1 6 B 6 1 1 1 6 6 6 2 9 0 6 ...
Page 39: ... 0 ...
Page 40: ... 0 0 ...
Page 42: ......
Page 43: ... 0122 3 4 5 6 4 4 4 4 5 4 4 4 4 4 7 7 4 4 6 4 4 5 5 4 5 8 8 3 5 3 5 3 5 3 5 5 ...
Page 44: ... 0 0 0 0 0 0 0 0 0 0 1 1 2 3 0 3 3 0 0 33 0 3 0 3 3 0 ...
Page 46: ... 011 2 3 3 4 3 2 5 5 6 ...
Page 47: ... 011 2 3 4 5 3 6 3 7 7 2 4 ...
Page 48: ... 00 1 2 3 4 3 5 5 5 5 5 3 1 1 2 2 6 1 1 1 5 5 7 5 5 5 5 ...
Page 49: ... 0122 3 4 5 6 7 4 8 4 4 8 4 4 8 5 5 5 5 5 5 5 5 5 5 5 5 ...
Page 50: ... 0 11 2 2 2 2 2 3 4 5 0 5 3 6 7 6 6 8 9 8 9 6 6 8 9 0 1 1 1 1 1 8 9 1 1 1 5 ...
Page 51: ... 011 2 3 4 5 4 2 2 2 6 2 6 6 3 3 3 3 3 3 3 ...
Page 53: ... 011 2 3 4 5 4 2 6 33 2 33 6 6 6 ...
Page 54: ... 011 2 3 3 3 3 4 5 4 33 2 33 6 3 3 3 ...
Page 56: ... 0122 3 4 5 6 7 8 4 4 5 8 4 4 8 9 9 9 8 4 4 4 88 8 8 8 ...
Page 57: ... 0 1 1 1 2 1 3 1 1 1 0 1 1 1 4 1 1 ...
Page 58: ... ...
Page 59: ... ...
Page 96: ...Bearing Maintenance Guide x Lubrication x Troubleshooting ...
Page 97: ......
Page 98: ......
Page 99: ......
Page 100: ......
Page 101: ......
Page 102: ......
Page 103: ......
Page 104: ......
Page 105: ......
Page 106: ......
Page 107: ......
Page 108: ......
Page 109: ......
Page 110: ......
Page 111: ......
Page 112: ......
Page 113: ......
Page 114: ......
Page 115: ......
Page 116: ......
Page 117: ......
Page 118: ......
Page 119: ......
Page 120: ......
Page 121: ......
Page 122: ......
Page 123: ......
Page 124: ......
Page 125: ......
Page 126: ......
Page 165: ... 0 0 1 2 3 4 5 6 52 3 52 3 7 8 4 6 52 4 6 1 9 9 9 9 9 ...
Page 166: ... 0 5 9 9 2 2 4 6 4 6 4 6 7 8 7 8 2 4 6 4 7 8 7 8 2 4 6 4 6 52 A ...
Page 167: ... 0 0 1 2 1 2 3 4 2 1 2 3 4 ...
Page 168: ... 0 2 1 2 3 3 4 2 1 2 3 4 2 ...
Page 194: ......
Page 195: ......
Page 196: ......
Page 218: ......
Page 219: ......
Page 234: ...15 Notes Model 121 Regulators Brochure ...
Page 236: ......

