Owners Manual
s
Rexnord
®
Planetgear™ 7000 Series Speed Reducers
(Page 12 of 32) Sizes Neptune, Neptune Plus, Orion Plus, Saturn Plus & Titan Plus
158-170
Rexnord
January 2015
3001 W. Canal St., Milwaukee, WI 53208-4200 USA
Supersedes 11-12
Telephone:414-342-3131 Fax: 414-937-4359 www.rexnord.com
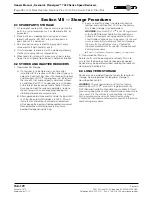
Section IV — Start-up
WARNING
: Never operate the speed reducer at speeds
and/or loads that exceed the limits specified on the
nameplate. Exceeding these limits may result in personal
injury or machinery damage. Check to insure that all
rotating equipment is properly guarded according to
OSHA standards.
CAUTION
: All speed reducers are shipped without oil but
may have been treated with a rust preventative oil. A vapor
phase inhibitor may also be added. Be sure to fill the unit
to the proper level prior to start-up.
Warning
: These corrosion inhibitors are not H1 registered
with the NSF (National Sanitation Foundation) as suitable
for food processing applications. When Food Grade
Lubricants are to be used it is the end users responsibility
to properly flush and prepare the drive for Food Grade
service. Contact the lubricant manufacturer for specific
information and flushing procedures.
CAUTION
: When starting up new equipment, proceed
cautiously.
4.1 PRE START-UP CHECKLIST
c
Has the reducer been filled with the proper oil type and
to the correct oil level?
d
Are all mounting bolts high strength ANSI 818.2.1
Grade 5 or ISO 898/1 Grade 8.8 and tightened
according to torque specifications in Table 17 (Page
28)?
e
Are all input and output shaft couplings, sprockets,
pinions, etc. mounted with full engagement and keys in
place?
f
Have couplings and reducer seals been properly
greased?
g
Are coupling connections properly aligned and
fastened?
h
Have all pipe plugs (oil fill, oil level, and oil drain) been
inserted and properly tightened?
i
Have all electrical connections been made?
j
Does the motor shaft rotate in the proper direction?
k
Are all guards in place and properly secured?
4.2 INITIAL START-UP
It is recommended that all Planetgear 7000 speed
reducers be run-in for a period of time before introduction
to full service. This will allow the gearing to mate properly
prior to being exposed to any high load conditions. The
following procedure is recommended for initial start-up.
4.2.1 PRIME MOVER
The prime mover should be set up to maximize the amount
of time necessary to get to the rated speed. This will avoid
any instantaneous gear loads that could exceed the rating
of the speed reducer or other components.
4.2.2 REDUCER ROTATION
If the reducer is equipped with an internal backstop, an
arrow located on the top of the maincase will indicate the
direction of rotation during operation. Make sure the motor
shaft will rotate in that direction. If necessary, reverse the
leads on the motor so that the proper motor direction is
attained.
4.2.3 START-UP
Start the reducer under as light a load as possible. As
the unit is brought up to normal operating speed, check
for unusual noises, excessive vibration, or excessive heat
and oil leakage. If any of these conditions exist, shut
down the unit immediately and determine the cause of the
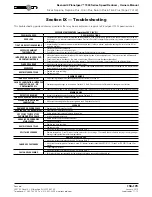
problem. Refer to Section 9.0 Troubleshooting (Page 27)
for assistance.
4.3 POST START-UP CHECKLIST
c
After approximately forty hours of use, check all
foundation and mounting bolts and tighten as required.
Note: Always recheck alignment after tightening.
d
The oil used in the initial start-up of a new reducer
should be completely drained and replaced after 500
hours of use. A thorough cleaning of the gear case
using a flushing oil should be performed to remove any
foreign matter during the first oil change.
Summary of Contents for CD-1261
Page 1: ... 0 1 2121 3 4 1 5 6 ...
Page 2: ... ...
Page 3: ... ...
Page 4: ... ...
Page 5: ... ...
Page 6: ... 0 1 2 3 4 5 6 5 6 7 1 1 5 6 5 6 5 6 1 0 0 ...
Page 7: ... ...
Page 8: ... 0 1 2 0 3 0 ...
Page 9: ... ...
Page 10: ... 0 12 2 0 3 4 5 5 5 0 0 ...
Page 11: ... 6 12 0 0 7 5 5 0 8 0 8 5 0 50 9 4 12 0 0 9 4 0 9 64 0 5 0 0 1 0 0 ...
Page 12: ... 0 2 0 0 3 0 6 6 6 6 6 0 0 0 5 5 0 6 0 ...
Page 14: ... ...
Page 15: ... 0 0 1 1 2 1 1 3 0 4 5 1 0 1 0 0 2 1 2 1 0 0 0 2 1 1 1 1 1 0 0 0 1 0 0 0 1 0 1 6 1 1 ...
Page 17: ... 1 0 3 0 0 1 1 1 71 0 0 1 1 1 0 1 1 ...
Page 18: ... ...
Page 25: ... 8 ...
Page 28: ... 1 7 4 0 4 1 4 1 1 4 1 1 1 4 85 4 4 1 4 1 4 0 6 4 1 1 1 01 0 1 4 6 4 1 1 4 L 1 ...
Page 29: ... 4 ...
Page 30: ... 0 1 2 3 24 3 5 6 4 5 6 4 5 5 1 5 4 74 8 5 9 1 4 27 3 5 4 74 8 5 5 29 13 27 3 1 29 13 5 1 ...
Page 31: ... 8 8 80 1 2 3 5 6 4 5 6 4 5 5 1 5 A 9 1 B 4 27 3 888 7 8 0 B 4 C D 5 29 13 B 27 3 888 7 29 13 ...
Page 32: ... 4 24 3 5 6 4 5 6 4 5 5 4 7 M 7 4 7 N 2 0 7 2 M 0 N M ...
Page 35: ... 8 G 8 0 G 4 88 8E 1 2 3 5 6 4 5 6 4 5 5 1 4 1 4 27 3 1 088 7 5 4 1 5 29 13 H 27 3 088 7 ...
Page 36: ... E 5 ...
Page 37: ... 9 4 5 H 0 1 2034 2034 2034 2034 0 5 1 6 71 6 1 2 1 1 1 0 1 81 1 9 9 ...
Page 38: ... 1 5 1 5 1 3 05 3 1 0 1 1 6 A 6 1 A 6 B 1 6 B 6 1 1 1 6 6 6 2 9 0 6 ...
Page 39: ... 0 ...
Page 40: ... 0 0 ...
Page 42: ......
Page 43: ... 0122 3 4 5 6 4 4 4 4 5 4 4 4 4 4 7 7 4 4 6 4 4 5 5 4 5 8 8 3 5 3 5 3 5 3 5 5 ...
Page 44: ... 0 0 0 0 0 0 0 0 0 0 1 1 2 3 0 3 3 0 0 33 0 3 0 3 3 0 ...
Page 46: ... 011 2 3 3 4 3 2 5 5 6 ...
Page 47: ... 011 2 3 4 5 3 6 3 7 7 2 4 ...
Page 48: ... 00 1 2 3 4 3 5 5 5 5 5 3 1 1 2 2 6 1 1 1 5 5 7 5 5 5 5 ...
Page 49: ... 0122 3 4 5 6 7 4 8 4 4 8 4 4 8 5 5 5 5 5 5 5 5 5 5 5 5 ...
Page 50: ... 0 11 2 2 2 2 2 3 4 5 0 5 3 6 7 6 6 8 9 8 9 6 6 8 9 0 1 1 1 1 1 8 9 1 1 1 5 ...
Page 51: ... 011 2 3 4 5 4 2 2 2 6 2 6 6 3 3 3 3 3 3 3 ...
Page 53: ... 011 2 3 4 5 4 2 6 33 2 33 6 6 6 ...
Page 54: ... 011 2 3 3 3 3 4 5 4 33 2 33 6 3 3 3 ...
Page 56: ... 0122 3 4 5 6 7 8 4 4 5 8 4 4 8 9 9 9 8 4 4 4 88 8 8 8 ...
Page 57: ... 0 1 1 1 2 1 3 1 1 1 0 1 1 1 4 1 1 ...
Page 58: ... ...
Page 59: ... ...
Page 96: ...Bearing Maintenance Guide x Lubrication x Troubleshooting ...
Page 97: ......
Page 98: ......
Page 99: ......
Page 100: ......
Page 101: ......
Page 102: ......
Page 103: ......
Page 104: ......
Page 105: ......
Page 106: ......
Page 107: ......
Page 108: ......
Page 109: ......
Page 110: ......
Page 111: ......
Page 112: ......
Page 113: ......
Page 114: ......
Page 115: ......
Page 116: ......
Page 117: ......
Page 118: ......
Page 119: ......
Page 120: ......
Page 121: ......
Page 122: ......
Page 123: ......
Page 124: ......
Page 125: ......
Page 126: ......
Page 165: ... 0 0 1 2 3 4 5 6 52 3 52 3 7 8 4 6 52 4 6 1 9 9 9 9 9 ...
Page 166: ... 0 5 9 9 2 2 4 6 4 6 4 6 7 8 7 8 2 4 6 4 7 8 7 8 2 4 6 4 6 52 A ...
Page 167: ... 0 0 1 2 1 2 3 4 2 1 2 3 4 ...
Page 168: ... 0 2 1 2 3 3 4 2 1 2 3 4 2 ...
Page 194: ......
Page 195: ......
Page 196: ......
Page 218: ......
Page 219: ......
Page 234: ...15 Notes Model 121 Regulators Brochure ...
Page 236: ......

