13
STARTING TO DRIVE YOUR SCOOTER
Getting Started
•
You must charge your scooter completely before first time use (8-12 hours).
•
Select a level area with plenty of space.
•
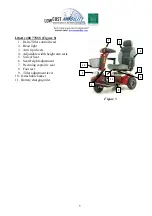
Mount the scooter, either by lifting the arm and sliding onto the seat or rotate the seat outwards, mount
and then rotate the seat back to face the tiller.
•
Adjust the tiller and seat as previously described
Starting Scooter Movement
•
Ensure that you are seated in a comfortable position.
•
Turn the key to the ON position.
•
Your speed setting should be on 1 or 2. If equipped, set the speed high/low switch to low.
•
Pull/press your right hand finger/thumb lever, the scooter will move forward slowly. The further you
pull/press the faster the scooter goes but will only reach the speed level that has been selected.
•
Release the lever and the scooter will slowly come to a stop as the magnetic brake is automatically
applied.
Steering
Steering the scooter is light and easy. Ensure when starting off you give a wide clearance when turning so
that the rear wheels clear any obstacle that you are passing. When steering through limited spaces such as
a doorway or when turning around, turn the tiller handles where you want to go and apply power gently.
The scooter will turn very tightly, but will still move with complete stability as long as the speed is not too
high.
Reversing
Before reversing ensure that the area behind is free from any hazards or obstructions. Adjust your speed
setting to a low setting before you reverse. Pull/press the left finger/thumb lever, and steer wide of all
corners and obstacles.
Dismounting
Before dismounting ensure that the key is turned to the off position. Raise the arm rest to slide off the seat
or turn the swivel seat outward.
CAUTION: Please ensure that care is exercised when mounting or dismounting the scooter and that
the tiller, seat back and foot rest are not used for support. For support, use the arm rests.
Summary of Contents for 250 GK83
Page 1: ...1 250 GK83 300 GK73 400 889NRF User Manual 300 GK9 400 778SS...
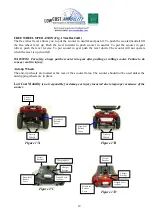
Page 15: ...15 Figure19 Liberty 300 Figure 20 Liberty 400...
Page 22: ...22 Notes...
Page 23: ...23 Notes...
Page 24: ...24 P N 300904 44...


