6
Surface Mounting - Without Access
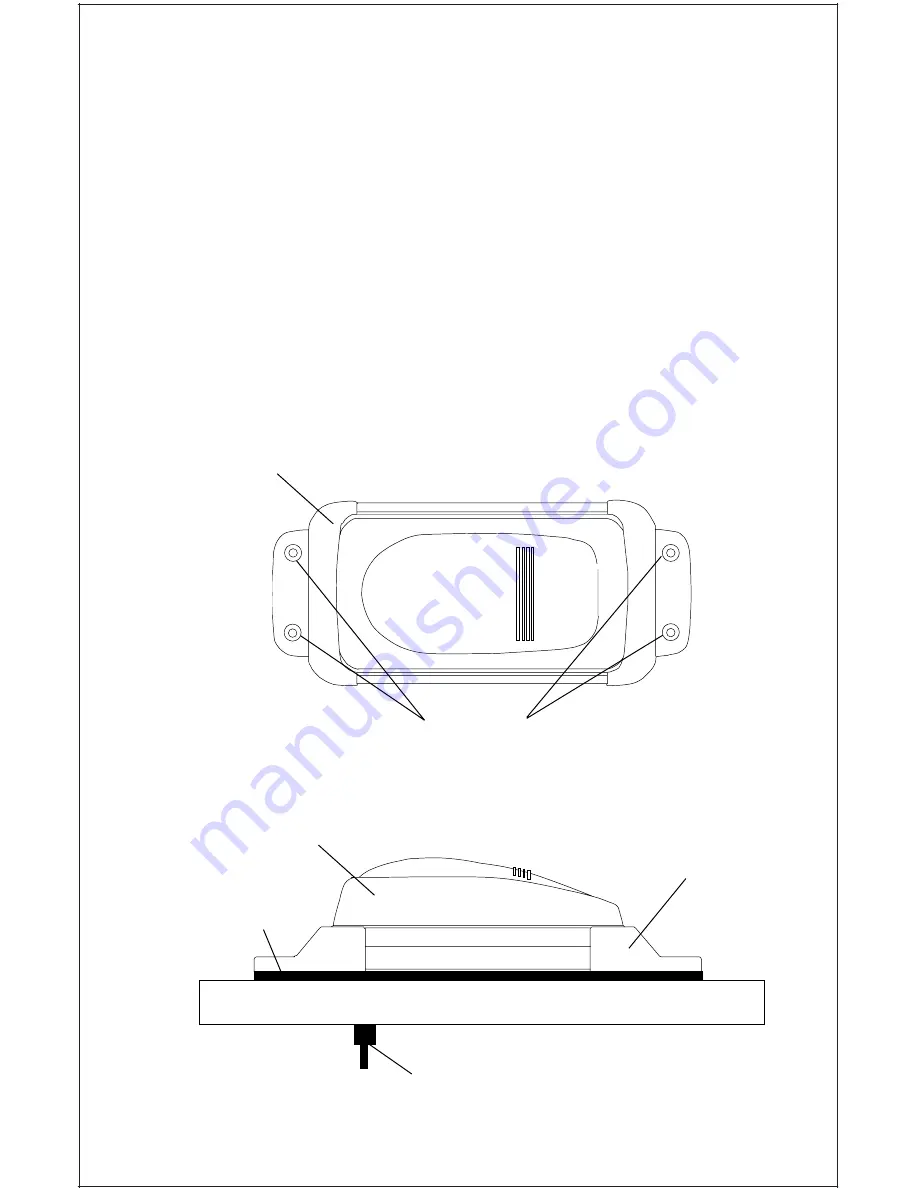
If you don't have access to the back side of the mounting surface, use
the "cleats" supplied with the LMS-350A. (Note: This is assuming you
can "snake" the module's cable to a location that is accessable. A hole
will still need to be drilled in the mounting surface for the cable.) Using
the gasket as a template, mark and drill the 17 mm (11/16") hole for the
cable. Attach the cable to the module and drop the other end of the
cable through the gasket and down the hole. Place the module on the
gasket. Slide the "cleats" onto each end of the module and (using the
cleats as templates) mark four holes for 5 mm (#10) mounting screws.
Drill the holes, then replace the cleats on the module and fasten them to
the mounting surface with 5 mm (#10) screws. Route the cable to the
LMS-350A.
12345678901234567890123456789012123456789012345678901234
12345678901234567890123456789012123456789012345678901234
12345678901234567890123456789012123456789012345678901234
12345678901234567890123456789012123456789012345678901234
12345678901234567890123456789012123456789012345678901234
GASKET
CABLE
MARK AND
DRILL FOUR
PLACES
GPS MODULE
"CLEAT"
"CLEAT"
Summary of Contents for LMS-350A
Page 1: ...INSTALLATION AND OPERATION INSTRUCTIONS LMS 350A ...
Page 4: ......
Page 49: ...45 GROUP H GROUP I GROUP M GROUP L GROUP O GROUP N GROUP K GROUP J ...
Page 50: ...46 GROUP P GROUP Q GROUP U GROUP T GROUP V GROUP S GROUP R ...
Page 52: ...48 WINDOW 13 WINDOW 12 WINDOW 15 WINDOW 14 WINDOW 11 WINDOW 10 WINDOW 9 WINDOW 8 ...
Page 53: ...49 WINDOW 21 WINDOW 20 WINDOW 19 WINDOW 18 WINDOW 17 WINDOW 16 ...
Page 92: ...89 This page intentionally left blank ...
Page 93: ...90 LITHO IN U S A 988 0133 01 ...


