Lowrance - LVR-250 Installation and Operation Instructions
8
Gimbal Installation
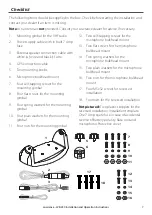
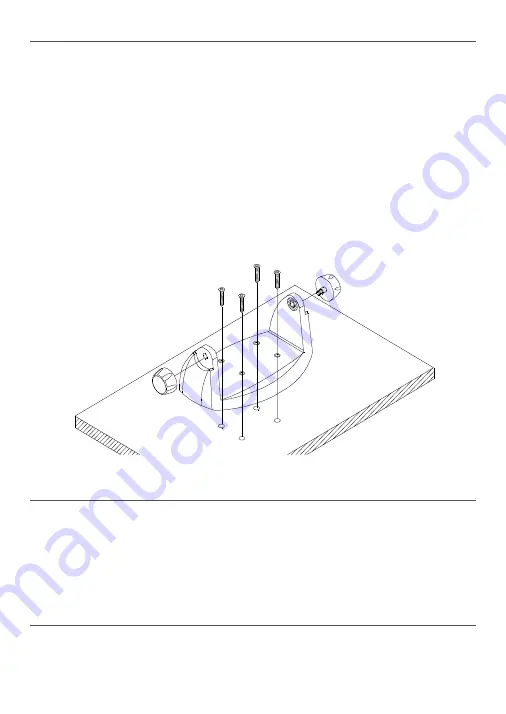
Hold the mounting gimbal at the chosen location and use a soft pencil to mark the
1.
screw hole positions onto the mounting surface.
If you can’t reach behind the mounting surface to attach the nuts, use the self-tapping
2.
screws instead of the flat screws shown in the picture. If you’re drilling into fibreglass,
use a drill bit smaller than 3/16” (5mm) to drill the pilot holes.
Otherwise, drill the four screw holes where marked, using a 3/16” (5mm) drill bit. Drill
completely through the mounting surface.
Use a Philips screwdriver and the set of four flat screws, spring washers, plain washers,
3.
and nuts to attach the mounting gimbal to the location site.
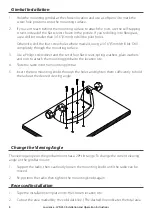
Slide the radio into the mounting gimbal.
4.
Insert the two mounting knobs through the holes and tighten them sufficiently to hold
5.
the radio at the desired viewing angle.
Change the Viewing Angle
The viewing angle on the gimbal mount has a 20º tilt range. To change the current viewing
angle on the gimbal mount:
Support the radio, then cautiously loosen the mounting knobs until the radio can be
1.
moved.
Re-position the radio then tighten the mounting knobs again.
2.
Recessed Installation
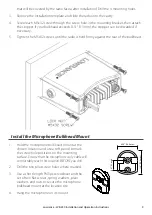
Tape the installation template onto the chosen location site.
1.
Cut out the area marked by the solid dark line. (The dashed line indicates the total area
2.


