background image

Screen Lift 750 Trolley Mount 


8

 
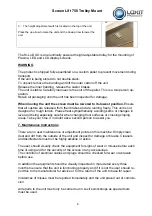
3.    The height adjustment switch is located on the top of the unit. 
 
Press the up arrow to raise the unit and the down arrow to lower the 
unit. 


The Hi-Lo DUO is an electrically powered height adjustable trolley for the mounting of 
Plasma, LED and LCD display screens. 
 

WARNING 

 
The product is shipped fully assembled on a custom pallet to prevent movement during 
transport. 
If the unit is being stored do not double stack. 
To unpack remove the banding and lift the outer carton off the unit 
Release the inner banding, release the castor brakes. 
The unit is stable. Carefully manoeuvre the unit off the pallet. This is a two person op-
eration. 
Retain all packaging until the unit has been inspected for damage. 
 

When moving the unit the screen must be lowered to its lowest position.

 Ensure 

that all castors are released from their brakes and are running freely. This unit is not 
designed for rough terrain. Please treat sympathetically avoiding kerbs or changes in 
level and being especially careful when changing floor surfaces or crossing sloping 
areas. Take your time. If in doubt ask a second person to assist you. 
 

7. Maintenance Instructions 

 
There are no user maintenance or adjustment points on this machine. Simply clean 
dust and dirt from the outside of the unit and inspect for damage or breaks. Cleaners 
and disinfectants must not be highly alkaline or acidic. 
 
The user should visually check the equipment for signs of wear or misuse before each 
time of using and for the security of the screen or any accessories. 
The condition of electrical cables and plugs should be checked for wear or abrasion 
before use. 
 
In addition the equipment should be visually inspected in more detail every three 
months to ensure that the unit is functioning properly and if it is not the user should re-
port this to the manufacturer for advice or for the return of the unit to base for repair.  
 
Incidences of misuse must be reported immediately and the unit placed out of commis-
sion.      
 
All repairs to the unit must only be carried out in Loxit’s workshops as special tools 
must be used. 
 

Summary of Contents for Screen Lift 750

Page 1: ...instructions for flatpack 6 Fitting mount brackets to screen 7 Maintenance Instructions 8 Screen Lift Contents 9 Bracket Pack Contents 10 Trouble shooting 11 Declaration of conformity WARNING WARNING...

Page 2: ...ge Unplug the lift IMMEDIATELY in the following conditions When the power cord or plug is damaged or frayed If liquid has spilled into the lift If the lift has been exposed to rain or water If the lif...

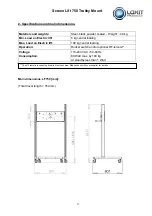
Page 3: ...kg central loading Max Load on Electric lift 100 kg central loading Operation Rocker switch and or optional RF remote Voltage Consumption 110 240 VAC 50 60Hz 80 Watt max by 100 kg At standby less tha...

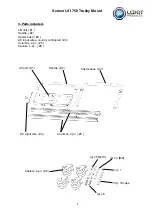
Page 4: ...ts included Lift unit 1 Handle 2 Castor base 3 AC input wires country configured 4 Columns 2 pc 5 Castors 4 pc 6 Lift unit 1 Handle 2 Castor base 3 Columns 2 pc 5 AC input wire 4 a x 6 M10 Castors 4 p...

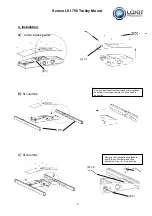
Page 5: ...k panel b fit columns c fit columns 1 Remove duct tape from shafts and micro switches and slide columns gently into the drive shaft in each side b x 4 5 4 Remove the transportation brackets gently Sav...

Page 6: ...f 2 2 6 a x 6 e x 6 d x 16 Connect the AC lead of the electric lift to the mains power socket The electric lift is now ready for use Note the WARNINGS in chapter 1 UP DOWN operation switch 2 screws al...

Page 7: ...r base has been fitted and then to tighten the handle bolts at the end 6 Fitting Mount Brackets to Screen 1 Remove the vertical plasma brackets from the front of the Screen Lift trolley by undoing the...

Page 8: ...hetically avoiding kerbs or changes in level and being especially careful when changing floor surfaces or crossing sloping areas Take your time If in doubt ask a second person to assist you 7 Maintena...

Page 9: ...with other office equipment and would by comparison be rated as low 8 Screen Lift Kit Contents 1nr 2 5mm long leg Allen key square end 1nr 3 0mm long leg Allen key ball end 1nr 4 0mm long leg Allen ke...

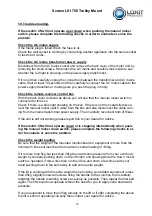
Page 10: ...also disconnect the cable com ing from the mains transformer power supply Then carefully reconnect both of these If the unit is still not working please report this to your dealer for advice If the el...

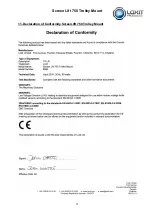
Page 11: ...Screen Lift 750 Trolley Mount 11 11 Declaration of Conformity Screen lift 750 Trolley Mount The information in this document is subject to change without notice...

Reviews: