2 | LP Morgan Installation Instructions
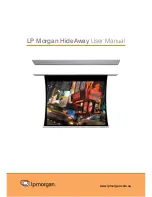
LP Morgan HideAway Manual
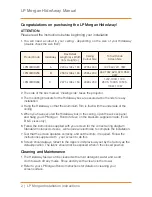
1. You will need a cutout in your ceiling - depending on the size of your HideAway
(double check the size first!):
Product Code
HideAway
Box Details
Length (a) x Width
(b) x Height (c)
Ceiling
Cutout Size
To Suit Rondo
Screen Size
LPM30HID220
A
2200 x 194 x 160
2205 x 200
72V, 84V, 72H, 74W
LPM30HID256
B
2560 x 194 x 160
2565 x 200
90V, 100V, 82H, 92H, 85W,
94W
LPM30HID298
C
2975 x 194 x 160
2980 x 200
120V, 100H, 110H,
95CS, 100CS, 105CS,
103W, 113W
Congratulations on purchasing the LP Morgan HideAway!
Cleaning and Maintenance
2. The side of the box marked “Viewing side” faces the projector.
3. The mounting brackets for the HideAway box are secured at both ends for easy
installation.
4. Hang the HideAway so that the Aluminium Trim is flush with the underside of the
ceiling.
5. When you have secured the HideAway box in the ceiling, open the access panel
and hang your LP Morgan Rondo Screen on the brackets supplied inside. (For A,
B & C sizes only).
6. Follow the instructions supplied with your screen for the correct wiring diagram.
Standard motorised screens will require an electrician to complete the installation.
7. Test that the screen operates correctly, and set the limits, if required. Follow the
instructions supplied with your screen to do this.
8. Screen should always retract to the Upper Limit previously set by the factory as the
default position. The fabric should not be exposed when in the closed position
ATTENTION:
Please read the instructions before beginning your installation
1. The HideAway fascia can be cleaned with a mild detergent, water and a soft
cloth to wash off any marks. Rinse and dry with a clean cloth or towel.
2. Refer to your LP Morgan Rondo Instructions for details on cleaning your
screen surface.

