background image

LRP GRAVIT VISION


2.4GHZ

deutsch

Kein Spielzeug. Nicht für Kinder unter 

14 Jahren geeignet. Bewahren Sie 

das Produkt außerhalb der Reichweite 

von kleinen Kindern auf. Beachten Sie 

unbedingt die folgenden Hinweise, da 

diese Ihr Produkt zerstören können 

und die Gewährleistung ausschließen. 

Nichtbeachtung dieser Hinweise können 

zu Sach- und Personenschäden und 

schweren Verletzungen führen! Lassen 

Sie das Produkt niemals unbeaufsichtigt, 

solange es eingeschaltet, in Betrieb 

oder mit einer Stromquelle verbunden 

ist. Im Falle eines Defekts könnte 

dies Feuer am Produkt oder seiner 

Umgebung verursachen. Vermeiden Sie 

falschen Anschluss oder Verpolung des 

Produkts. Alle Kabel und Verbindungen 

müssen gut isoliert sein. Kurzschlüsse 

können unter Umständen das Produkt 

zerstören. Dieses Produkt oder andere 

elektronische Komponenten dürfen 

niemals mit Wasser, Öl, Treibstoffen 

oder anderen elektrisch leitenden 

Flüssigkeiten in Berührung kommen, da 

diese Mineralien enthalten können, die 

elektronische Schaltkreise korrodieren 

lassen. Bei Kontakt mit diesen Stoffen 

müssen Sie sofort den Betrieb einstellen 

und das Produkt sorgfältig trocknen. Die 

Originalstecker und Originalkabel dürfen 

niemals verändert oder abgeschnit-

ten werden. Öffnen Sie niemals das 

Produkt und löten Sie keinesfalls auf 

der Platine oder anderen Komponenten 

Entnehmen Sie immer den Akku aus 

Ihrem Produkt bzw. trennen Sie das 

Produkt von der Stromquelle, wenn das 

Produkt nicht verwendet wird. Produkt 

regelmäßig auf Schäden überprüfen. 

Bei einem Schaden darf das Produkt bis 

zur vollständigen Reparatur nicht mehr 

verwendet werden. Laden Sie den Akku, 

der zum Betrieb dieses Produkts not-

wendig ist, immer außerhalb des Geräts 

auf. Sollte der Akku einen Defekt haben, 

kann dies zu einer Beschädigung des 

Produkts führen. Verbrauchte Batterien 

nicht in den Hausmüll geben, sondern 

nur bei den bestehenden Sammelstellen 

oder einem Sondermüllplatz abgeben. 

Öffnen Sie niemals einen Akku, eine 

Batterie oder einzelne Zellen. Laden Sie 

den Akku nur unter Aufsicht. Während 

der Ladung muss sich der Akku auf 

einer nicht brennbaren, hitzebestän-

digen Unterlage befinden. Desweiteren 

dürfen sich keine brennbaren oder leicht 

entzündlichen Gegenstände in der Nähe 

des Akkus befinden. Überschreiten Sie 

unter keinen Umständen den maximalen 

Lade-/Entladestrom, der empfohlen wird. 

Unter keinen Umständen darf ein NiMH/

LiPo-Akku tiefentladen werden. Der Akku 

darf nicht mit Feuer, Wasser oder ande-

ren Flüssigkeiten in Berührung kommen. 

Ladevorgang nur in trockenen Räumen 

durchführen. Die Aussenhaut des LiPo-

Akkus darf nicht beschädigt werden. 

Achten Sie also unbedingt darauf, dass 

keine scharfen Gegenstände wie Mes-

ser, Werkzeuge, Kohlefaserkanten oder 

Ähnliches den Akku beschädigen kön-

nen. Achten Sie darauf, dass der Akku 

nicht durch Herunterfallen, Schlagen, 

Verbiegen oder Ähnliches beschädigt 

wird. Beschädigte Zellen dürfen nicht 

mehr verwendet werden. Sollten die 

Zellen Verformungen, optische Beschä-

digungen oder Ähnliches aufweisen, so 

dürfen Sie diese nicht mehr verwenden. 

Verwenden Sie für die Ladung von 

NiMH/NiCd-Akkus nur Lade-/Entladege-

räte, die für diesen Akkutyp spezifiziert 

wurden. Verwenden Sie keinesfalls 

LiPo Lade-/Entladegeräte. Schalten Sie 

immer zuerst Ihren Sender ein, bevor 

Sie den Empfänger oder Fahrtenregler 

einschalten. Der Empfänger könnte 

Störsignale auffangen, Vollgas geben, 

und Ihr Modell beschädigen. Beim 

Ausschalten beachten Sie die umge-

kehrte Reihenfolge. Erst Empfänger und 

Fahrtenregler ausschalten, dann Sender 

ausschalten. Vermeiden Sie eine Über

-

lastung des Motors durch falsche oder 

zu lange Untersetzung. Blockieren Sie 

niemals den Lüfter oder die Kühlschlitze 

des Produkts. Sorgen Sie für gute Luft-

zirkulation um das Produkt. Schließen 

Sie sämtliche Teile der Ausrüstung sorg-

fältig an. Falls sich die Verbindungen 

durch Vibrationen lösen, können Sie die 

Kontrolle über das Modell verlieren. Der 

Hersteller kann nicht für Schäden verant-

wortlich gemacht werden, die infolge von 

Nichtbeachtung der Sicherheitshinweise 

und Warnungen verursacht werden. 

Verwenden Sie nur Original Ersatzteile. 

Wenn Sie Einstellungen am Modell 

vornehmen, stellen Sie vorher den 

Motor ab bzw. trennen Sie die Steck-

verbindung. Sie könnten unerwartet 

die Kontrolle über das Modell verlieren 

und es könnte dadurch eine gefährliche 

Situation entstehen. Schließen Sie 

niemals das Ladegerät an eine andere, 

als die angegebene Stromquelle an. 

Eine falscher Stromanschluss kann zur 

Explosion, Funkenflug, oder Feuer füh

-

ren. Personen, die nicht volljährig sind, 

dürfen nur unter Aufsicht Erwachsener 

fliegen. Wartungs- oder Reparaturar

-

beiten am Helikopter dürfen nur bei nicht 

angeschlossenem Flugakku durchge-

führt werden. Fliegen Sie niemals unter 

Alkoholeinfluss! Fliegen Sie nicht in der 

Nähe von Stromleitungen, Funkmasten, 

Personen, Tieren or Wasser. Suchen Sie 

Hilfe und Unterstützung erfahrener Mo-

dellbauer oder Ihres Händlers, wenn Sie 

kaum oder keine Erfahrung im Umgang 

mit ferngesteuerten Modellen haben. 

Das Modell und die Fernsteuerung 

immer ausschalten, solange diese nicht 

im Einsatz sind. Führen Sie vor jedem 

Flug einen Reichweitentest durch.

englisch

No toy. Not suitable for children under 

14 years. Keep the product out of the 

reach of children. Pay close attention to 

the following points, as they can destroy 

the product and void your warranty. 

Non-observance of these points can 

lead to property damage, personal and 

severe injuries! Never leave the product 

unsupervised while it is switched on, in 

use or connected with a power source. 

If a defect occurs, it could set fire to the 

product or the surroundings. Avoid in-

correct connections or connections with 

reversed polarity of the product. All wires 

and connections have to be well insula-

ted. Short-circuits can possibly destroy 

the product. Never allow this product or 

other electronic components to come in 

contact with water, oil or fuels or other 

electroconductive liquids, as these could 

contain minerals, which are harmful for 

electronic circuits. If this happens, stop 

the use of your product immediately 

and let it dry carefully. Never cut off or 

modify the original plugs and original 

wires. Never open the product and never 

solder on the PCB or other components. 

Always remove the battery from your 

product or disconnect the product from 

the power source, if the product is not in 

use. Chech product regularly if there are 

any damages. In the case of damage, 

the product must not be used until it has 

been completely repaired. Always char-

ge the battery, which is necessary to use 

this product, outside of the product. The 

product could get damaged, if a battery 

defect occurs. Do not throw away used 

batteries in the household garbage, but 

only give them to the collection stations 

or dispose them at a special garbage 

depot. Never open a battery or a single 

cell. Never leave the battery unattended 

while charging. During charging, the 

battery has to be kept on a non-flamma

-

ble, heat-resistant mat. Furthermore no 

flammable or highly inflammable objects 

may be close to the battery. Never 

exceed the maximum charge/discharge 

current, which is recommended. Under 

no circumstances a NiMH/LiPo-battery 

shall be deep discharged. The battery 

may never get in touch with fire, water or 

other liquids. Only charge in a dry place. 

The outside of the LiPo-battery must 

not be damaged. Therefore take special 

care, that no sharp objects like knifes, 

tools, carbon fibre edges or similar items 

can damage the battery. Pay special 

attention that the LiPo-battery does not 

get damaged or warped by letting it fall 

down, hitting it, bending it or by similar 

actions. Damaged packs cannot be used 

any longer. If the packs show signs of 

damage, are bent or similar, do not use 

the packs anymore. Only use chargers 

and dischargers, which are specified for 

NiMH/NiCd-batteries by the manufac-

turer. Never use chargers or dischargers, 

which are specified for LiPo-batteries! 

Always switch on your transmitter first 

before you switch on the receiver or 

the speed control. The receiver could 

receive interference signals, start full 

acceleration and damage your model. 

When you switch off, make sure you 

do so in the reverse sequence. First 

switch off the receiver and speed control, 

then switch off the transmitter. Avoid 

overloading the motor due to wrong or 

too long gear ratios. Do not block the fan 

or the cooling slits of the product. Ensure 

a good circulation of air around the pro-

duct, while in use. Always wire up all the 

parts of the equipment carefully. If any of 

the connections come loose as a result 

of vibration, you could loose control 

over your model. The manufacturer can 

not be held responsible for damages, 

which are a result of non-observance of 

the warning notes and security advices. 

Replace only with genuine parts. When 

making adjustments to the model, do so 

with the engine not running or the motor 

disconnected. You may unexpectedly 

lose control and create a dangerous 

situation. Never plug the charger into 

an outlet other than indicated voltage. 

Plugging the charger into the wrong out-

let may result in an explosion, sparking, 

or fire. Persons that are not of age are 

only allowed to fly under the supervision 

of an adult. Always disconnect the flight 

battery if you do maintenance or repair 

work on the helicopter. Never fly under 

the influence of alcohol! Do not fly 

near power lines, radio masts, people, 

animals or water. If you have only little 

or no experience with radio-controlled 

models, seek the help and advise from 

an experienced hobbyist or from your 

hobby shop. Always turn off the model 

and the transmitter while they are not in 

use. Always perform an operating range 

check prior to your flight.

französisch

Ce produit n‘est pas un jouet. Ne con-

vient pas pour les enfants de moins de 

14 ans. Ranger le produit hors de porté 

des enfants en bas âge. Absolument 

respecter les consignes ci-dessous sous 

peine de détruire le produit et d‘annuler 

la garantie. Le non-respect de ces consi-

gnes peut être à l‘origine de dommages 

matériels et personnels ainsi que de 

graves blessures ! Ne jamais laisser 

le produit sans surveillance tant qu‘il 

est allumé, fonctionne ou est raccordé 

à une source de courant. En cas de 

panne, ceci peut provoquer un incendie 

du produit ou de son environnement. 

Éviter tout branchement incorrect ou 

polarisation du produit. Tous les câbles 

et raccords doivent être correctement 

isolés. Dans certains cas, les courts-

circuits peuvent détruire le produit. 

Ce produit ou les autres composants 

électroniques ne doivent jamais entrer 

en contact avec de l‘eau, de l‘huile, 

des carburants ou tous autres liquides 

conducteurs, car ceux-ci contiennent des 

minéraux?? susceptibles de corroder les 

circuits électroniques. En cas de contact 

avec ces substances, il faut immédi-

atement interrompre le fonctionnement 

et soigneusement sécher le produit. 

Ne jamais modifier la fiche d‘origine ou 

couper le câble d‘origine. Ne jamais ou-

vrir le boîtier du produit, ni braser sur la 

platine ou d‘autres composants Toujours 

retirer l‘accu du produit ou débrancher le 

produit de la source de courant lorsqu‘il 

n‘est pas utilisé. Vérifier régulièrement 

le bon état du produit. Ne plus utiliser 

un appareil endommagé jusqu‘à sa 

réparation complète. Toujours charger 

l‘accu requis pour le fonctionnement 

de ce produit démonté de l‘appareil. Si 

l‘accu est défectueux, ceci peut endom-

mager le produit. Les piles usées ne 

doivent pas être jetées dans les ordures 

ménagères, mais doivent être recyclées 

dans les conteneurs ou les déchetteries. 

Ne jamais ouvrir un accu, une pile ou 

un élément. Ne jamais l‘accu se charger 

sans surveillance. Pendant le charge-

ment, l‘accu doit être installé sur une 

surface ininflammable et résistante aux 

températures élevées. Il convient en ou-

tre de proscrire tous objets combustibles 

ou aisément inflammables à proximité de 

l‘accu. Absolument proscrire tout dépas-

sement du courant de charge/décharge 

recommandé par la société. Absolument 

proscrire toute décharge profonde d‘un 

accu NiMH/LiPo. L‘accu ne doit jamais 

entrer en contact avec des flammes, de 

l‘eau ou tout autre liquide. Uniquement 

effectuer les recharges dans des locaux 

secs. La surface externe de l‘accu LiPo 

ne doit pas être endommagée. Il faut 

donc absolument veiller à ne pas en-

dommager l‘accu avec des objets tran-

chants tels que couteau, outil, chants en 

fibres de carbone ou autres. Veiller à ne 

pas endommager l‘accu par une chute, 

un choc, une torsion ou autre. Ne plus 

utiliser des éléments endommagés. Si 

les éléments sont déformés, visiblement 

endommagés ou autrement altérés, ils 

ne doivent plus être utilisés. Uniquement 

charger des accus NiMH/NiCd avec des 

chargeurs/déchargeurs spécifiés pour 

ce type d‘accu. Ne jamais utiliser des 

chargeurs/déchargeurs LiPo. Toujours 

commencer par allumer l‘émetteur avant 

d‘allumer le récepteur ou le régulateur 

de vitesse. Le récepteur pourrait recevoir 

des signaux parasites, accélérer à fond 

et endommager votre modèle. Procéder 

dans l‘ordre inverse pour l‘extinction. 

Éteindre d‘abord le récepteur et le 

régulateur de vitesse, puis éteindre 

l‘émetteur. Éviter toute surcharge du mo-

teur par une démultiplication incorrecte 

ou trop longue. Ne jamais obturer le ven-

tilateur ou les fentes de refroidissement 

du produit. Assurer une circulation d‘air 

convenable autour du produit. Raccorder 

tous les composants de l‘équipement 

avec soin. Si les raccords se détachent 

par des vibrations, vous pouvez 

perdre le contrôle de votre modèle. Le 

constructeur ne saurait être tenu respon-

sable pour les dommages causés par le 

non respect des consignes de sécurité et 

des avertissements. Uniquement utiliser 

des pièces de rechange d‘origine. 

WARNHINWEISE

WARNING NOTES

MISE EN GARDE

CONSEJOS DE 

SEGURIDAD

36

Summary of Contents for GRAVIT VISION

Page 1: ...BEDIENUNGSANLEITUNG USER GUIDE MODE D EMPLOI MANUAL DE INSTRUCCIONES MANUALE UTENTE ...

Page 2: ...Flugvorbereitung Preparations before flight Préparatifs pré vol Preparativos antes de volar 15 Flugsteuerung Flight control Commandes de vol Control en vuelo 18 Fehlerbehebung Troubleshooting guide Guide de dépannage Guia solucion de problemas 32 Explosionszeichnung Exploded view Dessin éclaté Despiece 33 Allgemeine Garantie und Gewährleistungs bestimmungen Repair procedures limited warranty Condi...

Page 3: ...e quadrocoptère est conçu pour une utilisation à l intérieur ou à l extérieur et présente des caractéristiques de vol extrêmement précises Le Gravit est prêt à voler sorti de l usine et les rotors sont protégés par une coque en plastique A bord du Gravit Vision une Camera action HD est installée vous pouvez l utiliser pour enregistrer vos vol en qualité HD Les fonctions vidéo et photo sont actionn...

Page 4: ... réglé d usine avec caméra HD 1x Carte mémoire Micro SD dans la caméra 1x Lecteur USB de carte Micro SD 1x Radiocommande 2 4GHz 1x Chargeur 1x Batterie de vol interchangeable 4x Rotors de rechange 1x Guide de l utilisateur Accessoires nécessaires 4x piles ou batteries AA par ex LRP 78221 batteries VTEC AA 3000mAh 1 Quadricóptero Gravit Vision RTF con cámara HD 1 Tarjeta Micro SD dentro de la cámar...

Page 5: ...ntes Diamètre 400mm Hauteur 75mm Masse prêt à voler 140g Radiocommande Radiocommande 2 4GHz Fonction trim Avant Arrière Droite Gauche Ecran LCD LED statut Bouton POWER UP Bouton FLIP LED Bouton Photo Vidéo Caméra action HD avec microphone intégré ESPECIFICACIONES TÉCNICAS Giróscopo de 6 ejes para espabilización automática Cuerpo protector de plástico rígido Batería LiPo reemplazable Luces de posic...

Page 6: ... um die eigene Achse bewegen Sie den Gashebel linker Hebel nach rechts oder links Wollen Sie seitwärts oder vor zurück fliegen bewegen Sie den Steuerhebel rechter Hebel der Fernsteuerung in die entsprechende Richtung Läßt sich Ihre Gravit nicht wie erwartet steuern benutzen Sie die Trimmung der Fernsteuerung um das Flugverhalten zu korrigieren Details zur Flugsteuerung der Trimmung und des LCD Dis...

Page 7: ...ant le chargeur inclus Pour cela branchez le chargeur à une prise secteur et connectez la batterie au chargeur Lorsque la LED du chargeur passe au vert la batterie est entièrement chargée et elle peut être déconnectée pour plus de détails voir page 15 Vous pouvez introduire la batterie chargée dans le support prévu à cet effet sur la face inférieure de votre Gravit ne con nectez pas la batterie im...

Page 8: ...n encendidos Para hacer volar su Gravit mueva el stick de aceleración stick izquierdo hacia arriba Para aterrizarlo muévalo hacia abajo Para girar su Gravit alrededor de su eje mueva el stick de aceleración stick izquierdo hacia la izquierda o hacia la derecha Si quiere desplazarlo lateralmente o adelante atrás mueva el stick de dirección stick derecho en la dirección correspondiente En el caso de...

Page 9: ...uo Gravit muovi lo stick acceleratore stick sinistro verso l alto per farlo scendere e atterrare muovilo verso il basso Per far ruotare il Gravit su se stesso muovi lo stick acceleratore stick sinistro verso destra o verso sinistra Se vuoi muoverti lateralmente o avanti e indietro muovi lo stick dello sterzo stick destro nella direzione corrispondente Nel caso in cui il tuo Gravit non dovesse comp...

Page 10: ...posizione LED Vorne Front Avant Parte delantera Frontale Davanti Schutz aus Kunststoff Plastic guard Garde dure Cuerpo protector dura Protezione in Plastica Akkuhalter Battery tray Compartement accu Alojamiento de la batería Scomparto batteria Akku Verbindungsstecker Battery connector Connecteur accu Conector de la batería Connettore batteria EINSETZEN DER AKKUS INSERTION OF BATTERIES INSERTION DE...

Page 11: ...che de contrôle aileron profondeur Stick de profundidad alabeo Comando Avanti Indietro Spostamento laterale Nick Trimmung Elevator trim Compensateur profondeur Trim de profundidad Trim Avanti Indietro Schub Gier Knüppel Throttle Yaw stick Throttle stick Manette de gaz contrôle de lacet Stick de aceleración dirección Comando Acceleratore Rotazione Yaw POWER UP POWER UP POWER UP POWER UP POWER UP FL...

Page 12: ...t auf Schub Trimmungs Anzeige Nick Trimmungs Anzeige Gier Trimmungs Anzeige Roll Trimmungs Anzeige Visuelle Power Anzeige Schub Anzeige für alle Kanäle STATUS LED LED does not glow Transmitter is switched off LED is blinking red Transmitter has not yet established a connection to Gravit please wait LED glows red Transmitter is switched on and operatio nal LCD DISPLAY Connection Indicator Here you ...

Page 13: ...uí puede ver el estado actual de carga de su batería pilas Cámbielas cuando solo queden una o dos barras Foto Display El símbolo de Foto se enciende brevemente cuando hace una foto con la cámara de vídeo Video Display Siempre que el símbolo aparezca en la pantalla LCD la cámara de vídeo de su Gravit estará gra bando Indicador Trim de Aceleración Indicador Trim de profundidad Indicador Trim de dire...

Page 14: ... la direction correspondante Funcionamiento de un Quadrocóptero El quadricóptero controla su direccion de vuelo variando la velocidad de rotación de sus cuatro motores El modelo es capaz de moverse en la dirección correcta gracias a que los rotores pueden funcionar a distinta velocidad y generar distintos empujes Por ejemplo Si usted le da la señal a su Quadricóptero de ir adelante moviendo el sti...

Page 15: ...chargeur est vert Ensuite vous pouvez brancher la batterie de vol sur le chargeur Le processus de la charge s affiche en rouge sur la LED d état Dès que la charge de la batterie est terminée complètement la LED est de nouveau verte Vous pouvez débrancher la batterie du chargeur et le chargeur de la prise ATTENTION Ne laissez jamais l accu sans surveillance pendant en charge Ne Jamais laissez l ali...

Page 16: ...room where no uninvolved persons are present Before connecting the battery to the Gravit put it on an even horizontal surface Only by doing so the gyro of the Gravit can calibrate correctly and thus ensure a controllable flight session Please avoid fast jerky travel of the two control sticks when learning to fly the Gravit The Gravit reacts strongly and quickly to your control commands and require...

Page 17: ... flight PRÉPARER LA GRAVIT POUR DÉCOLLER Allumez la radiocommande d abord L écran LCD s allume un signal sonore est émis et le LED rouge s allume Puis connectez la batterie au Gravit Les LEDs de position sur la face inférieure du Gravit clignoteront rapidement Placez l appareil sur une surface plane Après un court instant le Gravit établi une connection avec la radiocommande et les LEDs de positio...

Page 18: ...itesse de rotation des rotors de la quadricoptère donc elle commence à monter En déplaçant le manche vers l arrière vous diminuez la vitesse de rotation des rotors ainsi le Gravit commence à descendre Le grand chiffre au milieu d écran LCD vous donne des informations sur l amplitude de votre manche 0 correspond à arrêt complet 100 est égal à pleins gaz Si les hélices du Gravit se mettent à tourner...

Page 19: ...oving the control stick you can correct this by using the yaw trim If the Gravit rotates clockwise push the yaw trim button to the left and vice versa By doing so you can counter the unwanted rotation movement by pushing the yaw trim in the opposite direction You can read the degree of yaw trim you are currently using from the LCD Tourner gauche droite Lacet À l aide de la fonction de lacet ou dir...

Page 20: ...ccelerate The bigger the travel of the stick the faster the Gravit will fly Should any forward or backward movement occur without the stick being moved you an correct that by using the elevator trim If the Gravit flies forward move the elevator trim backwards and vice versa By doing so you counter the unwanted movement by pushing the trim in the opposite direction You can read the degree of elevat...

Page 21: ... In case that the Gravit hovers sidewards without the stick being moved you can correct this using the aileron trim If the Gravit hovers to the left move the aileron trim to the right and vice versa The degree of set aileron trim can be read from the LCD Vol stationnaire gauche droite Si vous voulez exécuter un mouvement vers gauche ou droite sans faire pivoter la Gra vit c est à dire en vol stati...

Page 22: ...t puis continue à voler normalement Assurez vous de disposer de suffisamment d espace avant d effectuer un looping Le Gravit ne doit heurter ni le plafond ni le sol ou tout autre obstacle lors d un looping Botón FLIP Cuando pulse una vez el botón FLIP botón esquina superior derecha el Gravit realizará una vuelta hacia adelante y luego continuará volando con normalidad Asegúrese de que tiene sufici...

Page 23: ... Level 3 100 of maximum flight power is available In addition to the maximum flight power Power Level 3 also gives you access to the advanced looping function please refer to chapter Advanced looping function When you are in Power Level 3 and press the POWER UP button one more time the Gravit is back to Power Level 1 again You will hear a single beep and you are back to 40 flight power again Pleas...

Page 24: ...olo puede hacer looping en una dirección predeterminada que nunca cambia Tenga en cuenta que cuando utiliza el Nivel de Velocidad 3 el stick de control derecho realiza una doble function Tan pronto como mueva el stick ligeramente podrá controlar de nuevo su Gravit con normalidad Pero si mueve con más fuerza el stick derecho su Gravit realizará un looping en la dirección del stick Al principio esta...

Page 25: ...l leuchtet dabei kurz auf dem LCD ihrer Fernsteuerung auf Photo button By pressing the photo button of your transmitter shortly you can take a picture with the HD camera of your Gravit The photo icon is flashing up shortly on the LCD of your transmitter Bouton photo En pressant rapidement le bouton photo de la radiocommande vous pouvez prendre une photo avec la caméra HD du Gravit L icone photo cl...

Page 26: ... camera HD presente sul tuo Gravit Durante una registrazione in corso l icona della videocamera sarà presente nello schermo LCD della tua trasmittente Premendo nuovamente il pulsante Video interromperai la registrazione del video L icona della videocamera scomparirà dallo schermo LCD della tua TX Wenn Sie mehr über die HD Action Camera Ihrer Gravit wissen wollen lesen Sie dazu bitte das Kapitel Di...

Page 27: ...encia simula los rotores en funcionamiento en el LCD Cuanto más acelera más rápido se mueve la animación en pantalla Ambas funciones son trucos técnicos y su apariencia es genial pero no son necesarias para volar Así que no deje que le distraigan en exceso Indicatore escursione per tutti i canali e indicatore visivo della potenza L indicatore dell escursione sullo schermo LCD rappresenta il movime...

Page 28: ...ons the standard adjustment of the lens pointing slightly downwards is perfectly ok If you want to browse the movies and pictures you have taken with you HD action cam please proceed as follows Gently push the Micro SD card further into it s tray at the back of the camera and then let loose The card will unlock itself and will be ejected from the memory card tray Now put the card into the provided...

Page 29: ...su alojamiento en la parte trasera de la cámara y retíre su dedo La tarjeta quedará libre y podrá retirarla de su alojamiento Ahora coloque la tarjeta en el lector USB suministrado e introdúzcalo en un puerto USB libre de su PC o portátil Ahora la tarjeta de memoria se muestra en su ordenador como un Pendrive y puedes buscar copiar mover y eliminar los archivos como con cualquier archivo en su ord...

Page 30: ...ht identisch sind und nicht beliebig getauscht werden dürfen Die korrekte Propeller Anordung ist wie folgt Am Propeller vorne links BLAU B Am Propeller vorne rechts BLAU A Am Propeller hinten links SCHWARZ A Am Propeller hinten rechts SCHWARZ B Um die Propeller zu tauschen lösen Sie bitte die kleine Schrau be welche den Propeller seitwärts am Schaft befestigt Dann ziehen Sie den Propeller gleichmä...

Page 31: ...les Para realizar la correcta sustitu ción de las hélices proceda de la siguiente manera Hélice delantera izquierda Azul B Hélice delantera derecha Azul A Hélice trasera izquierda Negra A Hélice trasera derecha Negra B Para cambiar las hélices afloje el pequeño tornillo que fija la hélice al eje Para retirarlo tire suavemente hacia arriba No olvide volver a atornillar las nuevas hélices cuando las...

Page 32: ...hez l accu et coupez l émetteur Ensuite ré allumez l émetteur à nouveau connectez l accu de vol à la Gravit et attendez que la connexion est établis Espere unos segundos No debe haber conexión alguna quite la batería y apague la emisora A continuación encienda la emisora conecte la batería al Gravit y espere a que se establezca la conexión Aspetta un momento Se non c è una connessione stabilita sc...

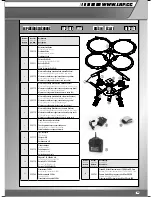
Page 33: ...e linksdehend schwarzes Gehäuse Motor with linkage and cage counter clockwise black cage Moteur avec biellette et cage sens anti horaire cage noire Motor giro izq incl soporte carcasa negra Motore con collegamenti senso anti orario cassa nero 7 222776 Plasik Chassis mit Batterie Halter Plastic chassis with battery tray Chassis plastique avec support de batterie Chasis plástico con alojamiento bate...

Page 34: ... the original date of purchase verified by sales receipt This limited warranty doesn t cover defects which are a result of misuse improper maintenance outside interference or mechanical damage This especially applies on already used batteries or batteries which show signs of heavy usage Damages or output losses due to improper handling and or overload are not a product fault Signs of wear loss of ...

Page 35: ... pedido lo antes posible adjunte por favor con su envío una descripción detallada del fallo del aparato así como su dirección y número de teléfono En caso de que el producto defectuoso enviado ya no sea fabricado por LRP y no podamos repararlo pondremos a su disposición otro producto de la serie posterior con características equivalentes a su producto Los datos indicados por LRP en cuanto al peso ...

Page 36: ...m at a special garbage depot Never open a battery or a single cell Never leave the battery unattended while charging During charging the battery has to be kept on a non flamma ble heat resistant mat Furthermore no flammable or highly inflammable objects may be close to the battery Never exceed the maximum charge discharge current which is recommended Under no circumstances a NiMH LiPo battery shal...

Page 37: ...ito l accumulatore quando è in carica Quando l accumulatore è in carica deve poggiare su una base non infiammabile e termoresistente Inoltre nelle vicinanze dell accumulatore non ci devono essere oggetti infiammabili o facilmente combustibili Non superare assolutamente la corrente massima di carico scarico consigliata da Un accumulatore NiMH LiPo non deve mai essere scaricato completamente L accum...

Page 38: ...ilmemelidir Ürünü asla açmayınız ya da hiçbir şartta platin veya diğer bileşenler üzerinde lehim yapmayınız Ürününüz kullanılmadığı zamanlar daima ürününüzden bataryayı çıkartın ve veya ürünü akım kaynağından ayırın Ürünü düzenli olarak hasara karşı kontrol edin Bir hasar söz konusu olduğunda ürün tamamen tamir görmeden tekrar kullanılmamalıdır Bu ürünün işletimi için gerekli olan bataryayı daima ...

Page 39: ...ånga utväxlin gar Blockera aldrig produktens fläkt eller kylslitsar Sörj för att luften kan cirkulera ordentligt runtom produkten Anslut om sorgsfullt samtliga delar till utrustningen Om förbindningarna skulle lossa genom vibrationer kan du förlora kontrollen över modellen Tillverkaren kan inte göras ansvarig för sådana skador vilka orsa kas av att säkerhetshänvisningarna och varningarna inte åtfö...

Page 40: ...ektronicznych z wodą olejem paliwem silnikowym lub innymi płynami przewodzącymi prąd elektryczny ponieważ ciecze te zawierać mogą minerały będące przyczyną korodowania elektronicznych układów przełączających W przypadku zetknięcia się z tymi substancjami należy natychmiast przerwać eksploatację urządzenia a następnie doprowadzić do całkowitego wyschnięcia produktu Nie wolno zmieniać i obcinać wtyc...

Page 41: ... dėmesį kad LiPo baterija nebūtų pažeista numetus sutrenkus suspaudus ar panašiai Pažeistų elementų naudoti nebegalima Jei matosi kad elementas pažeistas pasikeitė jo forma ar panašiai jo naudoti nebegalima Naudokite tik gamintojo nurodytus įkroviklius iškroviklius skirtus NiMH NiCd baterijoms Niekada nenaudokite įkroviklių iškroviklių skirtų LiPo baterijoms Visada pirmiau įjunkite siųstuvą prieš ...

Page 42: ...da ja garantii ei kehti Nende juhiste eiramine võib tekitada asja ja isikukahjusid ning põhjustada raskeid vigastusi Ärge jätke toodet kunagi järelvalveta kui ta on sisse lülitatud töötab või on ühendatud vooluallikaga Juhuslik defekt võib põhju stada toote või selle ümbruse süttimise Vältige toote ebaõiget ühendamist või polaarsust Kõik kaablid ja ühendused peavad olema hästi isoleeritud lühiühen...

Page 43: ...determined by turning the equipment off and on the user is encouraged to try to correct the interference by one or more of the following measures Reorient or relocate the receiving antenna Increase the separation between the equipment and receiver Connect the equipment into an outlet on a circuit different from that of the receiver Consult the dealer or an experienced radio TV technician for help ...

Page 44: ...577 4624 0900 LRP GMBH 0 49eur Minute aus dem deutschen Festnetz Mobilfunkpreise können abweichen Technik Service Hotline für A 0900 270 313 0 73eur Minute aus dem österreichischen Festnetz Mobilfunkpreise können abweichen info LRP cc www LRP cc HA00054 2015 by LRP electronic GmbH LRP GRAVIT VISION 2 4GHZ ...

Reviews: