background image

Warranty 


xi 

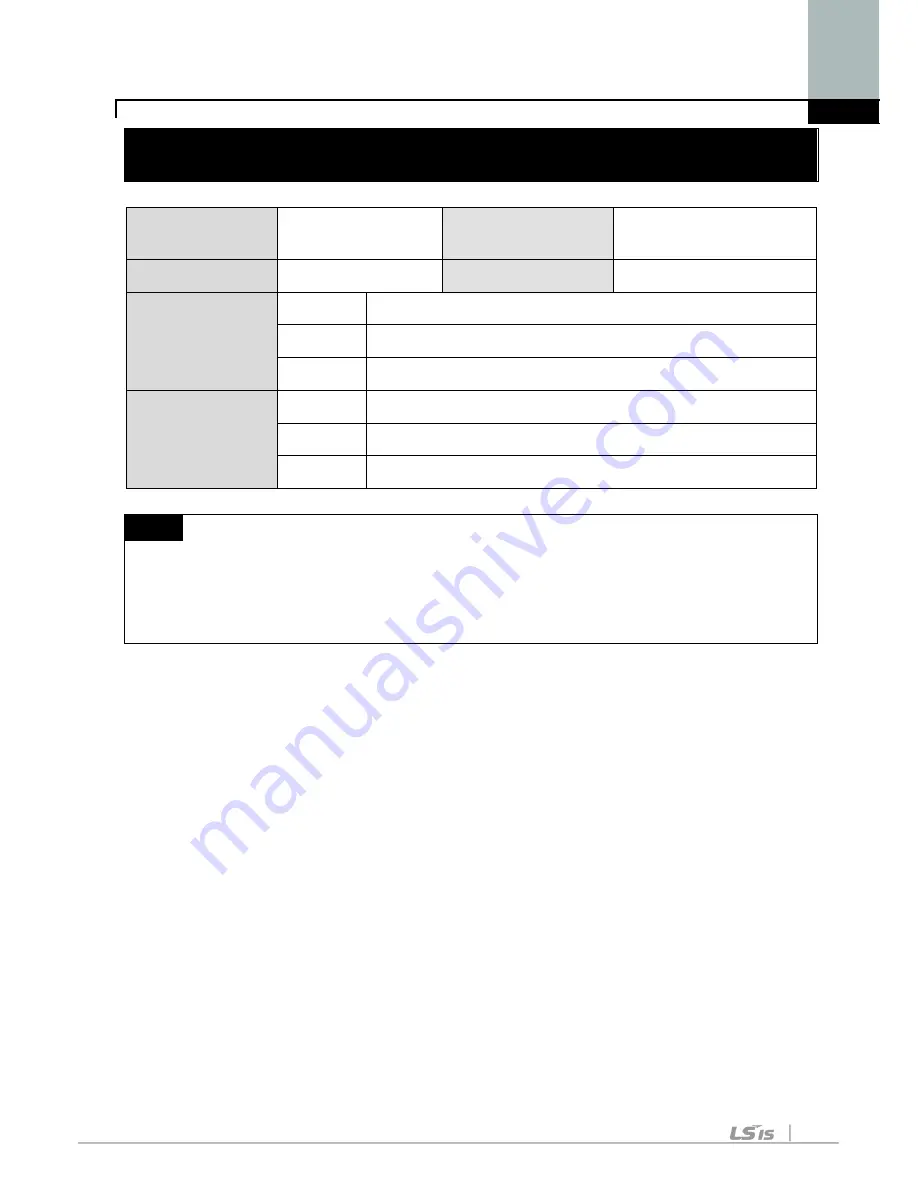
WARRANTY 


Maker 

LSIS Co., Ltd 

Installation 
(start-up) date 


Model No. 

SV-iC5 

Warranty period   

Customer info 

Name 


Address   
Tel. 


Sales office 

Name 


Address   
Tel. 


Note 


This product has been manufactured through the strict QC control and 
inspection of LSIS. Warranty period is 12 months after installation or 18 
months after manufactured when the installation date is unidentified. 
However, the guarantee term may vary on the sales term. 


In-warranty service information 


If the defective part has been identified under normal and proper use within the 
guarantee term, contact your local authorized LS distributor or LS Service center. 


Out-of-warranty service information 


The guarantee will not apply in the following cases. 


Troubles are attributable to a user’s intentional negligence or carelessness. 


Damage was caused by abnormal voltage and peripheral devices’ malfunction (failure). 


Damage was caused by natural disasters(earthquake, fire, flooding, lightning and etc). 


When LS nameplate is not attached. 


Summary of Contents for 004iC5-1

Page 1: ...ous voltage may be present Keep operating instructions handy for quick reference Read this manual carefully to maximize the performance of SV iC5 series inverter and ensure its safe use WARNING Do not remove the cover while power is applied or the unit is in operation Otherwise electric shock could occur Do not run the inverter with the front cover removed Otherwise you may get an electric shock d...

Page 2: ...an inverter with parts missing even if the installation is complete Otherwise electric shock could occur Do not allow lint paper wood chips dust metallic chips or other foreign matter into the drive Otherwise fire or accident could occur OPERATING PRECAUTIONS 1 Handling and installation Handle according to the weight of the product Do not stack the inverter boxes higher than the number recommended...

Page 3: ...et an electric shock or have bodily injury 3 Trial run Check all parameters prior to operation Changing parameter values might be required depending on the load Always apply permissible range of voltage to the each terminal as indicated in this manual Otherwise it could lead to inverter damage 4 Operation precautions When the Auto restart function is selected stay away from the equipment as a moto...

Page 4: ...ed 5 Fault prevention precautions Provide a safety backup such as an emergency brake which will prevent the machine and equipment from hazardous conditions if the inverter fails 6 Maintenance inspection and parts replacement Do not conduct a megger insulation resistance test on the control circuit of the inverter Refer to Chapter 8 Troubleshooting and Maintenance parts replacement 7 Disposal Handl...

Page 5: ...tions on how to install the SV iC5 inverter 3 Wiring Provides instructions on how to wire the SV iC5 inverter 4 Basic Configuration Describes how to connect the optional peripheral devices to the inverter 5 Programming Keypad Illustrates keypad features and display 6 Basic Operation Provides instructions for quick start of the inverter 7 Function List Outlines the parameter information of the SV i...

Page 6: ... NPN Selection and Connector for Communication Option 3 5 4 Basic Configuration 4 1 4 1 Connection of Peripheral Devices to the Inverter 4 1 4 2 Recommended MCCB Earth Leakage Circuit Breaker ELB and Magnetic Contactor Specification4 2 4 3 Recommendable AC DC Reactor 4 2 5 Programming Keypad 5 1 5 1 Keypad Features 5 1 5 2 Alpha numeric View on the LED Keypad 5 2 5 3 Moving to Other Groups 5 3 5 4...

Page 7: ...d Maintenance 8 1 8 1 Protective Functions 8 1 8 2 Fault Remedy 8 3 8 3 Precautions for Maintenance and Inspection 8 5 8 4 Check Points 8 5 8 5 Part Replacements 8 6 9 Specifications 9 1 9 1 Technical Data 9 1 9 2 Temperature Derating Information 9 3 DECLARATION OF CONFORMITY v TECHNICAL STANDARDS APPLIED vi EMC INSTALLATION GUIDE vii UL Marking viii ...

Page 8: ......

Page 9: ...2 2 kW Accessories If you have found any discrepancy damage etc contact your sales representative Preparations of instruments and parts required for operation Instruments and parts to be prepared depend on how the inverter is operated Prepare equipment and parts as necessary Installation To operate the inverter with high performance for a long time install the inverter in a proper place in the cor...

Page 10: ...ve it when wiring input power and motor Status LED Display Window Inverter Nameplate 4 Way button for parameter setting Up Down Left Right key Analog Input Output Terminal NPN PNP Select Switch Keypad Potentiometer STOP RST Button RUN Button Inverter Ground Terminal Caution Remove the bottom cover to access the terminal Body slot When front cover is pulled back till this line and lifted up it can ...

Page 11: ...way button will appear Use this button for parameter setting and changing the value Removal for wiring The method is the same as shown in 1 Hold both sides of the cover and lift upward to completely remove from the main body 3 Lift it up to remove 2 Hold both sides of this part 2 1 2 1 Push down the cover until cover top matches the side slot 1 Parallel 2 Push it down 4 Way Button Side slot 1 Pres...

Page 12: ...s control terminals after finishing power terminal wiring reinstall the bottom cover and then start wiring control terminals Note Use the recommended size of the cable as indicated in this manual ONLY Using larger size cable may lead to mis wiring or damage the insulation Note Input Power Terminals name is labeled here Note Control Terminals name is labeled here ...

Page 13: ...n Ambient 40 C UL 508C Ambient Temp Checking Location The inverter will be very hot during operation Install it on a non combustible surface Mount the inverter on a flat vertical and level surface Inverter orientation must be vertical top up for proper heat dissipation Also leave sufficient clearances around the inverter Protect from moisture and direct sunlight Do not install the inverter in any ...

Page 14: ... temperature of the inverters below the permissible value If they are installed in improper positions the ambient temperature of the inverters will rise and ventilation effect will be reduced Install the inverter using screws or bolts to insure the inverter is firmly fastened For installing multiple inverters in panel Note Take caution on proper heat ventillation when installing inverters and fan ...

Page 15: ...2 Installation 2 3 2 2 Dimensions 0 4 0 75 kW 1 2 1 HP Dimension 004iC5 1 004iC5 1F 008iC5 1 008iC5 1F W 79 79 79 79 H 143 143 143 143 D 143 143 143 143 Weight Kg 0 87 0 95 0 89 0 97 W D H ...

Page 16: ...2 Installation 2 4 1 5 2 2 kW 2 3HP Dimension 015iC5 1 015iC5 1F 022iC5 1 022iC5 1F W 156 156 156 156 H 143 143 143 143 D 143 143 143 143 Weight Kg 1 79 1 94 1 85 2 W D H ...

Page 17: ...Common Terminal for P1 P5 AM P24 24V power for P1 P5 Initial setting FX Forward run RX Reverse run BX Emergency stop JOG Jog operation RST Fault reset 12V power supply for potentiometer 0 10V Analog Input terminal 0 20mA Analog Input terminal AM Multi function Analog output terminal 0 10V CM Common terminal for AM terminal EXTG Multi function open collector output terminal Ground T M for MO A cont...

Page 18: ...t If tester is available check the voltage between P1 and N terminals Wiring should be performed after verifying that input voltage in inverter DC circuitry is all exhausted Applying input power supply to the output terminals U V and W causes internal inverter damage Use ring terminals with insulated caps when wiring the input power and motor wiring Do not leave wire fragments inside the inverter ...

Page 19: ...screw in the case or chassis etc for grounding Note Remove front and bottom cover before starting grounding Caution Follow the specifications below when grounding the inverter Model 004iC5 008iC5 1 1F 015iC5 022iC5 1 1F Wire size 2mm2 2mm2 Lug 2mm2 3φ 2mm2 3φ Ground impedance Below 100 ohm Below 100 ohm Dedicated Ground Terminal Dedicated Ground Terminal ...

Page 20: ...ange 0 20mA AM Multi function Analog output 22AWG 0 3 mm2 0 4 Max outputvoltage 11 V Max outputcurrent 10mA MO Multi function open collector output T M 20AWG 0 5 mm2 0 4 BelowDC26V 100mA EXTG Ground T M for MO 20AWG 0 5 mm2 0 4 P24 24V Power Supply for P1 P5 20AWG 0 5 mm2 0 4 Max outputcurrent 10mA 30A Multi function relay A B contact output 20AWG 0 5 mm2 0 4 BelowAC250V 0 25A BelowDC30V 2A 30B 20...

Page 21: ...vailable for SV iC5 Refer to MODBUS RTU option card manual for more details 2 When using 24V external power supply PNP 1 When using P24 NPN 2 Communication Option Card Connector Install Communication option CM FX 24X 24I CM Resistor Resistor Resistor CPU CM FX 24X 24I CM CM Resistor Resistor Resistor CPU S4 ...

Page 22: ...3 Wiring 3 6 ...

Page 23: ...ker ELB Select circuit breakers with care A large inrush current may flow in the inverter at power on Magnetic Contactor Install it if necessary When installed do not use it for the purpose of starting or stopping Otherwise it could lead to reduction in product life AC DC Reactors The reactors must be used when the power factor is to be improved or the inverter is installed near a large power supp...

Page 24: ...ntactor 004iC5 1 1F ABS33c UTE100 EBS33c MC 6a 008iC5 1 1F MC 9a MC 9b 015iC5 1 1F MC 18a MC 18b 022iC5 1 1F MC 22b 4 3 Recommendable AC DC Reactor Model AC input fuse AC reactor DC reactor 004iC5 1 1F 10A 2 13mH 5 7A 7 00mH 5 4A 008iC5 1 1F 20A 1 20mH 10A 4 05mH 9 2A 015iC5 1 1F 30A 0 88mH 14A 2 92mH 13 A 022iC5 1 1F 40A 0 56mH 20A 1 98mH 19 A ...

Page 25: ...row and Prog Ent keys UP Used to scroll through codes or increase parameter value Down Used to scroll through codes or decrease parameter value Left Used to jump to other parameter groups or move a cursor to the left to change the parameter value Right Used to jump to other parameter groups or move cursor to the right to change the parameter value Prog Ent key Used to set the parameter value or sa...

Page 26: ...5 Programming Keypad 5 2 5 2 Alpha numeric View on the LED Keypad 0 A K U 1 B L V 2 C M W 3 D N X 4 E O Y 5 F P Z 6 G Q 7 H R 8 I S 9 J T ...

Page 27: ...ation I O Input Output group Parameters necessary to make up a sequence using Multi function input output terminal Moving to other parameter groups is only available in the first code of each group as the figure shown below MovingtoothergroupsusingtheRight key MovingtoothergroupsusingtheLeft key Function group 1 Function group 2 I O group Drive group n Function group 1 Function group 2 I O group D...

Page 28: ...displayed Press the right arrow key once again to return to Drive group 5 Return to the 1st code in Drive group 0 0 If the left arrow key is used the above will be executed in the reverse order How to move to other groups from any codes other than the 1st code When you would like to move from the F 15 to function group 2 1 In F 15 press the Left or Right arrow key Pressing the key goes to the firs...

Page 29: ...again 5 Return to the first code of Drive group Use Down key for the opposite order Code change in Function group 1 When moving from the F 0 to the F 15 directly Function group 1 1 Press the Prog Ent key in F 0 2 1 the code number of F1 is displayed Use the Up key to set to 5 3 05 is displayed by pressing the Left key once to move the cursor to the left The numeral having a cursor is displayed bri...

Page 30: ...nd I O group Note Some codes will be skipped in the middle of increment decrement for code change That is because it is programmed that some codes are intentionally left blank for future use or the codes user does not use are invisible For example when F23 High low frequency limit select is set to O No F24 High frequency limit and F23 Low frequency limit are not displayed during code change But Wh...

Page 31: ... The digit 5 in 5 0 is active Then press the Up key once 5 The value is increased to 6 0 Press the Left key to move the cursor to the left 6 0 60 is displayed The first 0 in 0 60 is active Press the Up key once 7 16 0 is set Press the Prog Ent key once 16 0 is blinking Press the Prog Ent key once again to return to the parameter name 8 ACC is displayed Accel time is changed from 5 0 to 16 0 sec In...

Page 32: ...e Press the Left key once 6 Press the Left key once 7 00 0 is displayed with the first 0 active but the actual value 0 05 remains unchanged Press the Up key to set to 3 8 Press the Prog Ent key once 30 0 is blinking Press the Prog Ent key once 9 Run frequency is set to 30 0 when the blinking stops Three digit LED display is provided in SV iC5 Series However digit expansion is available using the L...

Page 33: ...se the value to 2 by pressing the Up key 5 27 is displayed Press the Prog Ent key once 6 The parameter number F27 is displayed Press the Prog Ent key once to check the set value 7 The set value is 0 Increase the value to 1 by pressing the Up key 8 Press the Prog Ent key once 9 F27 is displayed after 5 stops blinking Changing parameter value has been complete Press the either Left or Right key once...

Page 34: ...2 Monitoring output current is provided in this parameter Press the Prog Ent key once to check the current 3 Present output current is 5 0 A Press the Prog Ent key once to return to the parameter name 4 Return to the output current monitoring code Other parameters in Drive group such as dCL Inverter DC link current or vOL Inverter output voltage can be monitored via the same method ...

Page 35: ...code of Function group 1 The preset frequency is 57 6Hz Continue pressing the Up Down key until rPM is displayed 2 Motor rpm can be monitored in this code Press the Prog Ent key once 3 Last three digits 730 in 1730 rpm is shown on the LED Press the Left key once 4 First three digits 173 in 1730 rpm are shown on the LED Press the Prog Ent key once 5 Return to the rPM code ...

Page 36: ...e time of fault 30 0 is displayed Press the Up key once 3 The output current at the time of fault is displayed Press the Up key once 4 Operating status is displayed A fault occurred during acceleration Press the STOP RST key once 5 A fault condition is cleared and nOn is displayed When more than one fault occur at the same time Drive group Over current Over voltage Motor overheating Maximum three ...

Page 37: ...ove the cursor to the left 4 03 is displayed 0 in 03 is active Increase the value to 9 by pressing the Up key 5 93 is set Press the Prog Ent key once 6 The parameter number is displayed Press the Prog Ent key once 7 Present setting is 0 Press the Up key once to set to 1 to activate parameter initialize 8 Press the Prog Ent key once 9 Return to the parameter number after blinking Parameter initiali...

Page 38: ...5 Programming Keypad 5 14 ...

Page 39: ...t Press the Left key twice 4 00 0 is displayed and the first 0 is lit Press the Up key 5 10 0 is set Press the Prog Ent key once 10 0 is blinking Press the Prog Ent key once 6 Run frequency is set to 10 0 Hz when the blinking stops Turn on the switch between P1 FX and CM terminals 7 FWD Forward run lamp begins to blink and accelerating frequency is displayed on the LED When target run frequency 10...

Page 40: ...fter 2 stops blinking Turn the potentiometer to set to 10 0 Hz in either Max or Min direction 7 Turn on the switch between P1 FX and CM See Wiring below FWD lamp begins to blink and the accelerating frequency is displayed on the LED When run frequency 10Hz is reached the value is displayed as shown left Turn off the switch between P1 FX and CM terminals 8 FWD lamp begins to blink and the decelerat...

Page 41: ...e present frequency setting method 0 is run via keypad Press the Up key twice 9 After checking 2 frequency setting via potentiometer press the Prog Ent key 10 Frq is displayed after 2 is blinking Frequency setting is set via the potentiometer on the keypad Turn the potentiometer to set to 10 0 Hz in either Max or Min direction 11 Press the Run key on the keypad FWD lamp begins to blink and acceler...

Page 42: ...6 Basic Operation 6 4 ...

Page 43: ... Output Frequency During Multi step operation Multi step frequency 0 It cannot be set greater than F21 Max frequency 0 0 O ACC Accel time 0 6000 sec During Multi Accel Decel operation this parameter serves as Accel Decel time 0 5 0 O dEC Decel time 10 0 O Drv Drive mode Run Stop mode 0 3 0 Run Stop via Run Stop key on the keypad 1 X 1 Run Stop via control terminal FX Motor forward run RX Motor rev...

Page 44: ...is parameter sets Multi Step frequency 3 during Multi step operation 30 0 O CUr Output current This parameter displays the output current to the motor rPM Motor RPM This parameter displays the number of Motor RPM dCL Inverter DC link voltage This parameter displays DC link voltage inside the inverter vOL User display select This parameter displays the item selected at H73 Monitoring item select vO...

Page 45: ... is reached the inverter holds the output for the setting time before starting DC brake 0 1 X F10 DC Brake voltage 0 200 This parameter sets the amount of DC voltage applied to a motor It is set in percent of H33 Motor rated current 50 X F11 DC Brake time 0 60 sec This parameter sets the time taken to apply DC current to a motor while motor is at a stop 1 0 X F12 DC Brake start voltage 0 200 This ...

Page 46: ...ate In case of using a 50Hz motor set this to 50Hz 60 0 X F23 Start frequency 0 1 10 Hz The inverter starts to output its voltage at this frequency It is the frequency low limit 0 5 X F24 Frequency high low limit select 0 1 This parameter sets high and low limit of run frequency 0 X F25 2 Frequency high limit 0 400 Hz This parameter sets high limit of the run frequency It cannot be set above F21 M...

Page 47: ...parameters cannot be set above those of higher numbered 15 0 X F32 User V F voltage 1 0 100 25 X F33 User V F frequency 2 0 400 Hz 30 0 X F34 User V F voltage 2 0 100 50 X F35 User V F frequency 3 0 400 Hz 45 0 X F36 User V F voltage 3 0 100 75 X F37 User V F frequency 4 0 400 Hz 60 0 X F38 User V F voltage 4 0 100 100 X F39 Output voltage adjustment 40 110 This parameter adjusts the amount of out...

Page 48: ...using a separate motor to power a cooling fan F54 Overload warning level 30 150 This parameter sets the amount of current to issue an alarm signal at a relay or multi function output terminal see I54 I55 The set value is the percentage of H33 Motor rated current 150 0 F55 Overload warning time 0 30 sec This parameter issues an alarm signal when the current greater than F54 Overload warning level f...

Page 49: ...n decelerating during constant speed run and stops decelerating during deceleration 0 X During Decelerati on During constant speed During Acceleratio n Bit 2 Bit 1 Bit 0 0 1 2 3 4 5 6 7 F60 Stall prevention level 30 150 This parameter sets the amount of current to activate stall prevention function during Accel constant or Decel run The set value is the percentage of the H33 Motor rated current 15...

Page 50: ...ved in H 1 5 0 O H 7 Dwell frequency F23 400 Hz When run frequency is issued motor starts to accelerate after dwell frequency is applied to the motor during H8 Dwell time Dwell frequency can be set within the range of F21 Max frequency and F23 Start frequency 5 0 X H 8 Dwell time 0 10 sec This parameter sets the time for dwell operation 0 0 X H10 Skip frequency select 0 1 This parameter sets the f...

Page 51: ...during accel decel If it is set higher linear zone gets smaller 40 X H19 Output phase loss protection select 0 1 Inverter turns off the output when the phase of the inverter output U V W is not properly connected 0 O H20 Power On Start select 0 1 This parameter is activated when drv is set to 1 or 2 Run Stop via Control terminal Motor starts acceleration after AC power is applied while FX or RX te...

Page 52: ...tion Bit 3 Bit 2 Bit 1 Bit 0 0 1 2 3 4 5 6 7 8 9 10 11 12 13 14 15 H23 Current level during Speed search 80 200 This parameter limits the amount of current during speed search The set value is the percentage of the H33 Motor rated current 100 O H24 P gain during Speed search 0 9999 It is the Proportional gain used for Speed Search PI controller 100 O H25 I gain during speed search 0 9999 It is the...

Page 53: ...2 2 2 0 2 0 2 kW 1 Automatically set X 0 4 0 4 kW 0 75 0 75 kW 1 5 1 5 kW 2 2 2 2 kW H31 Number of motor poles 2 12 This setting is displayed via rPM in drive group X H32 Rated slip frequency 0 10 Hz 120 P rpm f f r s Where s f Rated slip frequency r f Rated frequency rpm Motor nameplate RPM P Number of Motor poles 2 Automatically set X H33 Motor rated current 1 0 20 A Enter motor rated current on...

Page 54: ... and leakage current will become greater 3 O H40 Control mode select 0 3 0 Volts frequency Control 0 X 1 Slip compensation control 2 PID Feedback control 3 Sensorless vector control H41 Auto tuning 0 1 If this parameter is set to 1 it automatically measures parameters of the H42 and H43 0 X H42 Stator resistance Rs 0 5 0 Ω This is the value of the motor stator resistance X H44 Leakage inductance L...

Page 55: ...of the output frequency thru the PID control The value is settable within the range of F21 Max frequency and H23 Start frequency 60 0 O H70 Frequency Reference for Accel Decel 0 1 0 The Accel Decel time is the time that takes to reach the F21 Max frequency from 0 Hz 0 X 1 The Accel Decel time is the time that takes to reach a target frequency from the run frequency H71 Accel Decel time scale 0 2 0...

Page 56: ...tput power kW 2 Torque kgf m H74 Gain for Motor rpm display 1 1000 This parameter is used to change the motor speed display to rotating speed r min or mechanical speed m mi 100 O H79 Software version 0 10 0 This parameter displays the inverter software version X X X H81 2nd motor Accel time 0 6000 sec This parameter is active when the selected terminal is ON after I20 I24 is set to 12 2nd motor se...

Page 57: ...rameters back to the factory default values 0 X 0 1 All parameter groups are initialized to factory default value 2 Only Drive group is initialized 3 Only Function group 1 is initialized 4 Only Function group 2 is initialized 5 Only I O group is initialized H94 Password register 0 FFF Password for H95 Parameter lock 0 O H95 Parameter lock 0 FFF This parameter is able to lock or unlock parameters b...

Page 58: ...cy corresponding to I 4 0 400 Hz Set the inverter output maximum frequency at maximum voltage of the V0 input 60 0 O I 6 Filter time constant for V1 input 0 9999 Set the input section s internal filter constant for V1 input 10 O I 7 V1 input Min voltage 0 10 V Set the minimum voltage of the V1 input 0 O I 8 Frequency corresponding to I 7 0 400 Hz Set the inverter output minimum frequency at minimu...

Page 59: ...f the value set in I 2 7 12 entered 2 Below the value set in I 2 7 12 entered I20 Multi function input terminal P1 define 0 24 0 Forward run command FX 0 O 1 Reverse run command RX I21 Multi function input terminal P2 define 2 Emergency Stop Trip EST 1 O 3 Reset when a fault occurs RST I22 Multi function input terminal P3 define 4 Jog operation command JOG 2 O 5 Multi Step frequency Low I23 Multi ...

Page 60: ...e I25 Input terminal status display BIT4 BIT3 BIT2 BIT1 BIT0 P5 P4 P3 P2 P1 I26 Output terminal status display BIT1 BIT0 30AC MO I27 Filtering time constant for Multi function Input terminal 2 50 If the value is set higher the response of the Input terminal is getting slower 15 O I30 Multi Step frequency 4 0 400 Hz It cannot be set greater than F21 Max frequency 30 0 O I31 Multi Step frequency 5 2...

Page 61: ...Decel time 5 7 0 I44 Multi Accel time 6 8 0 I45 Multi Decel time 6 8 0 I46 Multi Accel time 7 9 0 I47 Multi Decel time 7 9 0 I50 Analog output item select 0 3 Output item 10 V Output 0 O 200V 400V 0 Output frequency Max frequency 1 Output current 150 2 Output voltage 282 V 3 DC link voltage DC 400V I51 Analog output level adjustment 10 200 100 O I52 Frequency detection level 0 400 Hz This paramete...

Page 62: ...elay select 2 FDT 3 17 3 FDT 4 4 FDT 5 5 Overload OL 6 Inverter Overload IOL 7 Motor stall STALL 8 Over voltage trip OV 9 Low voltage trip LV 10 Inverter heatsink overheat OH 11 Command loss 12 During run 13 During stop 14 During constant run 15 During speed searching 16 Wait time for run signal input 17 Fault relay output I56 Fault relay output 0 7 When setting the H26 Number of auto restart try ...

Page 63: ...ect after loss of frequency command 0 2 It is used when frequency command is given via V1 and I terminal or communication option 0 O 0 Continuous operation 1 Free Run stop Coast to stop 2 Decel to stop I63 Wait time after loss of frequency command sec This is the time inverter determines whether there is the input frequency command or not If there is no frequency command input during this time inv...

Page 64: ...7 Function List 7 22 ...

Page 65: ... if the output current of the inverter flows at 150 of the inverter rated current for more than the current limit time 1 min Heat sink overheat The inverter turns off its output if the heat sink overheats due to a damaged cooling fan or an alien substance in the cooling fan by detecting the temperature of the heat sink DC link capacitor overload The inverter turns off its output when it is time to...

Page 66: ...ault message is displayed when a fault condition occurs in the inverter cooling fan Instant cut off Used for the emergency stop of the inverter The inverter instantly turns off the output when the EST terminal is turned on Caution The inverter starts to regular operation when turning off the Est terminal while FX or RX terminal is ON External fault A contact input When multi function input termina...

Page 67: ...ce the motor Inverter overload Load is greater than the inverter rating Inverter capacity is incorrectly selected Torque boost scale is set too large Upgrade the capacity of motor and inverter or reduce the load weight Select correct inverter capacity Reduce torque boost scale Overload trip Heat sink overheat Cooling system has faults An old cooling fan is not replaced with a new one Ambient tempe...

Page 68: ...nverter capacity is incorrectly selected Inverter has been operated at low speed for too long Reduce load weight and operating duty Change inverter with higher capacity Adjust ETH level to an appropriate level Select correct inverter capacity Install a cooling fan with a separate power supply External fault A contact input The terminal which is set to 18 External fault A or 19 External fault B in ...

Page 69: ...protective measures against ESD before touching them for inspection or installation Do not change any inner parts and connectors Never modify the inverter 8 4 Check Points Daily inspections Proper installation environment Cooling system fault Unusual vibration and noise Unusual overheating and discoloration Periodic inspection Screws and bolts may become loose due to vibration temperature changes ...

Page 70: ...leading to reduced performance or failure of the inverter For preventive maintenance the parts must be changed periodically The parts replacement guidelines are indicated in the following table Lamps and other short life parts must also be changed during periodic inspection Part name Change period unit Year Description Cooling fan 3 Exchange as required Smoothing capacitor in main circuit 4 Smooth...

Page 71: ...requency Analog 0 1 of Max output frequency V F Ratio Linear Squared Pattern User V F Overload capacity Software 150 for 60 s Torque boost Auto Manual torque boost Operation Operation mode Keypad Terminal Communication option selectable Frequency setting Analog 0 10 V 0 20 mA Keypad Potentiometer Digital Keypad Operation features PID control Up Down operation 3 wire operation Input Multi function ...

Page 72: ...erature of inverter and motor Output phase open Overload Communication error Loss of frequency command H W fault Alarm Conditions Stall prevention Overload Momentary power loss Less than 15 msec Continuous operation More than 15 msec Auto Restart enable Environment Cooling method Forced air cooling Degree of protection Open Pollution degree 2 Ambient temperature 10 C 50 C Storage temperature 20 C ...

Page 73: ...temp If the unit is installed in a panel install it where heat dissipation is properly done to keep the panel ambient temperature within permissible range 2 This derating curve is based on inverter current rating when rated motor is connected 1kHz 15kHz 100 Load Current 1kHz 15kHz 100 Load Current Carrier freq Carrier freq 80 8kHz For 0 4kW 0 8kW 1 5kW inverter For 2 2kW inverter ...

Page 74: ...9 Specifications 9 4 ...

Page 75: ...1000 4 11 1994 Type of Equipment Inverter Power Conversion Equipment Model Name SV iC5 Series Trade Mark LSIS Co Ltd Representative LG International Deutschland GmbH Address Lyoner Strasse 15 60528 Frankfurt am Main Germany Manufacturer LSIS Co Ltd Address 181 Samsung Ri Mokchon Eup Chonan Chungnam 330 845 Korea We the undersigned hereby declare that equipment specified above conforms to the Direc...

Page 76: ...ostatic discharge immunity test Electromagnetic compatibility EMC Part 4 3 Testing and measurement techniques Radiated radio frequency electromagnetic field immunity test Electromagnetic compatibility EMC Part 4 4 Testing and measurement techniques Electrical fast transients burst immunity test Electromagnetic compatibility EMC Part 4 5 Testing and measurement techniques Surge immunity test Electr...

Page 77: ...t all lead lengths are kept as short as possible and that incoming mains and outgoing motor cables are kept well separated No Models Description Interface Module1 Interface Module 2 CE Mark EMC LVD 1 SV004iC5 1F AC Drive 0 5HP 220V 1 phase Yes 1 2 SV008iC5 1F AC Drive 1HP 220V 1 phase Yes 2 3 SV015iC5 1F AC Drive 2HP 220V 1 phase Yes 3 4 SV022iC5 1F AC Drive 3HP 220V 1 phase Yes 4 5 SV004iC5 1 AC ...

Page 78: ...omologués de Classe H ou RK5 UL et des disjoncteurs UL Se reporter au tableau ci dessus pour la tension et le courant nominal des fusibless et des disjoncteurs Voltage and current fuse Class Input Voltage Motor kW Inverter Input Fuse Breaker Current A Voltage V Current A Voltage V 200 0 4 SV004iC5 10 500 15 220VAC 0 75 SV008iC5 20 500 20 220VAC 1 5 SV015iC5 30 500 30 220VAC 2 2 SV022iC5 40 500 40 ...

Page 79: ... member states It indicates the compliance of the products with the following technical regulations and requirements of the Eurasian Customs Union Technical Regulations of the Customs Union 004 2011 On safety of low voltage equipment Technical Regulations of the Customs Union 020 2011 On electromagnetic compatibility of technical products ...

Page 80: ... x Revision History No Revision Date Remarks 1 First Edition 2002 12 S W Version 1 3 2 S W version update 2003 10 S W Version 1 5 3 S W version update 2004 5 S W Version 1 8 4 S W version update 2005 6 S W Version 1 9 ...

Page 81: ...antee term may vary on the sales term In warranty service information If the defective part has been identified under normal and proper use within the guarantee term contact your local authorized LS distributor or LS Service center Out of warranty service information The guarantee will not apply in the following cases Troubles are attributable to a user s intentional negligence or carelessness Dam...

Reviews: