6
2.
Simple low/high fuel level calibration
a)
Low level set:
-
Ride the gas out to the amount you want to gauge show as a minimum. You can use the
moment when you switch to reserve for example.
-
Make sure the petcock is opened and bike stands straight.
-
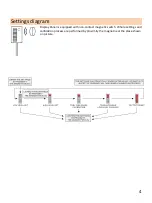
Hold the included magnet in active area of Display Panel as you see on picture on page 2 for
3-5 seconds. You should see the animation. When it ends, take the magnet out. The upper
segment is now on.
-
Hold the magnet in active area for ca. 3-5 seconds until you see the animation (all LEDs from
bottom to top will light on) and take the magnet out.
-
Now the low level is set.
b)
High level set:
-
Fill the tank to the amount you want to gauge show as a maximum.
-
Make sure the petcock is opened and bike stands straight.
-
Hold the magnet in active area of Display Panel for 3-5 seconds. You should see the
animation. When it ends, take the magnet out. The upper segment is now on.
-
Proximity the magnet to the active area shortly (0.5-2s) and take it out. You should see the
two segments from the top are on.
-
Hold the magnet in active area for ca. 3-5 seconds until you see the animation (all LEDs from
bottom to top will light on) and take the magnet out.
-
Now the high level is set.
Note: You can do low/high level calibration separately whenever you want. You can also turn the gauge
off and on between low and high level calibrations.


