7
3.
Calibration with fuel tank shape compensation
-
Fill the tank to the amount you want to gauge show as empty tank.
-
Make sure the petcock is opened and bike stands straight.
-
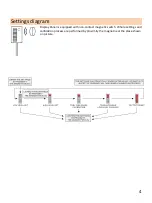
Hold the included magnet in active area of Display Panel as you see on picture on page 2 for 3-5
seconds. You should see the animation. When it ends, take the magnet out. The upper segment
is now on.
-
Proximity the magnet to the active area shortly (0.5-2s) and take it out. You should see two
segments from the top are on.
-
Proximity the magnet to the active area shortly (0.5-2s) and take it out again. You should see
three segments from the top are on.
-
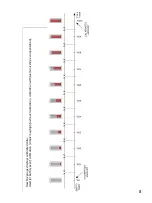
Hold the magnet in active area for ca. 3-5 seconds until you see the animation and take the
magnet out. Now you will see two flashing segments – top and bottom.
o
Now the device is prepared for storing first value (0%).
o
We suggest to fill 0.2-0.5l to the empty tank to make sure all fuel hoses are filled up.
-
Confirm 0% by proximity the magnet to the active area shortly (0.5-2s) and take it out. After
animation you should see the 1
st
bottom flashing segment.
o
Device is prepared for storing second value (10%).
-
Fill the 10% fuel to the tank now confirm 10% by proximity the magnet to the active area
shortly (0.5-2s) and take it out. After animation you should see the two bottom flashing
segments.
o
Device is prepared for storing third value (20%).
-
Repeat previous step for two flashing bottom segments (20%), three bottom flashing segments
(30%) up to ten flashing segments (100% of fuel tank capacity).
-
Now the FuelGaugePro system is calibrated.


