_
10
_
BUTTONS & INDICATOR LIGHTS
POWER BUTTON:
Press and hold the power button to start the device.
Quick press the power button to take a photograph.
Press and hold the power button to lock/unlock the most recent video file when the device boots up.
RESET BUTTON:
Press Reset to restart the machine.
INDICATOR LIGHT:
1.
Determine the exact location the device will be
installed, ensuring not to obstruct the drivers
view (usually in the centre of the windscreen
behind the rear-view mirror, preferably on the
passenger side of the vehicle) The device must
have a clear view with the road ahead and not
be intrusive of the wiper blade area.
2.
Thoroughly clean the area around the rear-view
mirror on the front windshield where the
dashcam will be mounted.
3.
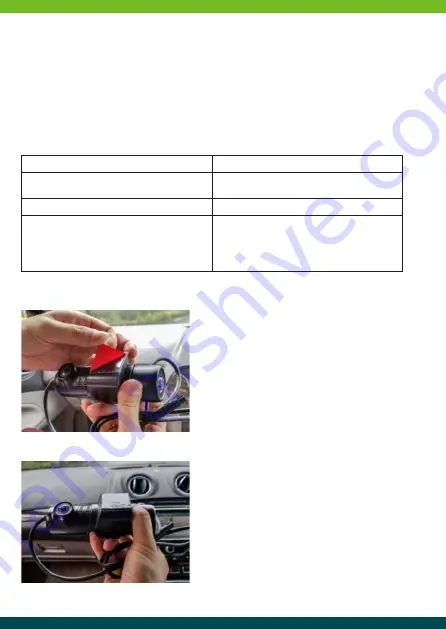
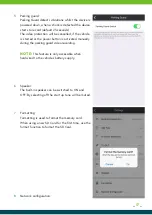
Remove the double-sided tape from the device
and position the unit horizontally with a clear
view of the road ahead before attaching it to
the windscreen.
4.
Before installation refer to your owner’s manual
to determine the location off your fuse box.
The installation should be carried out by a
trained Auto Electrician.
INSTALLATION
Solid Red Light and Blue Flashing Light
The device is on and recording
Red Flashing Light and Blue Solid Light
The device is on with no SD card inserted or
requires attention
Blue and Red Lights off
The device is off or in park mode
Red and Blue Light Flashing rapidly
The device has registered an event (G-Sensor)
alternatively the emergency record button has
been activated. The LEDS will continue to flash
in this sequence until the event recording has
ceased
Summary of Contents for TVVD001HD
Page 1: ...DASHCAM User Manual TVVD001HD DASHCAM User Manual TVVD001HD ...
Page 2: ..._ 2 _ ...
Page 23: ..._ 23 _ ...


