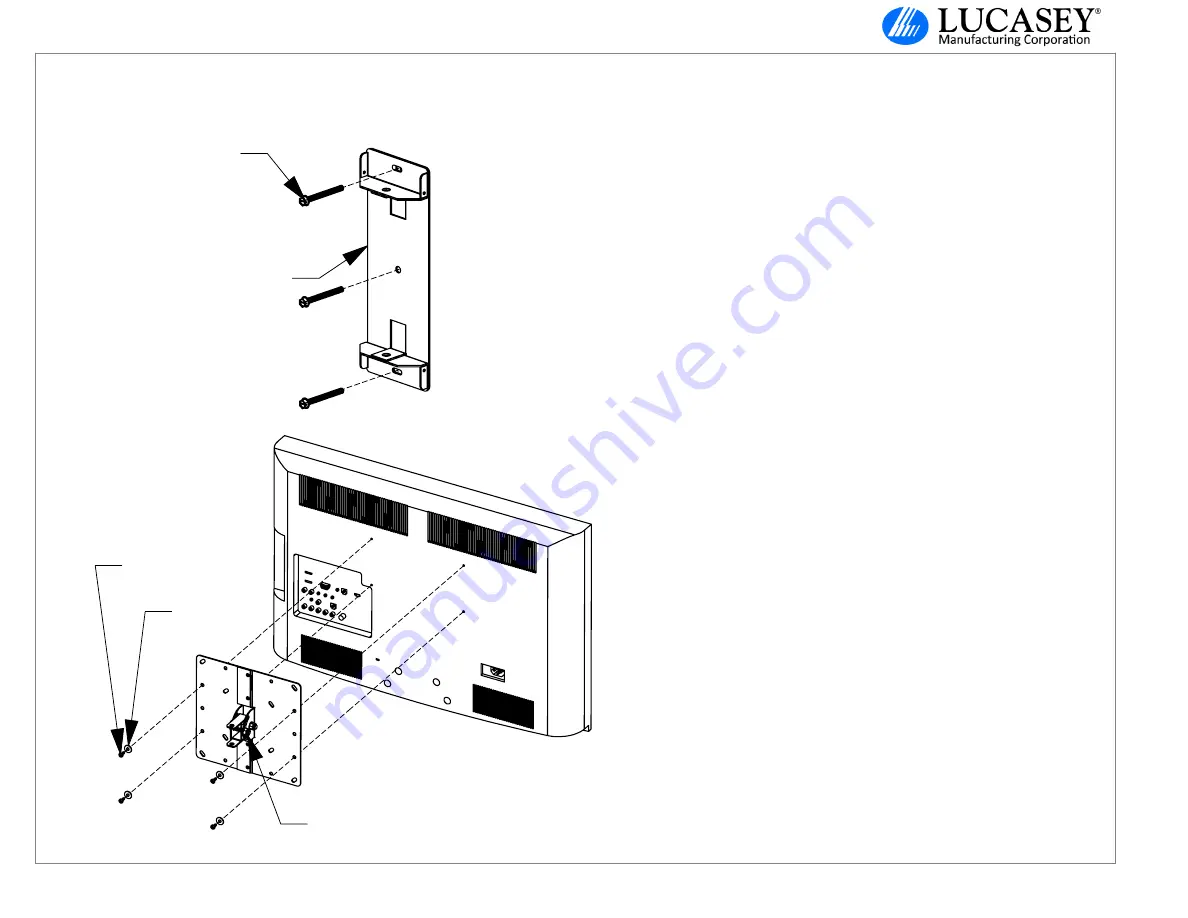
3Pl. Lag Screws
LC200WDA Wall Plate
4Pl. Monitor Attaching
Screws
4Pl. Washers
Tilt Adjustment Nut
Steps 5-6
4. Use the provided Lag Screws to securely fasten the Wall Plate to the wall.
Tighten the top and bottom screws before tightening the middle screw to
allow for some adjustment to make the Wall Plate level.
5. Attach the monitor to the VESA Plate using hardware appropriate for the
threaded inserts on the monitor as specified by the manufacturer. Several
sizes of monitor attaching hardware have been provided for convienience.
6. Tighten the Tilt Adjustment Nut with the desired viewing angle.
Step 4
Protected under one or more of these U.S. Patent numbers: 3,291,432 3,559,942 3,724,798 DES.270,689 4,613,109 4,878,645 4,852,842 DES.309,5624,973,023 5,169,114 5,255,884 5,310,152 5,522,576 5,621,614 Re.35,677 DES.398,834 5,826,384 5,941,492 5,964,068 6,060,661 6,102,398 6,158,704 6,454,116B1 6,761,276B2 6,806,425B1
for up to 35Lbs Flat Screens
LC200WDA - Articulating Wall Mount
LC200WDA _Instructions (2/11) ©2011 Lucasey Manufacturing Corporation, Oakland, California www.lucasey.com
LC200WDA INSTALLATION INSTRUCTIONS Page 2 of 3


