background image

V1.0 

–EN Published on 04.2017 


LUCCI 

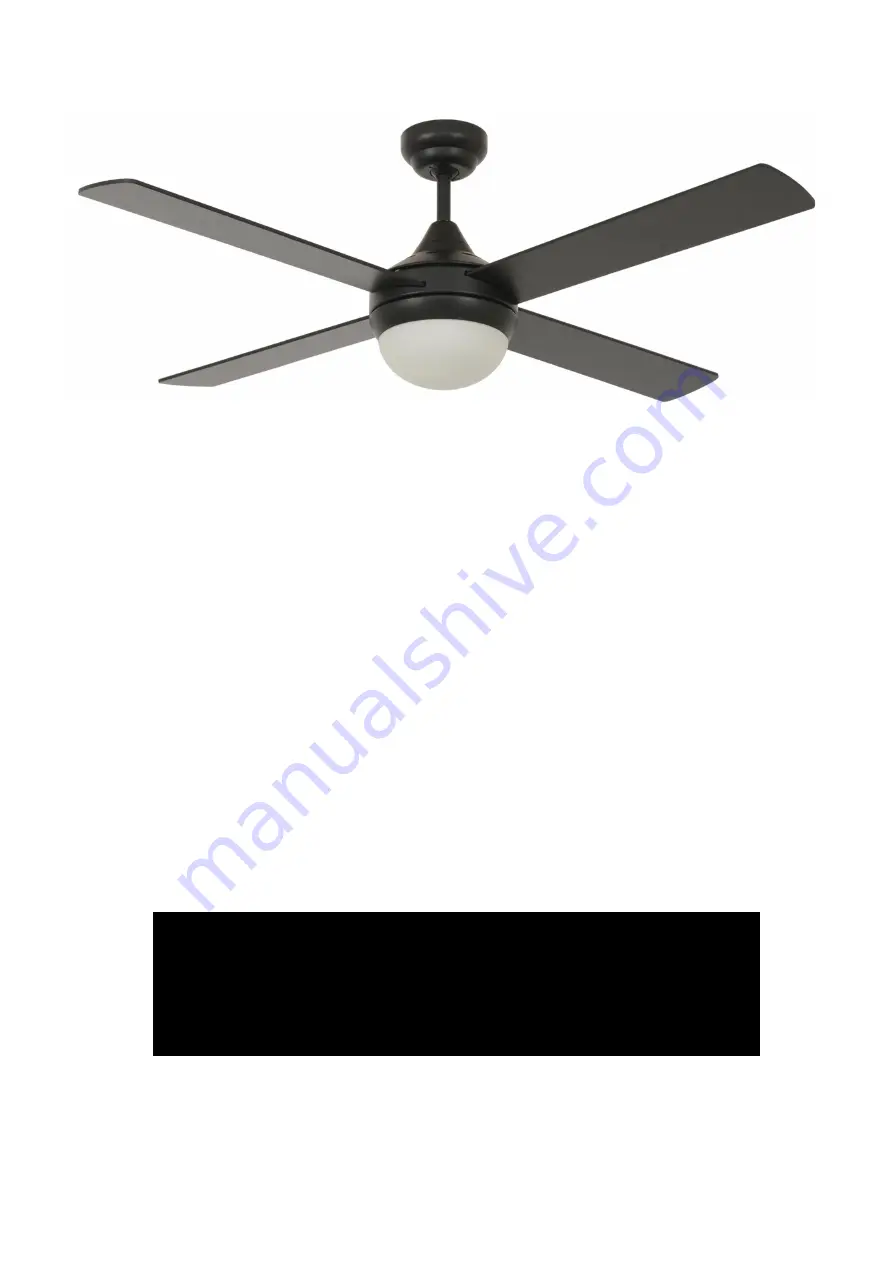
AIRFUSION AIRLIE II ECO SERIES 

CEILING FAN 


INSTALLATION 


OPERATION 


MAINTENANCE 


WARRANTY INFORMATION 


CAUTION


READ INSTRUCTIONS CAREFULLY FOR SAFE 

INSTALLATION AND FAN OPERATION.


Summary of Contents for AIRFUSION AIRLIE ECO Series

Page 1: ...EN Published on 04 2017 LUCCI AIRFUSION AIRLIE II ECO SERIES CEILING FAN INSTALLATION OPERATION MAINTENANCE WARRANTY INFORMATION CAUTION READ INSTRUCTIONS CAREFULLY FOR SAFE INSTALLATION AND FAN OPERA...

Page 2: ...ren without supervision 2 In Australia The appliance is not intended for use by persons including children with reduced physical sensory or mental capabilities or lack of experience and knowledge unle...

Page 3: ...eparate collection facilities Contact your local government for information regarding the collection systems available If electrical appliances are disposed of in landfills or dumps hazardous substanc...

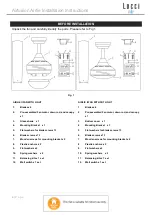
Page 4: ...nopy x 1 3 Glass shade x 1 3 Bottom cover x 1 4 Mounting Bracket x 1 4 Mounting Bracket x 1 5 Flat washers for blade screw x 13 5 Flat washers for blade screw x 13 6 Blade screws x 13 6 Blade screws x...

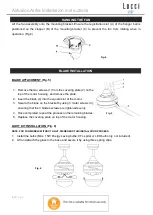
Page 5: ...bracket to the ceiling joist or structure that is capable of carrying a load of at least 30kg with the two long screws provided Ensure at least 30mm of the screw is threaded into the support NOTE The...

Page 6: ...using and remove the plate 2 Insert the blade 4 into the square slot of the motor 3 Secure the blade on the bracket by using 3 motor screws 3 ensuring that the 3 blades screws are tightened evenly 4 O...

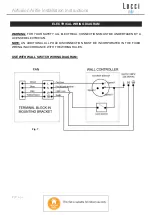
Page 7: ...NG DIAGRAM WARNING FOR YOUR SAFETY ALL ELECTRICAL CONNECTIONS MUST BE UNDERTAKEN BY A LICENSED ELECTRICIAN NOTE AN ADDITIONAL ALL POLE DISCONNECTION MUST BE INCORPORATED IN THE FIXED WIRING IN ACCORDA...

Page 8: ...Airfusion Airlie Installation Instructions 8 P a g e USE WITH REMOTE WIRING DIAGRAM REMOTE sold separately 1 Remote without plugs 2 Remote with plugs Fig 8 Fig 9...

Page 9: ...L CONTROL Turn on the power and check the operation of the fan OFF Position fan off 3rd Position low fan speed 2nd Position medium fan speed 1st Position high fan speed Light Control Toggle Switch on...

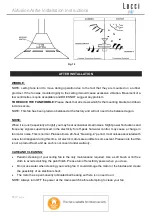
Page 10: ...ls superimposed in the electricity for off peak hot water control may cause a change in fan motor noise This is normal Please allow a 24 hour breaking in period most noises associated with a new fan d...

Page 11: ...P a g e Ceiling Fan model Rated Voltage Rated Power motor Rated Power lamp Airlie II fan with light 220 240 VAC 50W 2 X MAX 15W CFL Spiral or LED Bulbs E27 Airlie II fan without light 220 240 VAC 50W...

Page 12: ...as a result of normal wear and tear 3 The product was installed by a licensed electrical contractor 4 A copy of the original receipt of purchase is presented 5 12 month warranty applies when used in a...

Page 13: ...LUCCI WARRANTY HOTLINE 1800 602 243 Complete and retain this form for your personal records and warranty purposes NAME ADDRESS POSTCODE MODEL NUMBER PO DATECODE Sticker here PO NUMBER or DATECODE DAT...

Reviews: