Airfusion HAVANA Installation Instructions
11 |
P a g e
FINISHING THE INSTALLATION
•
After completing the electrical connection at the mounting bracket terminal block, connect the ceiling fan
wiring via the quick connector plug.
•
Ensure the earth wiring is secure and correct, by performing an earthing continuity test from the fan’s
accessible metal body back to the earth terminal at the terminal block on the mounting bracket.
•
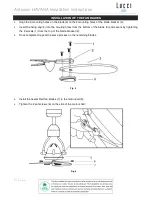
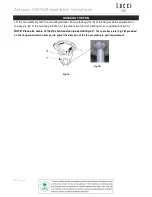
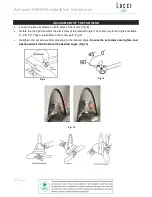
Cover the mounting bracket with the canopy. Ensure all electrical wiring is tucked inside the canopy and
that the wires are not damaged during this step. Secure the canopy to the hanger bracket using the screws
provided. (Fig. 11)
•
Switch ON mains power supply to the fan. Test the fan operations or enjoy using the fan following
instructions the under “USING YOUR CEILING FAN” section of this instruction manual.
USING YOUR CEILING FAN
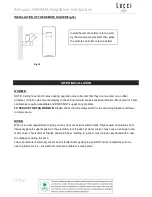
BATTERY INSTALLATION IN THE REMOTE CONTROL (Fig.13)
Your ceiling fan is controlled by the remote control. The following must be considered before operating the
remote.
Fig.12
Fig. 13
1 x CR2032 3V battery is required for the remote control.
-
Remove the screw (6) and Pull out the battery tray (2) by
pressing the clip (1) and pulling out the battery tray together.
-
Place the battery (3) on the tray and insert the tray back to remote
hand set (4) indicated by “+” polarity symbol (5).
-
Ensure the polarity is correct as shown in the battery
compartment.
-
Reinstall the screw (6) to secure the battery tray (2).


