Airfusion Louisville Installation Instructions
6 |
P a g e
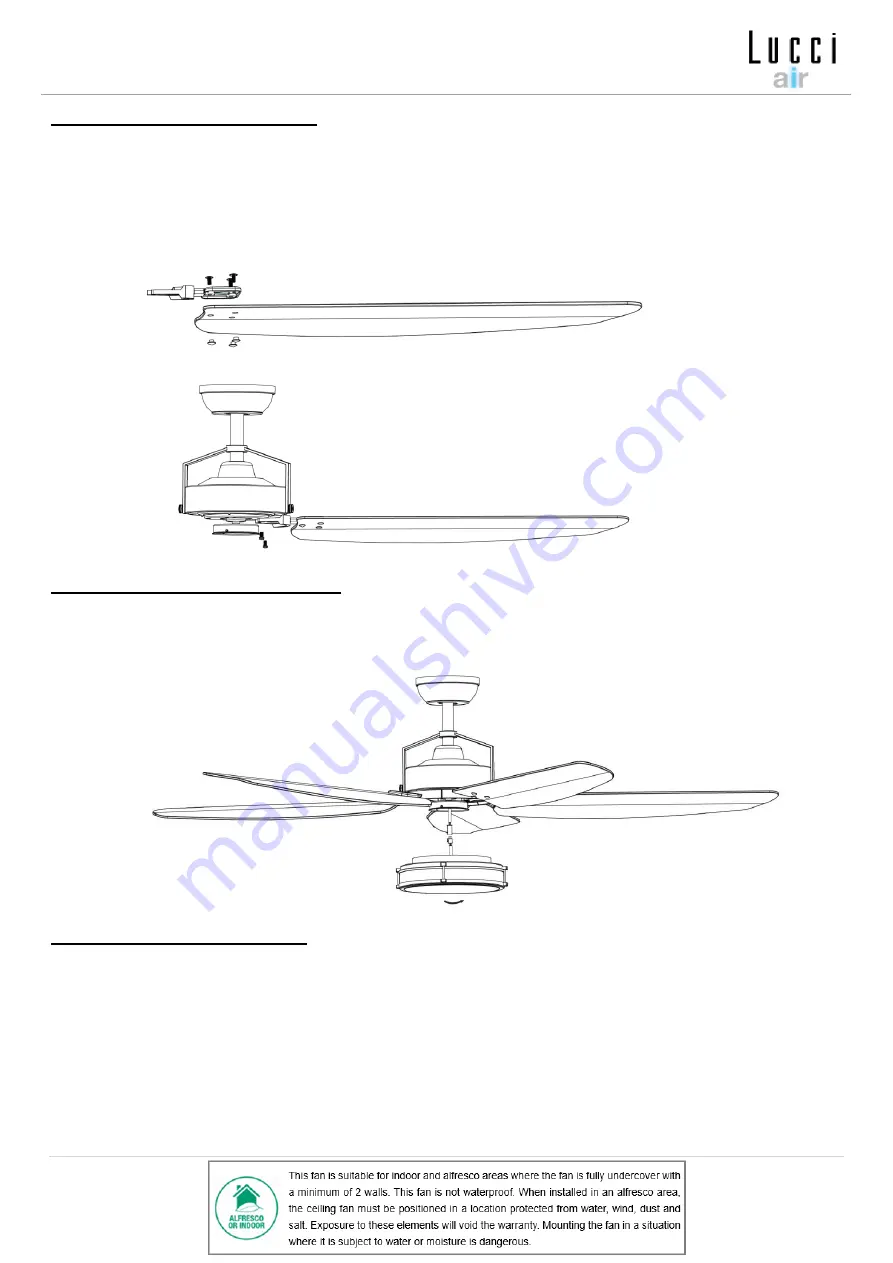
INSTALLATION OF BLADE (Fig. 4)
1.
Install the fan blades to the bracket by tightening the 3 screws to the nuts.
2.
Install the bracket to the fan assembly by tightening the 2 screws.
Ensure all screws are tightened evenly to reduce the chance of warping or unbalancing.
Take care not to over tighten the screws, as this can damage the blades
3.
Repeat the same process for the other blades.
INSTALLATION OF LIGHT KIT (Fig. 5)
•
NOTE:
The light kit must be installed by a licensed electrician.
•
Connect the wires of light kit to the fan assembly via the quick connector.
•
Install the light kit on the fan assembly then secure it by turning clockwise.
INSTALLATION OF LAMP (Fig. 6)
•
NOTE:
The GX53 lamp is pre-installed in the light kit. Follow the below if it is required to replace the lamp.
•
Remove the lamp shade (C) by loosening the 3 screws (A).
•
Replace the GX53 lamp (B) by a new one. Do not exceed the maximum power rating.
•
Install the lamp shade (C) back by tightening the 3 screws (A).
Fig. 4
Fig. 5


