

Moonah Installation Instructions
4 |
P a g e
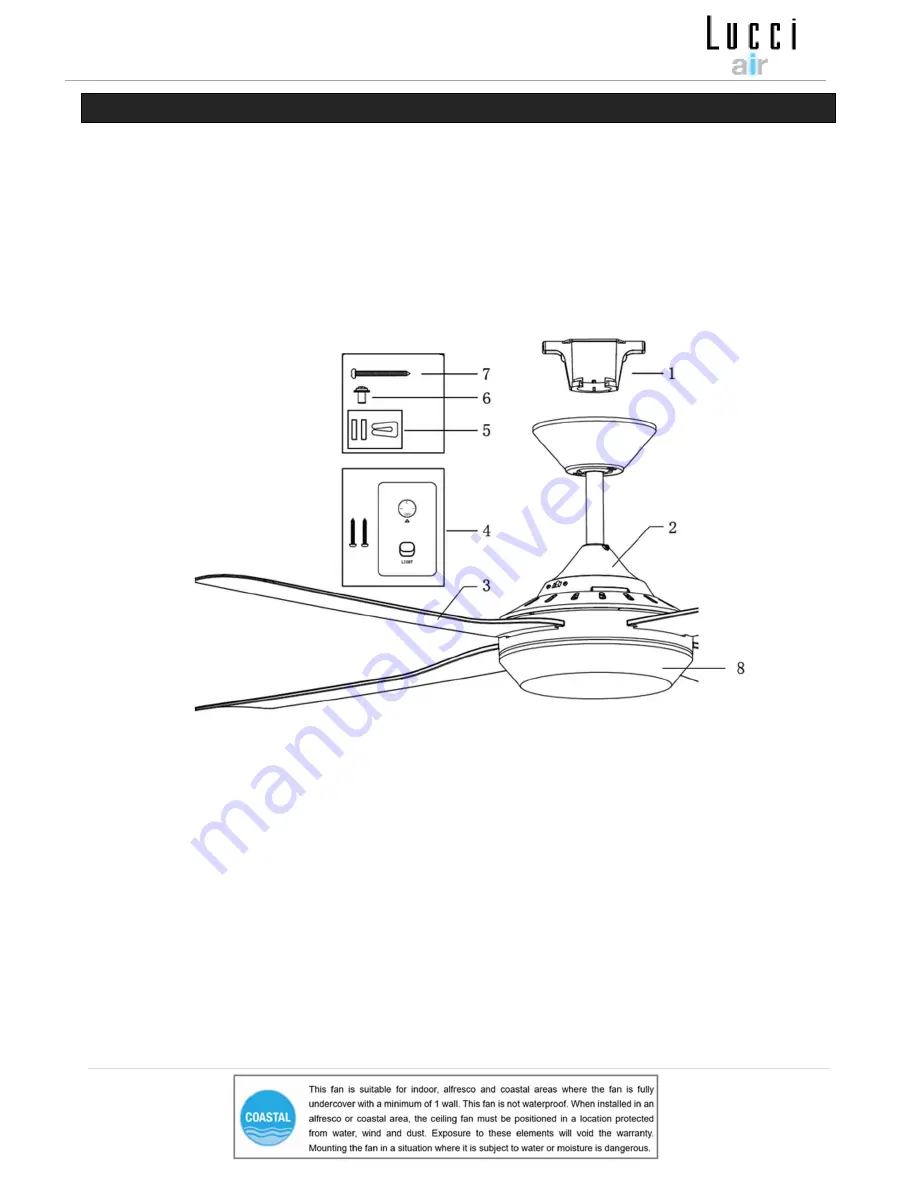
PARTS LIST
•
Unpack your ceiling fan carefully. Remove all parts and hardware.
•
Lay out all the components on a smooth surface and make sure there are no components missing before
assembling. If parts are missing, return the complete product to the place of purchase for inspection or
replacement.
•
Check whether the ceiling fan has been damaged during transport. Do not operate/install any product
which appears damaged in any way. Return the complete product to the place of purchase for inspection,
repair or replacement.
•
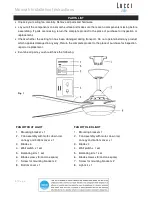
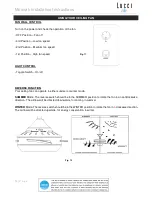
Examine all parts, you should have the following:
FAN WITHOUT LIGHT
FAN WITH LED LIGHT
1. Mounting bracket x 1
1. Mounting bracket x 1
2. Fan assembly with motor, down rod,
canopy and bottom cover x 1
2. Fan assembly with motor, down rod,
canopy and bottom cover x 1
3. Blade x 4
3. Blade x 4
4. Wall switch x 1 set
4. Wall switch x 1 set
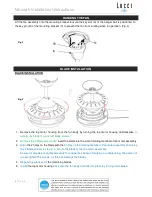
5. Balancing kit x 1 set
5. Balancing kit x 1 set
6. Blade screw x 8 (and one spare)
6. Blade screws x 8 (and one spare)
7. Screw for mounting bracket x 2
7. Screw for mounting bracket x 2
8. Bottom cover x 1
8. Light kit x 1
Fig. 1


