AIRFUSION MOTO Installation Instructions
9 |
P a g e
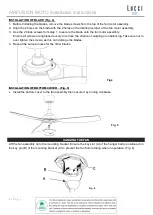
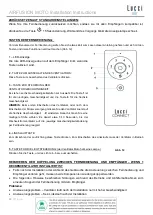
INSTALLATION OF THE REMOTE CONTROL HOLDER (Fig. 10)
1.
Locate a suitable wall to fix the remote control holder with the 2 screws. (Fig.10a).
2.
Slide the remote into the holder. (Fig. 10b)
USING YOUR CEILING FAN
NOTE: The remote and receiver will need to be paired after the installation of the ceiling fan.
NOTE: When two or more ceiling fans are installed in one location, please refer to the
instruction on the next page.
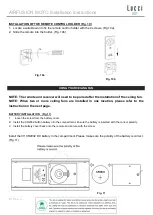
BATTERY INSTALLATION (Fig.11)
1.
loosen the screw from the battery cover.
2.
Install the CR2032 button battery into the compartment. Ensure the battery is inserted with the correct polarity.
3.
Install the battery cover back onto the remote and secure with the screw.
Install the 3V CR2032 DC battery in the compartment. Please make sure the polarity of the battery is correct.
(Fig. 11)
Fig. 10a
Fig. 10b
Fig. 11
Summary of Contents for Airfusion Moto
Page 80: ...AIRFUSION MOTO Installation Instructions 79 P a g e 2 8 9 10 11 4...
Page 82: ...AIRFUSION MOTO Installation Instructions 81 P a g e Phillips 300 15 30 2 11 3 2 11 15...
Page 83: ...AIRFUSION MOTO Installation Instructions 82 P a g e 4 1 2 2 2 3 2 1 4 5 A B C 6 4 6 5...
Page 84: ...AIRFUSION MOTO Installation Instructions 83 P a g e 7 DC 7 1 L 2 3 7 7 7...
Page 85: ...AIRFUSION MOTO Installation Instructions 84 P a g e 8 8 7 L N 220 250 VAC L N...
Page 86: ...AIRFUSION MOTO Installation Instructions 85 P a g e 9 1 2 2 3 10 1 2 10 2 10 9 10 10...
Page 90: ...AIRFUSION MOTO Installation Instructions 89 P a g e 30 24 6...

