AIRFUSION MOTO Installation Instructions
6 |
P a g e
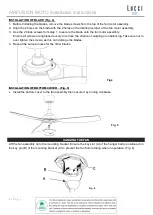
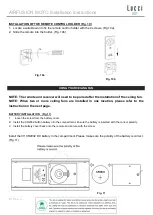
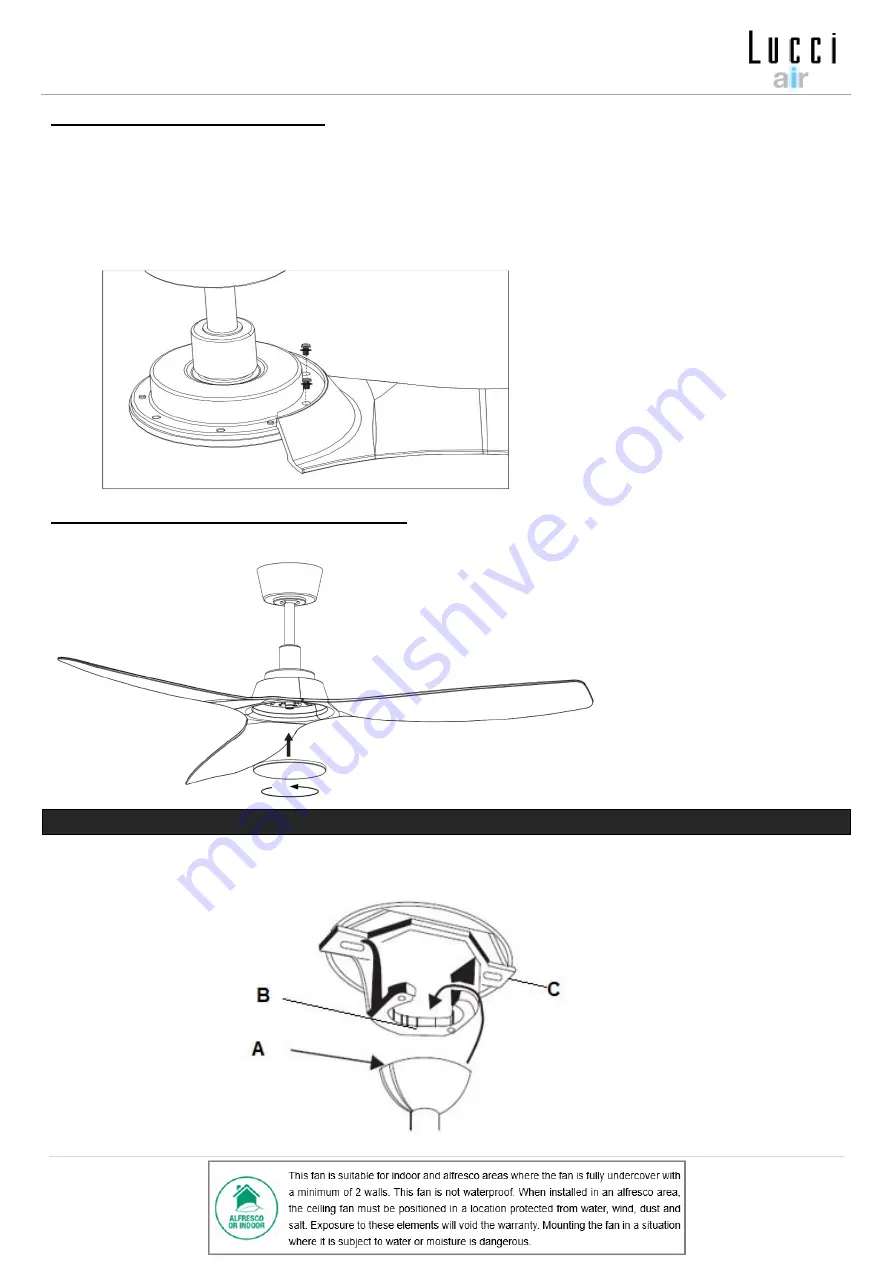
INSTALLATION OF BLADE (Fig. 4)
1.
Before Installing the blades, remove the blade screws from the top of the fan motor assembly.
2.
Align the 2 holes on the blade with the 2 holes on the rotating member of the fan motor assembly.
3.
Use the 2 blade screws from step 1, to secure the blade onto the fan motor assembly.
Ensure all screws are tightened evenly to reduce the chance of warping or unbalancing. Take care not to
over tighten the screws, as this can damage the blades.
4.
Repeat the same process for the other blades.
INSTALLATION OF BOTTOM COVER (Fig. 5)
•
Install the bottom cover to the fan assembly then secure it by turning clockwise.
HANGING THE FAN
Lift the fan assembly onto the mounting bracket. Ensure the key slot (A) of the hanger ball is positioned on
the key pin
(B) of the mounting bracket (C) to prevent the fan from rotating when in operation. (Fig. 6)
Fig.4
Fig. 6
Fig. 5
Summary of Contents for Airfusion Moto
Page 80: ...AIRFUSION MOTO Installation Instructions 79 P a g e 2 8 9 10 11 4...
Page 82: ...AIRFUSION MOTO Installation Instructions 81 P a g e Phillips 300 15 30 2 11 3 2 11 15...
Page 83: ...AIRFUSION MOTO Installation Instructions 82 P a g e 4 1 2 2 2 3 2 1 4 5 A B C 6 4 6 5...
Page 84: ...AIRFUSION MOTO Installation Instructions 83 P a g e 7 DC 7 1 L 2 3 7 7 7...
Page 85: ...AIRFUSION MOTO Installation Instructions 84 P a g e 8 8 7 L N 220 250 VAC L N...
Page 86: ...AIRFUSION MOTO Installation Instructions 85 P a g e 9 1 2 2 3 10 1 2 10 2 10 9 10 10...
Page 90: ...AIRFUSION MOTO Installation Instructions 89 P a g e 30 24 6...

