


Installation Instructions
4 |
P a g e
v 1 . 0 ( 0 7 / 2 0 2 1 )
Sensor Settings
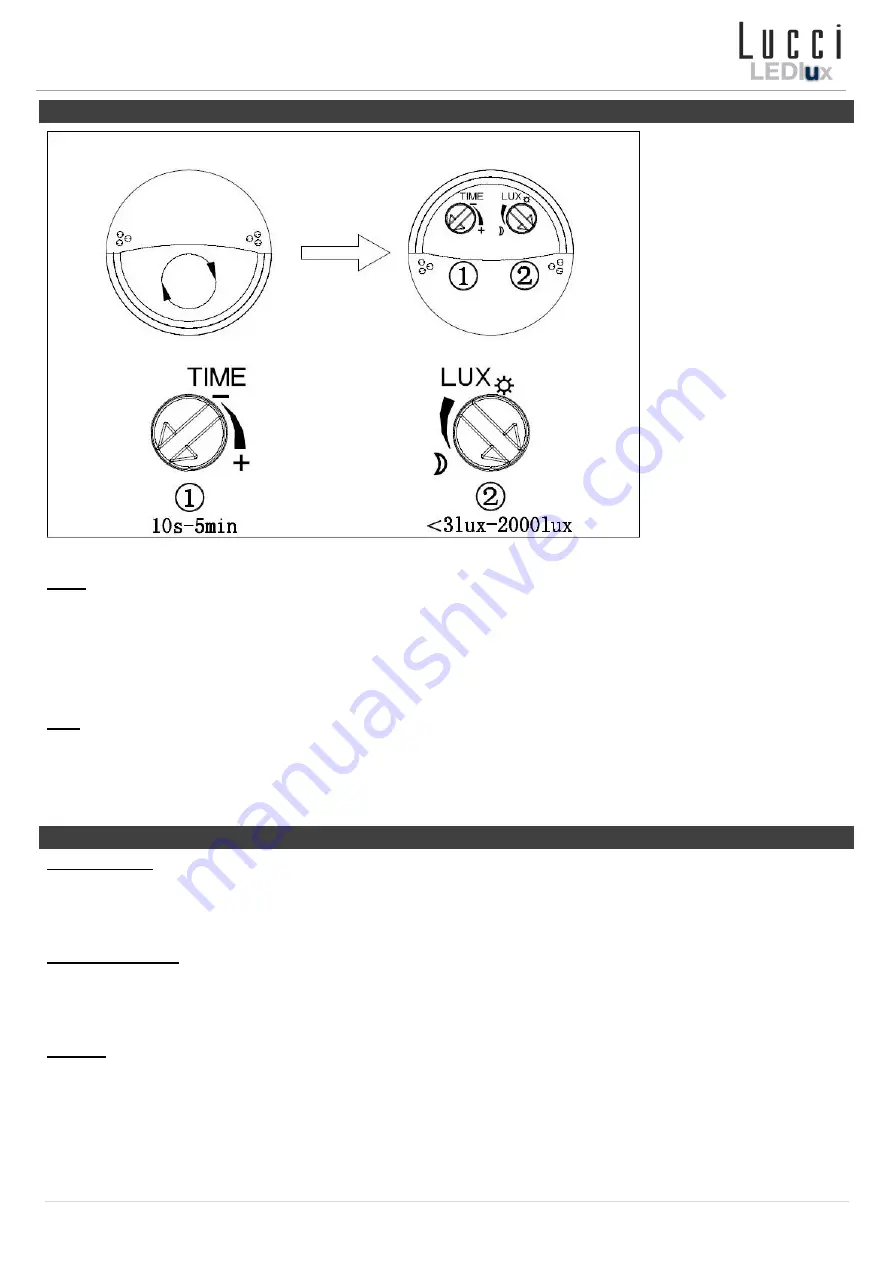
TIME:
The duration time of the luminaire remains ON can be adjusted.
The (+) position means the luminaire will be ON for the maximum duration time of 5mins.
The (-) position means the luminaire will be ON for the minimum duration time of 10secs.
NOTE:
Once the PIR sensor has been triggered, any subsequent detection will start the timed period again from the
beginning, the sensor will remain on until there is no movement detected.
LUX:
The sensor has a built-in sensing device (photocell) that detects daylight and darkness.
The (
) position means that the sensor will work at both day and night. Maximum light of 2000lux.
The (
) position will only work at night. Minimum light of 3lux.
NOTE:
If you want to test the detection area of the PIR sensor, please wait for the ambient light level is below 20lux.
Sensor Modes
AUTO MODE:
Switch the power on, and the luminaire will be on for about 15 seconds. When it turns off, wait 5 seconds,
and the luminaire will now be in the auto mode. Now, the luminaire will switch on and off automatically when it detects any
movement.
MANUAL MODE:
While in auto mode, switch the power OFF-ON-OFF-ON within 3 seconds (toggle ON/OFF 2 times
within 3 seconds). The luminaire will enter manual mode and will be continuously on for 8 hours (manual mode). After 8
hours, the sensor will return to the auto mode.
RESET:
To return the sensor to auto mode during the manual mode, turn the power OFF for 10 seconds and ON again.
The luminaire will now be in auto mode.


