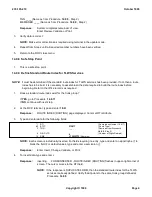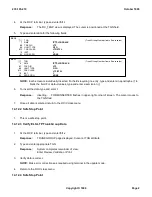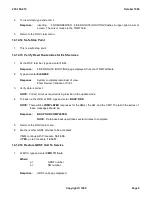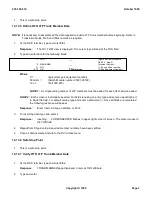
4.
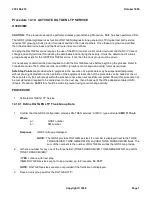
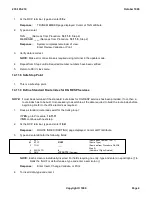
Return to the RC/V class menu.
14.11.4 Safe Stop Point
1.
This is a safe stop point.
14.11.5 Define DG RESP LTP Trunk Member Data
NOTE:
It is necessary to assemble all the data required to build a LTP trunk member before beginning. Refer to
Translation Guide TG-5 and office records as required.
1.
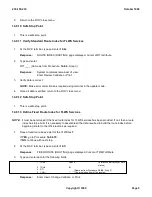
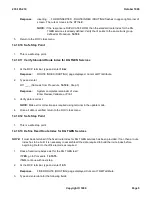
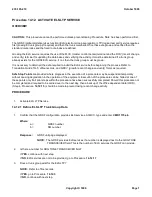
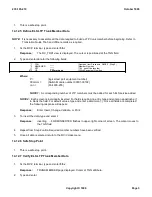
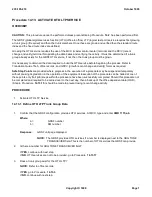
At the RC/V terminal, type and enter
5.5i
Response:
The RC_TRK1 view is displayed. The cursor is positioned at the TGN field.
2.
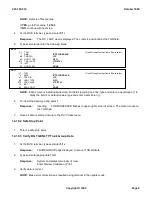
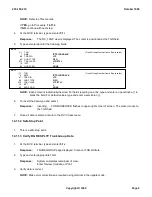
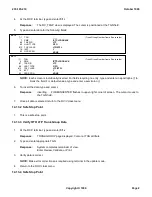
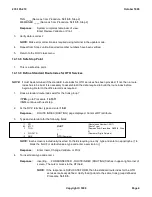
Type and enter data for the following fields:
*1
TGN
____
(Same as from Procedure
14.11.1
,
Step 5)
*2
MEMB NBR
____
(Member Number)
(*)
QTY
____
(1-24, see office records)
#12
OE
P 00mmmnnn
(Office Equipment Number)
Where:
P =
(logical test port equipment number)
00mmm =
(Switch Module number 00001-00192)
nnn =
(Port 000-255)
NOTE 1:
A corresponding number of LTP members must be added for each DG RESP service
added.
NOTE 2:
Each screen is individually inserted. For fields requiring no entry, type and enter an apostrophe (')
to blank the field. For default values, type and enter a semicolon (;). Once all fields are completed
the following response will appear:
Response:
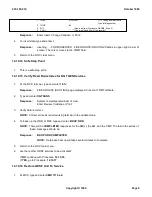
Enter Insert, Change, Validate, or Print:
3.
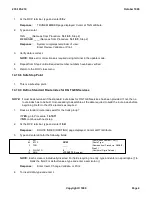
To insert the data, type and enter
i
Response:
inserting . . . FORM INSERTED flashes in upper-right corner of screen. The cursor moves to
the TGN field.
4.
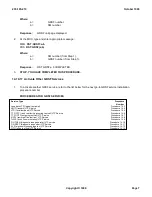
Repeat from Step 2 until all required member numbers have been verified.
5.
Once all data is entered, return to the RC/V class menu.
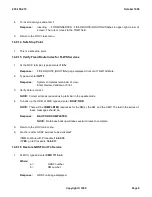
14.11.6 Safe Stop Point
1.
This is a safe stop point.
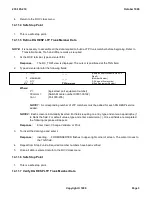
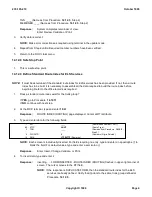
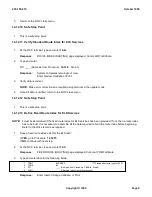
14.11.7 Verify DG RESP LTP Trunk Member Data
235-105-210
October 1999
Copyright © 1999
Page 3
Summary of Contents for 5ESS-2000
Page 96: ...235 105 210 October 1999 Copyright 1999 Page 2 ...
Page 184: ...235 105 210 October 1999 Copyright 1999 Page 3 ...
Page 300: ...13 STOP YOU HAVE COMPLETED THIS PROCEDURE 235 105 210 October 1999 Copyright 1999 Page 55 ...
Page 339: ...7 STOP YOU HAVE COMPLETED THIS PROCEDURE 235 105 210 October 1999 Copyright 1999 Page 13 ...
Page 342: ...235 105 210 October 1999 Copyright 1999 Page 2 ...
Page 359: ...235 105 210 October 1999 Copyright 1999 Page 5 ...
Page 609: ...2 STOP YOU HAVE COMPLETED THIS PROCEDURE 235 105 210 October 1999 Copyright 1999 Page 12 ...
Page 676: ...235 105 210 October 1999 Copyright 1999 Page 9 ...
Page 792: ...3 STOP YOU HAVE COMPLETED THIS PROCEDURE 235 105 210 October 1999 Copyright 1999 Page 9 ...
Page 799: ...Figure 11 36 3 1 Cleaning Points 235 105 210 October 1999 Copyright 1999 Page 7 ...
Page 801: ...235 105 210 October 1999 Copyright 1999 Page 9 ...
Page 839: ...2 STOP YOU HAVE COMPLETED THIS PROCEDURE 235 105 210 October 1999 Copyright 1999 Page 16 ...
Page 999: ...2 STOP YOU HAVE COMPLETED THIS PROCEDURE 235 105 210 October 1999 Copyright 1999 Page 13 ...
Page 1008: ...Figure 11 55 1 CTSNS DIP Switch Settings 235 105 210 October 1999 Copyright 1999 Page 2 ...
Page 1011: ...235 105 210 October 1999 Copyright 1999 Page 5 ...
Page 1053: ...235 105 210 October 1999 Copyright 1999 Page 15 ...
Page 1289: ...Figure 15 17 2 AMATPS Data Link 235 105 210 October 1999 Copyright 1999 Page 2 ...
Page 1292: ...235 105 210 October 1999 Copyright 1999 Page 5 ...
Page 1303: ...9 STOP YOU HAVE COMPLETED THIS PROCEDURE 235 105 210 October 1999 Copyright 1999 Page 2 ...
Page 1360: ...Figure 15 47 2 Typical SCANS III Link Diagram 235 105 210 October 1999 Copyright 1999 Page 2 ...
Page 1372: ...235 105 210 October 1999 Copyright 1999 Page 2 ...
Page 1374: ...235 105 210 October 1999 Copyright 1999 Page 4 ...
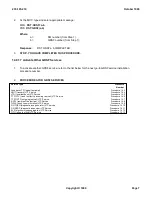
Page 1421: ...Table 1 1 O M Checklist 235 105 210 October 1999 Copyright 1999 Page 3 ...


