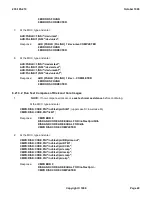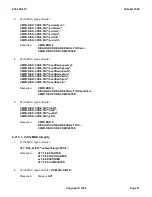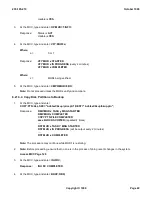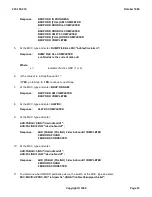
Procedure 6.23: MAKE FULL OFFICE BACKUP TAPE
5E10 and LATER
OVERVIEW
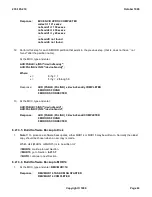
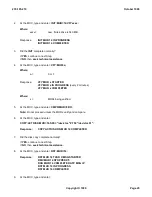
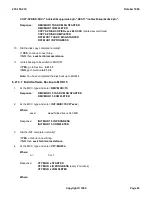
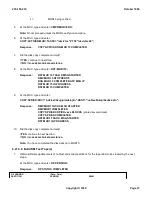
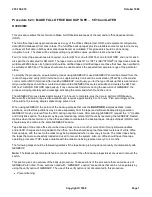
This procedure allows the technician to Make Full Office Backup tapes of the text and/or office dependent data
(ODD).
The full office tape backup procedure saves a copy of the office software [text, ODD, and equipment configuration
data (ECD) databases] from disk to tape. The full office backup tapes provide a reliable source for system recovery
in the event that data in both system disk drives becomes mutilated. This procedure should be done during
nonprime hours. The disks will be simplex during any partition copies, partition clears, and restorals.
Four (or more) tape sequences are required: one for AM Text, one for SM Text, one for AM ODD, and one for each
disk pair that is allocated for SM ODD. The tapes made on KS23113, LIST 14 (
KEYSTONE
®
III) tape drives must be
writable at 6250 bits-per-inch (bpi) and should be certified tapes. (Certified tapes are those that have been verified to
be writable at 6250 bpi.) The tapes should also be usable across the expected temperature range of the particular
office.
To simplify the procedure, an automated process using GENBKUP is used. GENBKUP should be entered from the
recent change and verify (RC/V) terminal, or a supplementary trunk and line work station (STLWS), or the master
control center (MCC) terminal. After invoking GENBKUP, it will query you for the type of backup that is wanted and
tell you when tapes should be mounted and unmounted. GENBKUP executes all audits and creates the AM Text,
SM Text, AM ODD, SM ODD tape backup. If any commands find errors during the execution of GENBKUP, the
process will quit gracefully with a message indicating the command which found the errors.
The GENBKUP process takes approximately 2 to 6 hours to complete, plus the time to perform ODD backup.
Manual office backup to tape is also available and requires approximately 8 to 12 hours. Plan accordingly so the
office will not be running simplex disks during prime hours.
When using GENBKUP, the portion of the backup process that runs the
BKUP:ODD
, simplexes disks, clears
partitions, and restores partitions may be done separately from the tape (and software backup disk) generation.
GENBKUP may be entered from the SCC during nonprime hours. After entering GENBKUP, request the ``u'' Update
and Verify Disk option. The tapes may be generated during normal shift hours by reentering the GENBKUP Restart
Options when the technician is in the office and able to manipulate the backup tapes. Groups of tapes (ODD or text)
should always be made in the same GENBKUP session.
Tape backup of the entire office should be done at least once a month or more often if many software updates
and/or ECD changes are being added to the office. An office should keep the three latest versions of entire office
backup tapes, with the next to the oldest copy being discarded when a new copy is made. The oldest tapes being
the tapes that were successfully loaded and used to recover the system. Also, an office should have three tape
operating procedure (TOP) tapes available with the oldest one being replaced every 3 to 4 months.
The following steps should be followed regardless if the tape backup is being done manually or automatically with
GENBKUP.
Note:
The Backout Last Overwrite feature cannot be used if the office backup tapes/disks are used to recover the
switch.
This section gives an overview of the backup procedure. Those sections of the procedure that can make use of
GENBKUP are noted. Those sections noted with ``GENBKUP v-option'' are sections that can be run separately by
using the verify option of GENBKUP. The use of this verify option is not documented in this procedure.
Preconditioning:
235-105-210
October 1999
Copyright © 1999
Page 1
Summary of Contents for 5ESS-2000
Page 96: ...235 105 210 October 1999 Copyright 1999 Page 2 ...
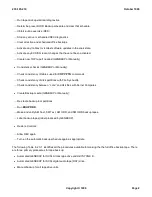
Page 184: ...235 105 210 October 1999 Copyright 1999 Page 3 ...
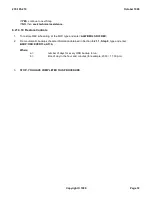
Page 300: ...13 STOP YOU HAVE COMPLETED THIS PROCEDURE 235 105 210 October 1999 Copyright 1999 Page 55 ...
Page 339: ...7 STOP YOU HAVE COMPLETED THIS PROCEDURE 235 105 210 October 1999 Copyright 1999 Page 13 ...
Page 342: ...235 105 210 October 1999 Copyright 1999 Page 2 ...
Page 359: ...235 105 210 October 1999 Copyright 1999 Page 5 ...
Page 609: ...2 STOP YOU HAVE COMPLETED THIS PROCEDURE 235 105 210 October 1999 Copyright 1999 Page 12 ...
Page 676: ...235 105 210 October 1999 Copyright 1999 Page 9 ...
Page 792: ...3 STOP YOU HAVE COMPLETED THIS PROCEDURE 235 105 210 October 1999 Copyright 1999 Page 9 ...
Page 799: ...Figure 11 36 3 1 Cleaning Points 235 105 210 October 1999 Copyright 1999 Page 7 ...
Page 801: ...235 105 210 October 1999 Copyright 1999 Page 9 ...
Page 839: ...2 STOP YOU HAVE COMPLETED THIS PROCEDURE 235 105 210 October 1999 Copyright 1999 Page 16 ...
Page 999: ...2 STOP YOU HAVE COMPLETED THIS PROCEDURE 235 105 210 October 1999 Copyright 1999 Page 13 ...
Page 1008: ...Figure 11 55 1 CTSNS DIP Switch Settings 235 105 210 October 1999 Copyright 1999 Page 2 ...
Page 1011: ...235 105 210 October 1999 Copyright 1999 Page 5 ...
Page 1053: ...235 105 210 October 1999 Copyright 1999 Page 15 ...
Page 1289: ...Figure 15 17 2 AMATPS Data Link 235 105 210 October 1999 Copyright 1999 Page 2 ...
Page 1292: ...235 105 210 October 1999 Copyright 1999 Page 5 ...
Page 1303: ...9 STOP YOU HAVE COMPLETED THIS PROCEDURE 235 105 210 October 1999 Copyright 1999 Page 2 ...
Page 1360: ...Figure 15 47 2 Typical SCANS III Link Diagram 235 105 210 October 1999 Copyright 1999 Page 2 ...
Page 1372: ...235 105 210 October 1999 Copyright 1999 Page 2 ...
Page 1374: ...235 105 210 October 1999 Copyright 1999 Page 4 ...
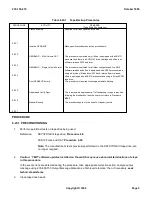
Page 1421: ...Table 1 1 O M Checklist 235 105 210 October 1999 Copyright 1999 Page 3 ...

