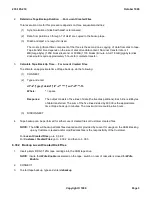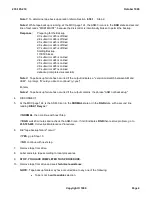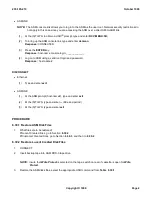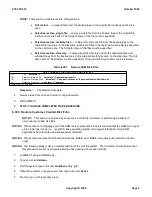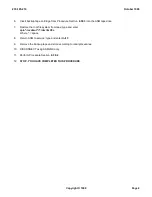
Tape drive heads are dirty.
Poor tape quality.
11.
With the problem corrected, return to
Step 1
.
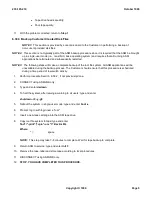
6.38.3 Backup Customer Created Disk Files
NOTE 1:
This section is provided by Lucent as an aid to the Customer in performing a backup of
non-Lucent provided disk files.
NOTE 2:
This section is not typically part of the ASM backup procedure since it is required that the ASM be brought
up in single-user mode (i.e., non-UNIX, base operating system) and requires that all running ASM
applications be terminated and subsequently restarted.
NOTE 3:
The following steps will make a complete backup of the root file system. All ASM applications will be
unavailable during the backup process. The Customer should ensure that this procedure is scheduled
during a time period of low switch activity.
1.
Perform procedure Section 6.38.2 , if not previously done.
2.
CONNECT using ASMLNK only.
3.
Type and enter
dsdown
4.
To halt the system, after issuing a warning to all users: type and enter
shutdown -i0 -y -g0
5.
Reboot the system in single-user mode: type and enter
boot -s
6.
Prompt: log in with login name "root".
7.
Insert a new tape cartridge into the ASM tape drive.
8.
Copy root file system to tape: type and enter
find^/^-print^|^cpio^-ocv^>^/dev/rmt/0c
Where:
^ =
space
NOTE:
This step may take 7-8 minutes to complete. Wait for tape backup to complete.
9.
Return ASM to service: type and enter
init 3
10.
Remove the tape, label and store tape according to local procedures.
11.
DISCONNECT using ASMLNK only.
12.
STOP. YOU HAVE COMPLETED THIS PROCEDURE.
235-105-210
October 1999
Copyright © 1999
Page 5
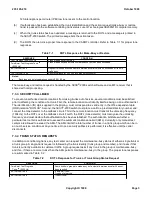
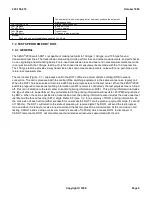
Summary of Contents for 5ESS-2000
Page 96: ...235 105 210 October 1999 Copyright 1999 Page 2 ...
Page 184: ...235 105 210 October 1999 Copyright 1999 Page 3 ...
Page 300: ...13 STOP YOU HAVE COMPLETED THIS PROCEDURE 235 105 210 October 1999 Copyright 1999 Page 55 ...
Page 339: ...7 STOP YOU HAVE COMPLETED THIS PROCEDURE 235 105 210 October 1999 Copyright 1999 Page 13 ...
Page 342: ...235 105 210 October 1999 Copyright 1999 Page 2 ...
Page 359: ...235 105 210 October 1999 Copyright 1999 Page 5 ...
Page 609: ...2 STOP YOU HAVE COMPLETED THIS PROCEDURE 235 105 210 October 1999 Copyright 1999 Page 12 ...
Page 676: ...235 105 210 October 1999 Copyright 1999 Page 9 ...
Page 792: ...3 STOP YOU HAVE COMPLETED THIS PROCEDURE 235 105 210 October 1999 Copyright 1999 Page 9 ...
Page 799: ...Figure 11 36 3 1 Cleaning Points 235 105 210 October 1999 Copyright 1999 Page 7 ...
Page 801: ...235 105 210 October 1999 Copyright 1999 Page 9 ...
Page 839: ...2 STOP YOU HAVE COMPLETED THIS PROCEDURE 235 105 210 October 1999 Copyright 1999 Page 16 ...
Page 999: ...2 STOP YOU HAVE COMPLETED THIS PROCEDURE 235 105 210 October 1999 Copyright 1999 Page 13 ...
Page 1008: ...Figure 11 55 1 CTSNS DIP Switch Settings 235 105 210 October 1999 Copyright 1999 Page 2 ...
Page 1011: ...235 105 210 October 1999 Copyright 1999 Page 5 ...
Page 1053: ...235 105 210 October 1999 Copyright 1999 Page 15 ...
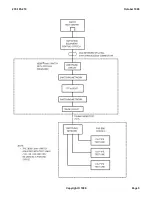
Page 1289: ...Figure 15 17 2 AMATPS Data Link 235 105 210 October 1999 Copyright 1999 Page 2 ...
Page 1292: ...235 105 210 October 1999 Copyright 1999 Page 5 ...
Page 1303: ...9 STOP YOU HAVE COMPLETED THIS PROCEDURE 235 105 210 October 1999 Copyright 1999 Page 2 ...
Page 1360: ...Figure 15 47 2 Typical SCANS III Link Diagram 235 105 210 October 1999 Copyright 1999 Page 2 ...
Page 1372: ...235 105 210 October 1999 Copyright 1999 Page 2 ...
Page 1374: ...235 105 210 October 1999 Copyright 1999 Page 4 ...
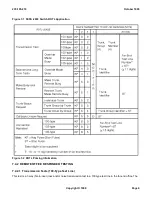
Page 1421: ...Table 1 1 O M Checklist 235 105 210 October 1999 Copyright 1999 Page 3 ...


